In software development, managing code across multiple contributors can get messy fast. Imagine several people editing the same document at the same time, each adding new ideas, fixing bugs, or tweaking features. Without a structured system in place, it’s incredibly difficult to track who changed what, when, and why? Mistakes can be hard to undo, and merging different versions of a project can quickly become chaotic. This is the core problem that Git, and by extension, GitHub aims to solve, giving developers a powerful way to track changes, collaborate efficiently, and manage multiple versions of a codebase without stepping on each other’s toes. This article would serve as a Git tutorial for those struggling with it, and would provide a walkthrough from a beginner’s purview.
Table of contents
What is Git?
Git is a distributed version control system. It is used to monitor code changes, over time. It allows developers to work separately and combine their work without clashes. Git also provides a separate copy of the entire project along with code history, this makes it faster and more reliable. Hence it is suitable for both individual and collaborative projects. Git is mostly command-line based, it provides users with a robust toolbox to branch off features, commit updates, stage changes, and precisely undo errors. It’s crucial to remember that Git is just a tool for managing code; it is completely independent of websites like GitHub and can operate without the internet or any hosting services.
Core Concepts You Need to Know
Here’s a quick breakdown of the main ideas behind Git:
- Repository (Repo): A directory where Git tracks your files and changes.
- Clone: A copy of a remote repository on your local machine.
- Commit: A snapshot of your code at a given moment with a message describing the change.
- Branch: A separate version of your codebase to work on new features or fixes.
- Merge: Integrating changes from one branch into another.
- Push/Pull: Sending your changes to GitHub or pulling down others’ updates.
How to Access Git
Following are the 3 different ways in which you can access Git:
- Command line – the most widely used way to access Git.
- IDEs – Most popular extensions for Git is gitlens – it bring tons of extensions in vs code
- GUI for Git – You can refer to the official website – https://git-scm.com/downloads/guis
- GitKraken – Git GUI is one of the popular GUI
- SourceTree – this is available only for windows and mac
We will primarily focus on the command line in this article. To Install Git please follow this guide.
Hands-on
Now, that we’ve covered the basics and set up Git on our system, it’s time to get our hands dirty. In this section, we’ll go over some of the most essential Git commands that every developer should know. Whether you’re starting a new project or collaborating on an existing one, these commands form the core workflow of using Git effectively. We’ll keep it simple, practical, and beginner-friendly. No fancy setups, just real commands you’ll actually use. Open your terminal, and let’s dive in!
Create a directory
mkdir git_learningChanging directory
cd git_and_githubInitialize git
git initThis command with initialize the Git repository.
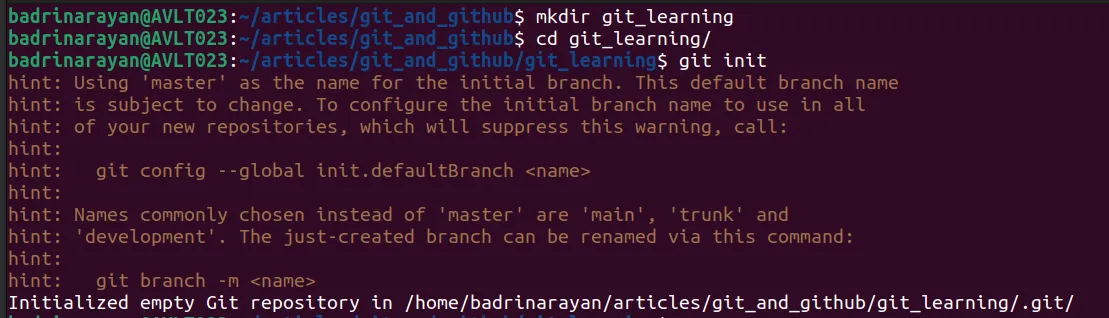
You can find a .git folder. This is the important folder that is maintained by Git. It gets created when the git init command is executed. Git basically uses hashes to store files, it is really memory efficient.
Now let’s create some files.
Creating a file
touch file1.txt Editing the file
vi file1.txt Enter i to get into insert mode, and add in some text, then, click escape and type :wq to save the file.
Do it for the other file as well.
touch file2.txt

vi file2.txt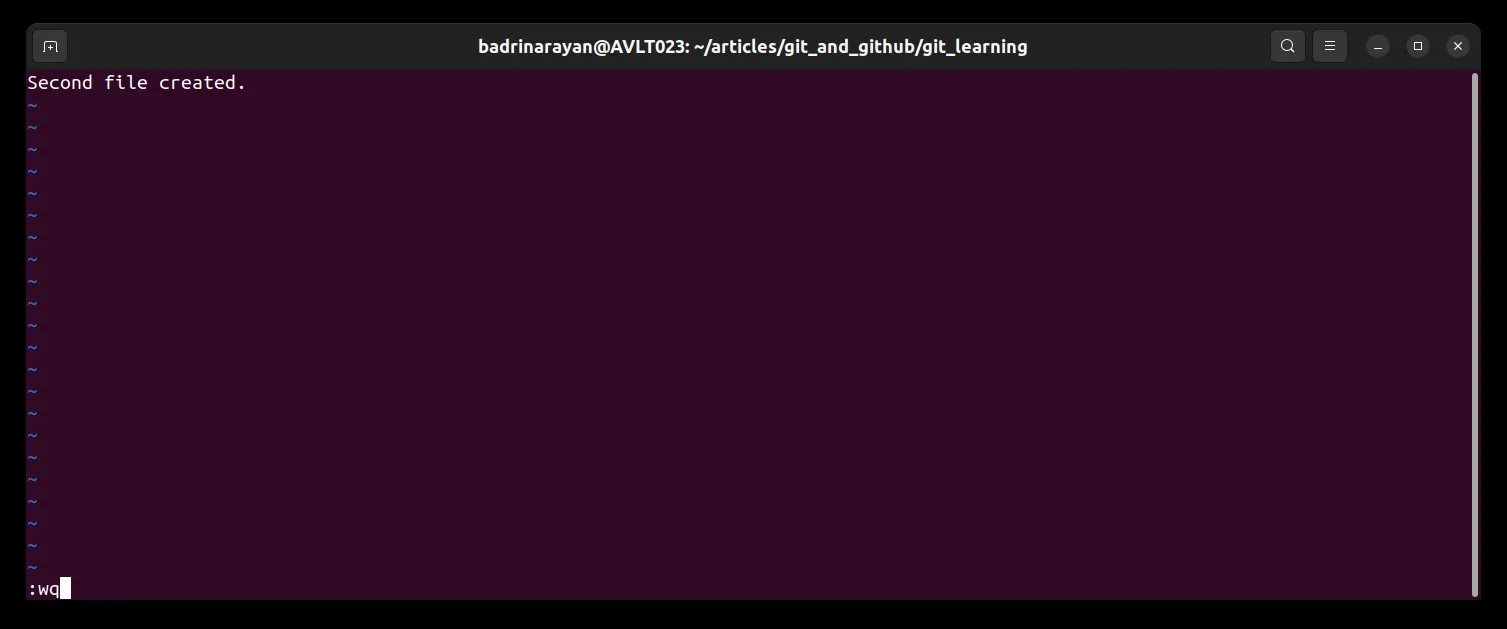

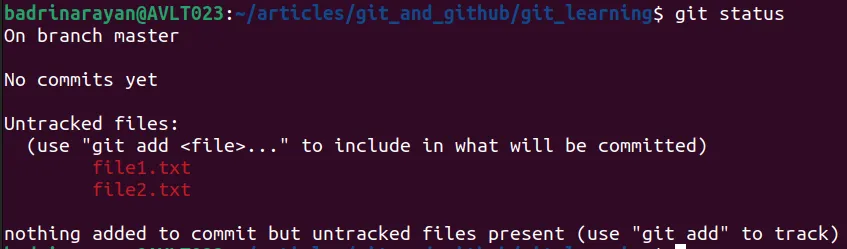
To know the status of the repository
git statusThis command will show the changes made in the directory and whether they are tracked or not.
For a short status you can use
git status -s Staging area in Git
Before making a commit in Git we have something called staging area. Where we will see the changes made and would review them before making a commit. This is a special feature in Git. We can review the changes between the previous commit and the staged changes and then make a new commit.
To stage the changes done in our directory we will use
git add

git add file1.txt file2.txt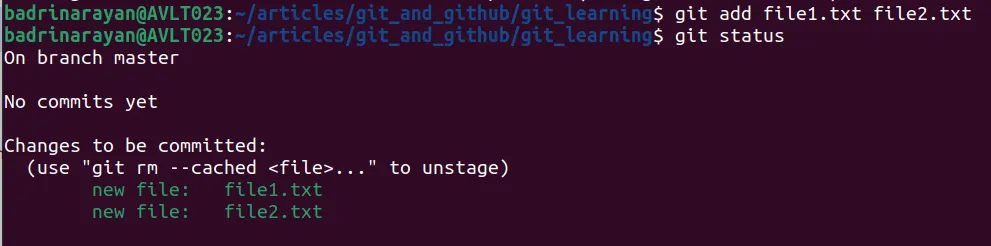
This will start tracking the changes made in the directory.
Now, to add all the files in the directory to staging, you can simply use:
git add .be cautious when using this command. This is because it would track everything in your directory like logs, environment files, datasets, etc. This might overload Git and cause inefficient version management.
Each commit has a:
- ID – Unique identifier (a hashvalue).
- Message – Description of what changes have been done.
- Date/Time – when was it changed.
- Author – Who has changed the files.
- Complete snapshot – at the time of commit.
You may think that saving the entire snapshot every time in commit will make use of memory which is very inefficient. But Git does not store duplicate content and compresses the contents in order to reduce memory space. So, it might be a viable strategy after all!
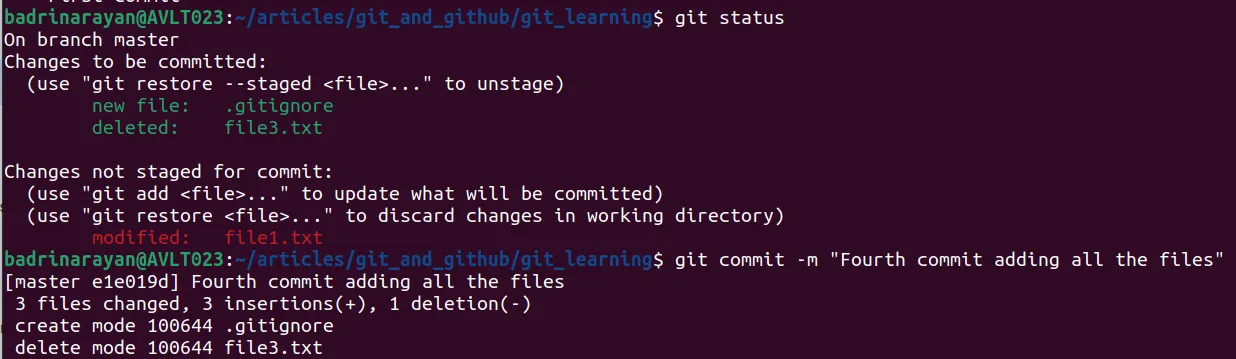
Committing Changes
git commit -m “Short description”-m is for message.

But sometimes, we’ll not be happy with a short description. We would have to provide more context on the changes done.
To do that we will just use:
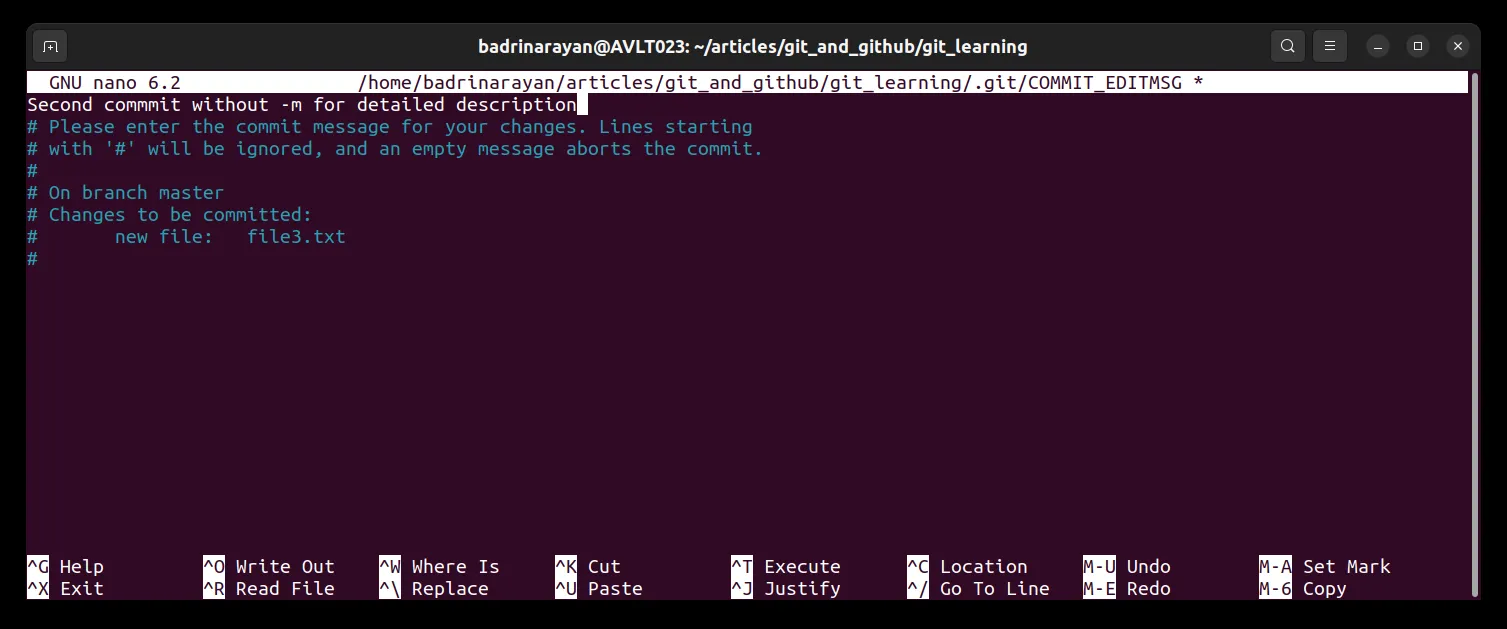
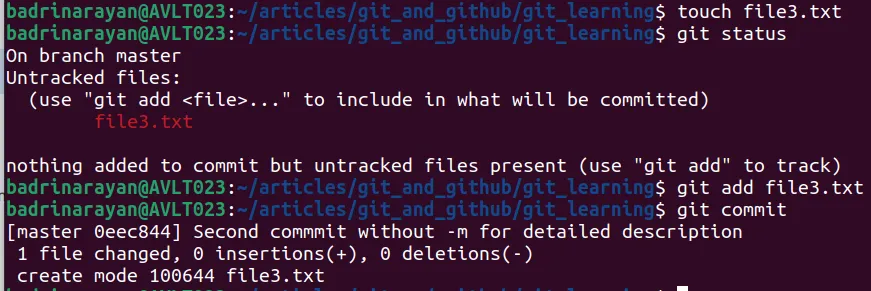
git commit This will open a file in our editor, where we can type a description which is less than 80 characters (don’t forget to add a line break after the description). To achieve this, let’s make some changes for a new commit. Let me add another empty file and commit the changes.
One misconception is “when we commit the staging; the staging area becomes empty!.” This is incorrect. The staging area does not become empty instead there is no difference between staging area and previous commit.
Guidelines:
- Commits should not be too big or too small. We don’t have to commit on small changes for each file. Also, we don’t have to commit only after a lot of changes are made. As you reach a state where you want to record then make a commit.
- If you have a typo and a bug resolved meaning: you found a typo while resolving a bug; both should not be committed at the same time as when reverting a typo, the bug will be reverted as well. Hence we have to do it separately. Also, if you have staged both together we can unstage them separately as well.
- Commit messages should be meaningful. Since, Git is used for collaboration as well (not just for version control) giving meaningful commit messages and following nomenclatures would help everyone in the project understand the changes made.
Committing without staging
Can we commit changes without adding them to the staging area i.e., before git add command?
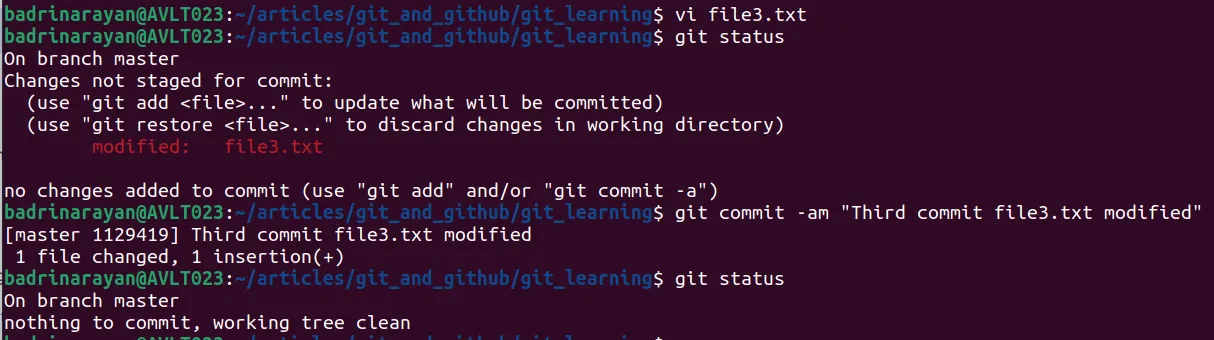
Yes! we can. Let’s look at an example. Let me make a change in file3.txt.
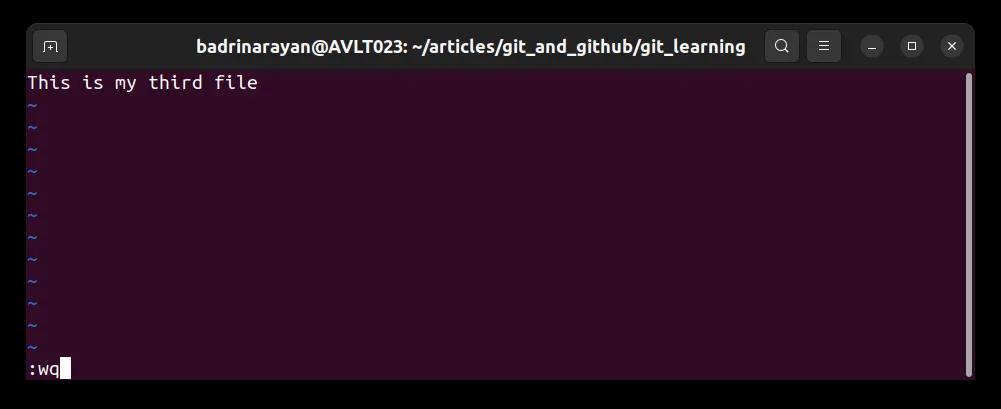
git commit -am “message” -a tells Git to automatically stage any files that have been modified and already tracked.
Let’s say you have staged your entire repository, but you would want to remove a file. Usually, you will use the rm command to remove the file. But that file will still be in the staging area, so to remove that as well we will be doing below steps.
One possible way is to use a normal rm command and then git add <deleted_filename> to remove that from starting area. I know it sounds weird but git add here will remove the file from the staging area.
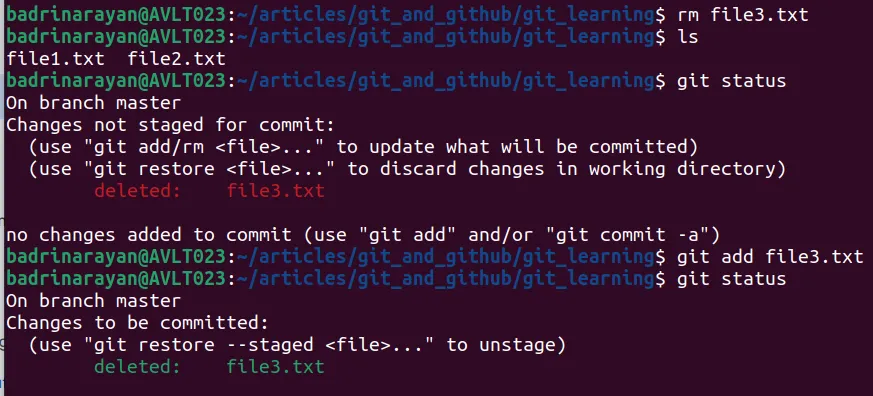
Since here file3.txt is being tracked it shows file3.txt is deleted.
In case there is a file which was staged already and you would want to remove it, follow this:
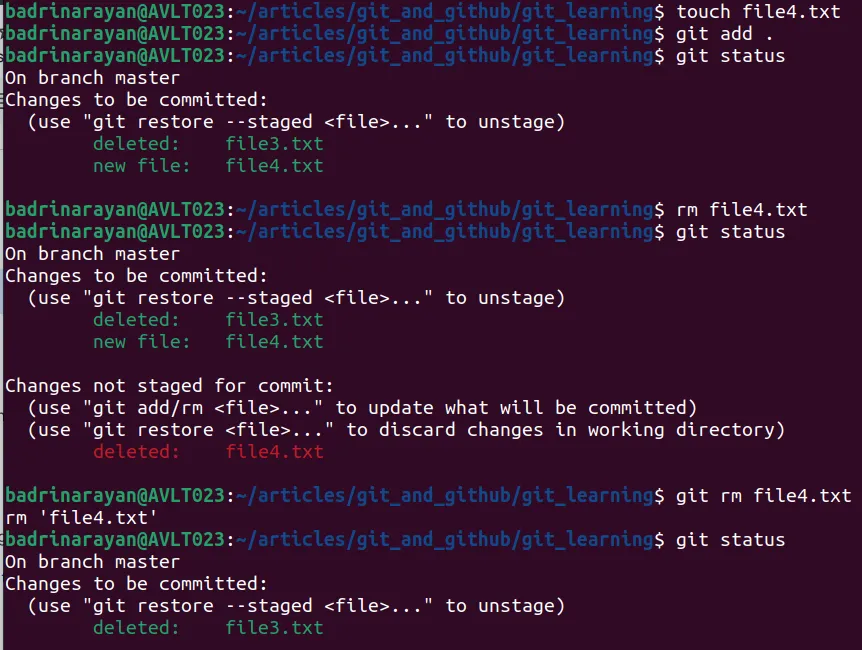
Let’s try using git rm <file_name> without using the traditional rm command.

We can see from git status that the new file is present. Later, after using git rm command we can see that the new file is not present. The git rm command deletes the file from the staging area and the working directory whereas the rm command (linux) only deletes the file form your working directory.
How to ignore some files from being tracked
Let’s see how to ignore tracking of some files. But that begs the question: why would you want to not tract files. Here’s why, Suppose you have log files: you generate hefty amount of log files, dataset, this will be updated each time a change is made to them. There basically JSON representation yet running notebooks may yield different outputs each time making hard for Git to track changes. Hence use .gitignore to avoid Git from tracking these files.
We will always have to ignore some files from tracking, like log files. Adding these files to the repository will just increase the size of the repository. Therefore, we have to ignore these files in Git. In the following image, I am creating a logs directory and a logs file. Later, a .gitignore file was created and then a logs directory entry was added into the .gitignore file. This will stop Git from tracking the specified files.
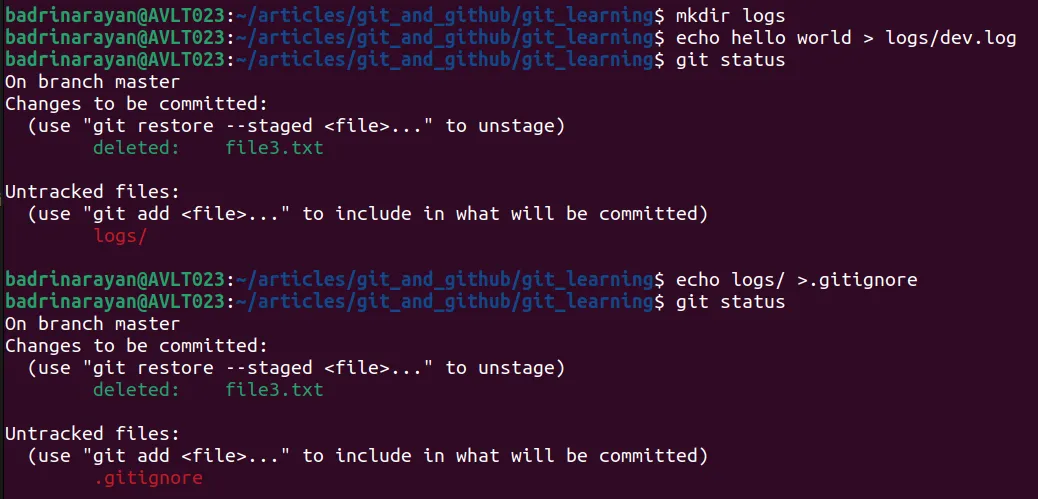
We can see that the logs folder is not tracked anymore.
Handling the outliers
There is one problem! When we start tracking a file using git add or commit, and then add that to gitignore, Git will still track changes made in that file or directory. So to avoid that we have to remove the files/directories from staging area. But git rm will remove the files in both staging and directory. Therefore, If we want to remove it only from staging, we will be using :
git rm -r – cached directory_name/filename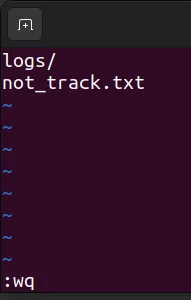
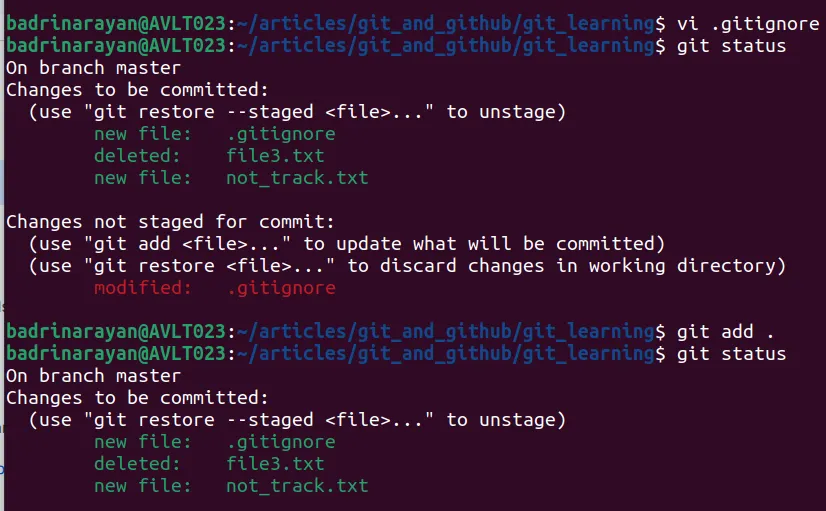
You can see that the file not_track.txt is tracked. So to avoid this from happening, we have to use the following command:
git rm -r –cached directory_name/filename
Seeing the difference
Now, let’s see what changes have been made between the last commit and the staged files.
We will using the below command to do it:
git diff --staged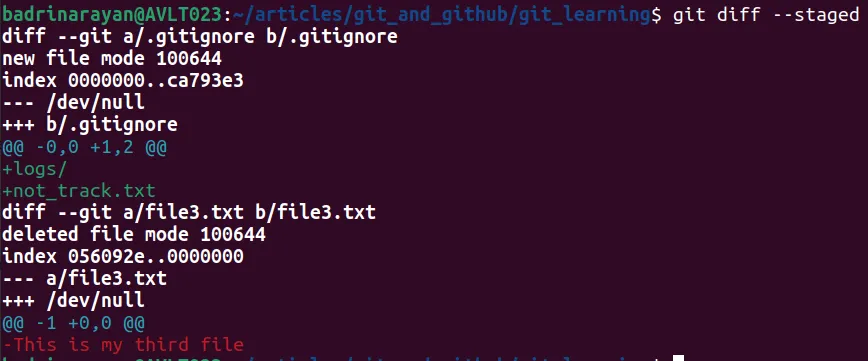
Following is the explanation of the above screenshot:
.gitignore didn’t exist before (/dev/null means no previous file).
Two entries were added:
- logs/ → Ignores the directory.
- not_track.txt → Ignores the file.
file3.txt is being removed from the repo (staged for deletion). The file had one line: “This is my third file”.
Usually developers use GUI tools to see the diff like VS Code – but it is also possible to visualize the difference using the command line.
git diff comes to the rescue
What git diff does is, it will compare the files between the last commit and the staged ones . Ex. a/file1.js is the old file and b/file1.js is the new file → changes in the old copy is indicated by - (minus) sign in red and changes in the new copy are indicated by + (plus) in green (can be seen in the image).
Green - newly appended lines

Red - these lines will be removed

White - These lines are there in the old and new code.
git diff command shows the difference between directory and staging.
Let’s make some changes in the directory to use this command:

Now, let’s stage all the files, and commit our changes to look at all the commits that are made in the past. To view this use:
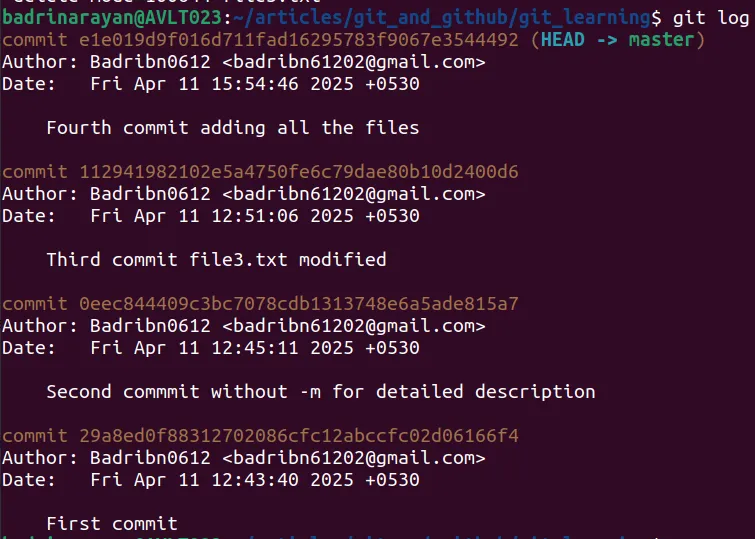
git log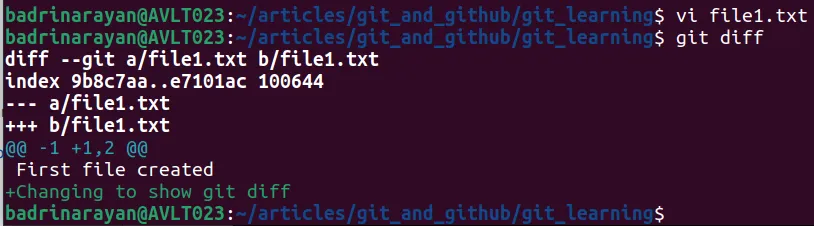
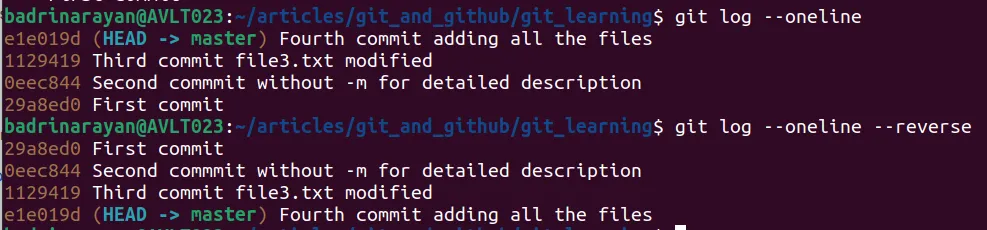
git log —oneline → this gives us a brief summary of commits.
git log —oneline —reverse → this will reverse the order of commits.
To see the changes in a commit we can use
git show <id of that commit>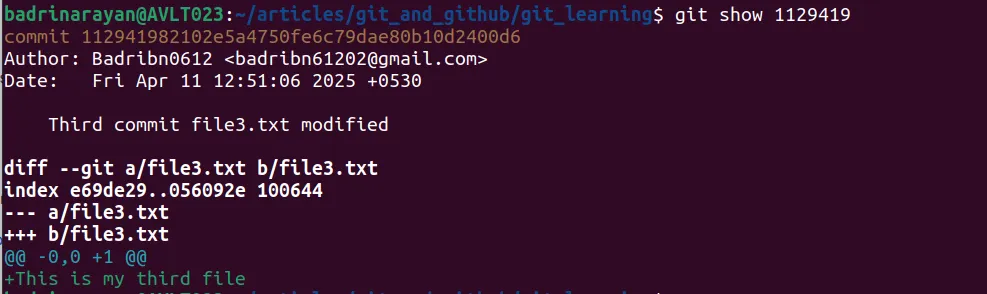
How to get the previous commit’s changes
git restore --staged filename → this will take the file from the previous commit and put it here.
git restore . will take files from staging environment and put it in the working directory. But if there is a new untracked file which is not present in previous commits, it will stay as it is.
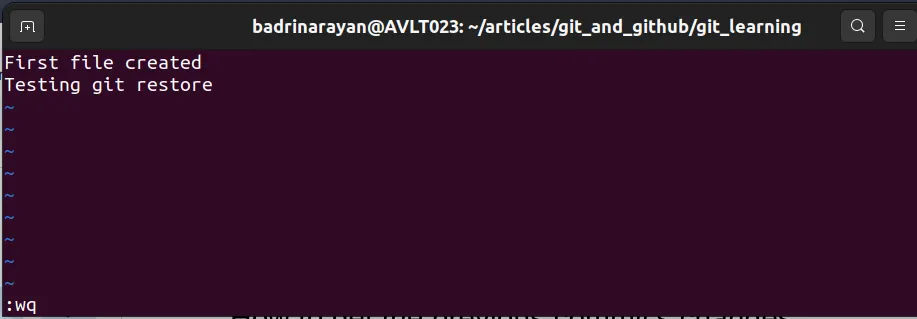
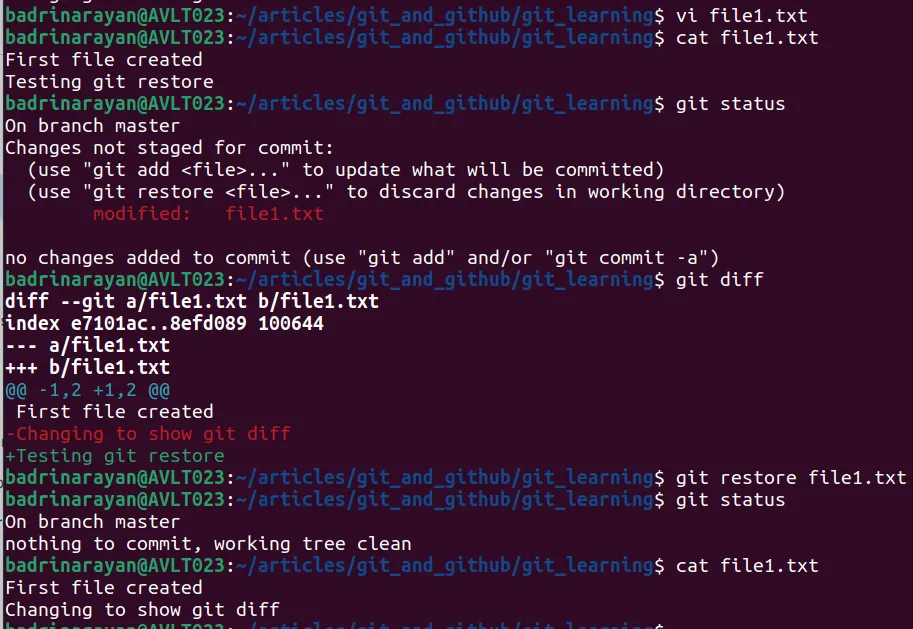
We can see that the changes made in file1.txt after running the command git restore, have been reverted to their previous commit state.
Recap
In this hands-on session, we walked through the foundational Git commands used in real-world development workflows. We began by setting up a Git repository and learned how to create and edit files. Key concepts such as the working directory, staging area, and commits were introduced along with commands like git init, git add, git commit, and git status. We explored how Git tracks changes, manages file versions, and handles staged vs unstaged files. Special emphasis was given to proper commit practices, the use of .gitignore to avoid tracking unnecessary files, and viewing differences with git diff. Finally, we looked at ways to inspect previous commits and recover changes using git log, git show, and git restore.
Conclusion
Git might seem overwhelming at first, but once you grasp the core concepts like staging, committing, restoring, and viewing history, it becomes a powerful tool in your workflow. In this article, we focused on the command line because it gives you the most control and transparency over what’s happening behind the scenes. Understanding how Git tracks files, handles commits, and manages changes lets you write cleaner code, collaborate more effectively, and recover quickly when things go wrong. Whether you’re rolling back a bad change, exploring commit history, or just organizing your work, Git has got your back.
Data science Trainee at Analytics Vidhya, specializing in ML, DL and Gen AI. Dedicated to sharing insights through articles on these subjects. Eager to learn and contribute to the field's advancements. Passionate about leveraging data to solve complex problems and drive innovation.


