This article was published as a part of the Data Science Blogathon
Pre-requisites
- Knowledge of OpenCV is a must.
- Basic understanding of detection algorithm.
Overview of Threat Detection Model
We know that security is always a main concern in every area because of the rise in crime rates in crowded areas or in suspicious isolated areas. Threat violence is a modern human rights issue. Nowadays Gun-related violence threatens our most fundamental human right that is the right to life. Gun violence is a daily tragedy that affects the lives of people around the world. At least or more than 400 people die every single day because of violence committed with these weapons. The availability of guns always remains a big factor behind the stake in crime and chaos. This is just illustrated by the crime scene in America like you know. In the USA, Gun culture is very strong and has a historical origin also.
Even for light weapons or guns, licenses are a must under the “2016 Arms Rules”. However, securing a license is a very complex procedure that can take some months. It’s much difficult to put a point on illegally possessed weapons. This possesses a major problem for these dangerous weapons on the security concern of the public. Due to the thriving demand for the protection of safety, security, and personal properties if any, the needs and deployment of video surveillance systems can recognize and interpret the scene, and irregular events play important role in intelligence monitoring.
What is the objective behind the threat detection system?
We are going to implement the following method to detect weapons using the YOLOv3 algorithm. Hence, we have the required dataset which will have exactly one class. This dataset is further trained for the classification of weapons using the YOLOv3 (You Only Look Once) algorithm. Once the data is trained successfully, the system will be able to classify the type of weapon present in the real-time input video from the surveillance cameras(CCTVs) along with the weapon. If the weapon is detected, then a threat alert will be sent to the respective authorities. Let’s get started…
Before getting started, first we need to look at the YOLOv3 algorithm.
What is the YOLOv3 and how it works?
Yolov3 Algorithm namely YOLOv3 (You Only Look Once Version 3) is a real-time object detection algorithm that identifies specific objects in videos, webcams, or images. As we know, Region-based convolutional neural networks (R-CNN) require thousands of network evaluations to make predictions better for one image which might be very time-consuming and sore to optimize.
In YOLOv3, the feature extraction and object localization were unified into a single uniform block. Its single-stage architecture, named YOLO (You Only Look Once) results in a very fast surmise time. It takes the entire image in a single case and predicts the bounding box coordinates and class probabilities for these boxes for an object. Unlike other methods, images are scanned with a sliding window but in YOLO, the whole image is passed into a convolutional neural network (CNN) and predicts the output in one pass. The following fig shows its working:-

System Requirement
Hardware:
● Intel Pentium Processor
● Min 4 GB RAM
● Min 1 GB Hard Disc
● Any Operating System
● WebCam
Software:
● Anaconda, Jupyter Notebook
● OpenCV: OpenCV is an open-source library used for computer vision(CV), machine learning(ML), and image processing(IP).
● YOLOv3
Implementation of our threat detection System
Dataset for the threat detection system
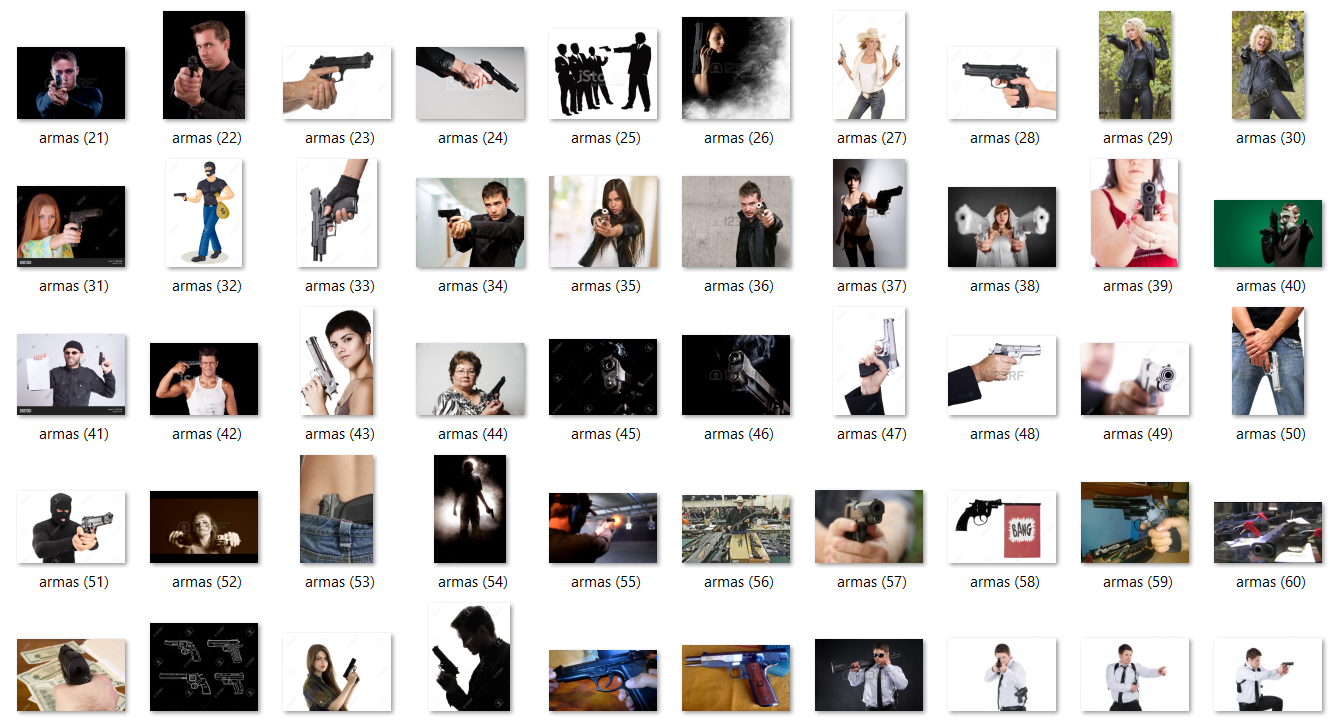
Here raw images are not appropriate for analysis purposes and it needs to be converted into the processed format, such as jpeg, jpg for further analysis. The image size is reconstructed into a square image and the images were then retained in the RGB/BGR format. Dataset is created by collecting weapon images and making them ready for the creation of the dataset. We have taken this dataset from the internet in which images are in jpeg format in the Images folder. There is one more Labels folder that has txt format files where for each file, the first line contains several objects in the corresponding image and the next line contains coordinates of the describing the object. This is used for training. The following figure shows how the dataset is collected.
To download this dataset, click dataset.
Separation of the Dataset into training and testing data
As the dataset is stored in the darknet folder and then compressed darknet folder into a zip file and upload into your google drive. The dataset that is uploaded is further divided into 70% training data and 30% testing data and the images are separated into different folders which can be used further for training the model.
By using the following code you can perform train test splitting:
So we need to install the sci-kit learn library and then import module train_test_split from it. As we want to split data so we have set test_size=0.3 for testing data and random_state is nothing but our seed which will keep all samples the same at every time.
Further, save this splitting in the form of .txt files. Although this is beyond the scope of this article, hence you can download directly these files from here: train.txt and val.txt which I have already split, and placed them in the directory “darknetdata“.
The following code shows how to read data and split.
Import following libraries to work with operating system and files inside it:
import os
import random# Read data with train and validation
X = [os.path.join('train', x) for x in os.listdir('train')]
Y = [os.path.join('val', x) for x in os.listdir('val') if x[-3:] == "txt"]from sklearn.model_selection import train_test_split X_train, X_test, y_train, y_test = train_test_split(X, Y, test_size=0.3, random_state=2021)
As you can see in the above code, listdir() will return a list that contains names of files in that directory which is given by the path earlier to read data accordingly.
Further, In the next step, we are required to create file “yolo.names” in the same directory “darknetdata”, with object names that we want to detect as every new line. For example, in our case, we need to detect weapons only so the first line would be “weapon”. You can create this file by using notepad.
Now, create file “yolo.data” in the directory darknetdata, containing:
classes= 1 #number of objects that we want to detect
train  = data/train.txt
valid  = data/val.txt
names = data/yolo.names
backup = backup #folder which is created on google drive
C. How to train the model?
The darknet repository is downloaded from https://pjreddie.com/darknet and by using the darknet53.conv.74 file, the pre-trained files are used for transfer learning and the neural network is trained for our weapon data. Once the training is completed the yolov3_training_2000.weights file and yolov3_testing.cfg file is generated which can be used for our weapon detection model. Here I have used these weights for one class only and modified them into the appropriate class. If you have more than one class you can adjust the weights in the respective file. Click here to see its documentation if you face any problems while training.
So you need to modify only this part of the code in the configuration file to train the model as shown below: (open it with notepad and make changes accordingly)
# At Line 8 & 9:
width = 416, height = 416
#At Line 20
max_batches = 6000
# At Line 22
steps = 5400
#At Line 603, 689, 776
filters = 18
#At Line 610, 696, 783
classes = 1
Suppose you need to detect two objects, then your filter will be in this format: filters=(2+5)*3 = 21 and classes = 2.
Open directory “darknetexamples” folder, open file “detector.c” file . At line 138, change or modify this line as below:
if(i%1000==0 || (i < 1000 && i%100 == 0))
Here you can refer to my COLAB notebook i.e how to train the model.
Testing the threat detection model
So we are required to install OpenCV libraries by using the pip command as follows:
pip install opencv-python
So we will import OpenCV, NumPy libraries to read images and perform mathematical operations simultaneously.
import cv2
import numpy as np
# Load Yolo algorithm
nnet = cv2.dnn.readNet("yolov3_training_2000.weights", "yolov3_testing.cfg")
classes = ["Weapon"]
Here, in the above code, we can see that, we need to load weights and configuration files in order to use the Yolo algorithm and define classes of your object detection by using OpenCV. The configuration file contains all convolutional neural network layers.
layer = net.getLayerNames()
op_layer = [layer[i[0] - 1] for i in nnet.getUnconnectedOutLayers()]
colors = np.random.uniform(0, 255, size=(len(classes), 3))
In the above code, you can see that we have taken CNN layers i.e neural network layers as well as output layers(op_layer). And then we have also taken random colors according to classes. So that each object is uniquely identified by a different color.
def value():
    val = input("Enter Filename or press key enter to start web camera: n")
    if val == "":
        val = 0
    return val
In the above code, we have defined the value() function where it accepts the file name that you wanted to test. by using the input function we can accept some value from the user.
# for image capture
cap = cv2.imread(value())
while True:
    height, width, channels = cap.shape

    # Detecting objects
    blobi = cv2.dnn.blobFromImage(cap, 0.00392, (512, 512), (0, 0, 0), True, crop=False)
    net.setInput(blobi)
    outl = net.forward(output_layers)
    # Showing information on the screen
    class_ids = []
    confidences = []
    boxes = []
    for out in outl:
        for detection in out:
            scores = detection[5:]
            class_id = np.argmax(scores)
            confidence = scores[class_id]
            if confidence > 0.5:
                # Object detected
                center_x = int(detection[0] * width)
                center_y = int(detection[1] * height)
                w = int(detection[2] * width)
                h = int(detection[3] * height)
                # Rectangle coordinates
                x = int(center_x - w / 2)
                y = int(center_y - h / 2)
                boxes.append([x, y, w, h])
                confidences.append(float(confidence))
                class_ids.append(class_id)
    ind = cv2.dnn.NMSBoxes(boxes, confidences, 0.5, 0.4)
    print(ind)
    if ind == 0:
        print("Weapon detected in Image!! Threat Alert!")
    else:
        print("Weapon Not detected...")
    font = cv2.FONT_HERSHEY_PLAIN
    for i in range(len(boxes)):
        if i in ind:
            x, y, w, h = boxes[i]
            label = str(classes[class_ids[i]])
            color = colors[class_ids[i]]
            cv2.rectangle(cap, (x, y), (x + w, y + h), color, 2)
            cv2.putText(cap, label, (x, y + 30), font, 3, color, 3)
    cv2.imshow("Image", cap)
    key = cv2.waitKey(0)
cap.release()
cv2.destroyAllWindows()
In the above code, firstly we have read the image from an input file. Then to detect objects in the given image we need to find out height, width and then detect an object and pass it to the input layer and output as well. And then to detect an object we are required its respective coordinates as (x,y,h,w) so that the bounding box can be drawn.
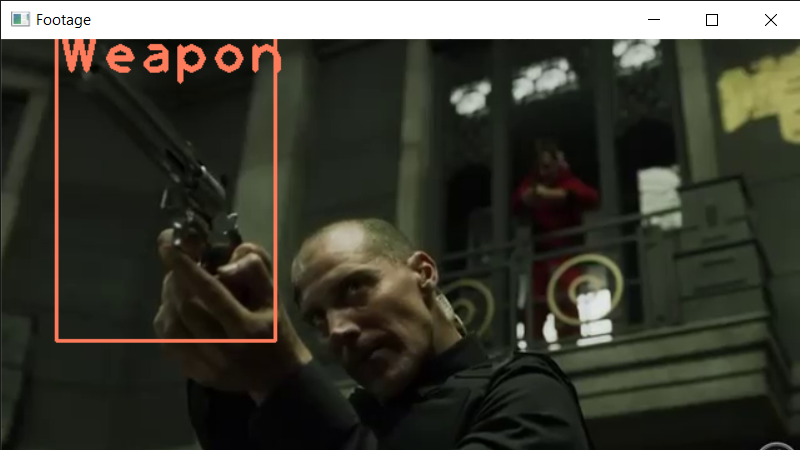
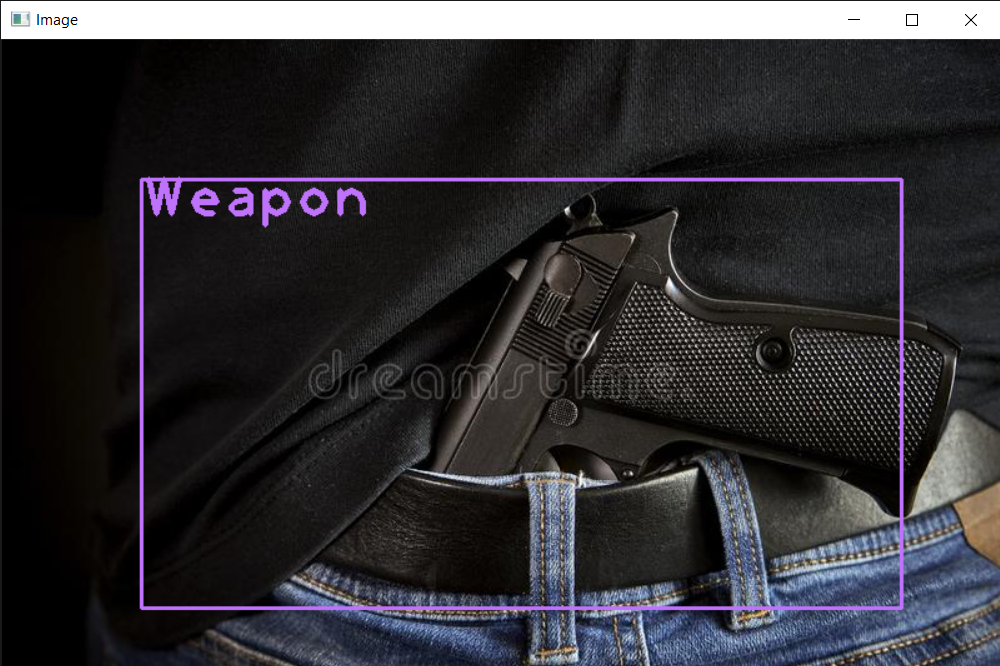
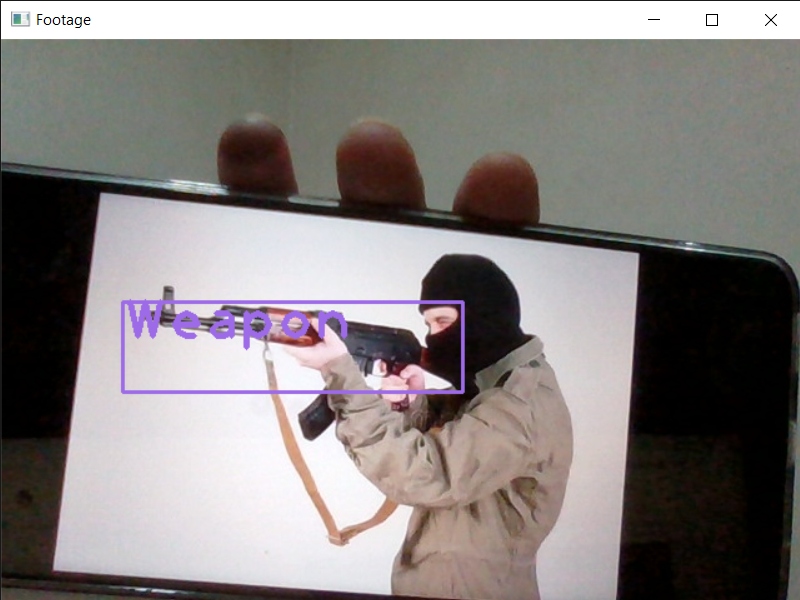
Once all these get completed, we need to perform NMS that is Non-Max Suppression to avoid multiple bounding boxes around the object and get only the best box. Then if this weapon is found in the image then it will alert as below:
.png)
And if this weapon is not found in the image then it will alert as below:
.png)
Output of the threat detection model
The above detection is done through a live webcam.
Conclusion
With this result, this can be useful to security and police officers who are constantly on patrol to make them aware of the weapon in the surveillance. I hope you liked the article. Thank You!
Image Source
Image 1 – https://miro.medium.com/max/1400/1*dDhtsluIu9mnmK9I_x0eHA.png
I am Software Engineer, data enthusiast , passionate about data and its potential to drive insights, solve problems and also seeking to learn more about machine learning, artificial intelligence fields.


