Introduction
Building a machine learning / deep learning workstation can be difficult and intimidating. There are so many choices out there. Would you go for NVidia developer box and spend $15,000? or could you build something better in a more cost-effective manner. Which hardware is right for your requirements? How much RAM do you need? The questions are endless and there might be no right or wrong answers.
We just finished building our first workstation at Analytics Vidhya. It was a special moment for all of us at Analytics Vidhya. Not because the server is a monster (which it is) and we can now let our fantasies run on a much larger machine. But, because we were all proud of what we have built together. Building this server was symbolic of something much bigger. It meant that as an organization, we are coming out of our monthly cash flow challenges and starting to build for an exciting future.
While building this work station, we faced several trade-offs. We made several choices people come across while creating a workstation for data science. In this article, I will highlight some of the choices we made while building this server, the steps in getting it up and running and the thrill of running first large dataset on it. If you are only interested in knowing the configuration, you can read it below. If you are interested in understanding the trade-offs and the reasons for the hardware / software we chose, you can continue to read the rest of the article.
Configuration of the Workstation:
- Processor – Intel Xeon E2630 v4 – 10 core processor, 2.2 GHz with Turboboost upto 3.1 GHz. 25 MB Cache
- Motherboard – ASRock EPC612D8A
- RAM – 128 GB DDR4 2133 MHz
- 2 TB Hard Disk (7200 RPM) + 512 GB SSD
- GPU – NVidia TitanX Pascal (12 GB VRAM)
- Intel Heatsink to keep temperature under control
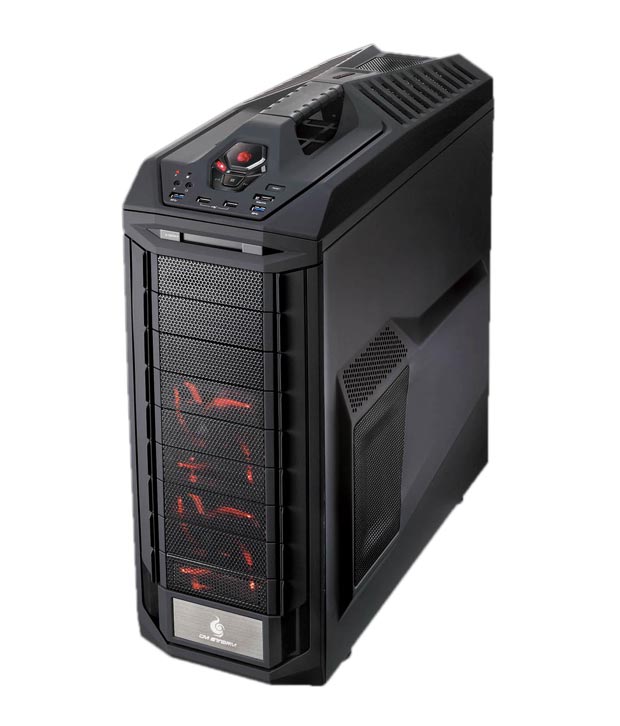
- Storm Trooper Cabinet
Pros and Cons of building a Workstation?
I am sure some of you would be asking, why build a monster workstation in today’s world? Why not rent a machine on the cloud?
The true answer is it depends on your requirements. In our case, this was the best way to enable the team to do machine learning at scale. Just to give some context, Analytics Vidhya currently has 5 people today, who might work on large datasets or huge computations. These datasets could come from competitions, real world problems from clients looking to crowd source solutions from our community or running solutions of our winners to verify them.
Here are the reasons, why building a workstation worked best for us:
- Efficient use of resources – Till now, we used to enable people with laptops having 16 GB RAM. While it is not bad, it is not the most efficient way to use the resources. Firstly, if the dataset needs higher RAM, we had no way but to rent a bigger machine. Secondly, not every one was using all the RAM all the time, but needed high RAM when needed. By creating a workstation, we are able to pool in same resources, but if required people can have access to a much bigger machine. Similar argument applies for number of cores, if you want to perform parallel computing.
- Ease of travel with laptops – It is difficult to find machines which are good for data science (i5 / i7 quad core processor with 16 GB RAM) which are light and not too expensive. Due to resource constraints, we were forced to buy bulky laptops. With a workstation, people could buy cheaper and lighter laptops and connect to the work station when needed for the computations.
- Enabling large scale Deep Learning – Even if we would have spent more on getting the laptops, you can’t get similar GPU power on a laptop today. Moving to a workstation enabled us to order the NVidia Titan X 2016, one of the fastest GPU in the world today! There was no way to get this on a laptop and cloud based GPUs would have been too expensive.
- Limitations on Big data transfers to cloud – While getting computational power on cloud has become cheap, the data transfer hassles are still there. On our internet plan, our upload speed is capped at 2 Mpbs. So, if you had big data sets – uploading them on the cloud can end up taking days. Even if we get un-interupted speed from the service provider (we are not on a lease line), it would take 12 hours to upload a 10 GB dataset.
Obviously nothing comes free in life. So, while we had these advantages, there were a few down sides as well. Here are the compromises we had to make:
- Invest in buying the machine upfront – Since we had to buy the machine, we had to spend the entire amount upfront. In the long term, this is a much better decision as the machines on cloud will cost lost more. In the short term, it essentially ended up impacting our cash flows 🙂
- Danger of machine getting obsolete – One of the advantages with cloud machines is that you can upgrade any time you want. You could change the complete hardware of your machines without much challenges. On the other hand, the workstation hardware can not be replaced that easily. So, in a few years, this impressive monster would look like an old bulky machine sitting in one corner of our office!
- Risk of hardware failure – With cloud based machines, hardware failure would not impact you a lot. Your service provider would typically take care of it for you. In this case, we now own the risk of any damages to the hardware.
Given the pros were working out better for us and I think we would still be able to use the server a few years down the line, we went ahead with the decision to build a workstation.
A few high level decisions:
Once we decided that we would build a workstation, there were a few more decisions we had to take. Here were the decisions we needed to take:
- Build vs. Buy: The immediate question which came up was whether to build / assemble the workstation ourselves or to buy one from one of the server providers. Given the difference in cost, the choice was obvious for us. Also, by assembling a workstation, you could customize it fit your needs closely. For example, even after making a few compromises on the requirement, servers from Dell or HP would cost at least 50% higher. So, we decided to build our own workstation.
- Define your Budget: We had to define the overall budget for creating the workstation. We decided to spend a maximum of ~INR 300,000 (or $4,400) for creating the workstation.
- One workstation vs. 2 Workstations: One of the possible option was to create 2 servers instead of one. One focused on CPU based computations and another one on GPU based computations. This would have made sure that we had 2 specialized workstations, but it would have created a sub-optimal configuration as we would have to buy multiple processors and motherboard. It would have also meant needing more physical space. We decided to go with a single server.
Once these high level decisions were taken, we started the search on finding hardware components of the server.
Choosing the hardware:
- Processor:
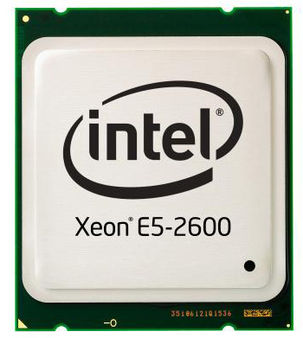 The first trade-off we came across was which chip to buy? i7 processors seemed to have lesser cores compared to Xeon processors, but higher frequency. i7 processors are also very easy to overclock, which is not the case with Xeon. Xeon on the other hand, supported much higher RAM – i7 maxed out at 128 GB RAM (that too was available on a single model). Also, the power consumption of Xeon is lower compared to an i7. We started shortlisting possible processor chips, which would fit our requirement. We came down to a shortlist of a few i7 and Xeon processors. We decided to go for higher cores, power efficiency and possibility to expand more RAM in future over high frequency i7 chips. After searching for prices of various chips and their benchmarks, we finally zeroed in on Intel Xeon E2630 v4 .
 - Motherboard:
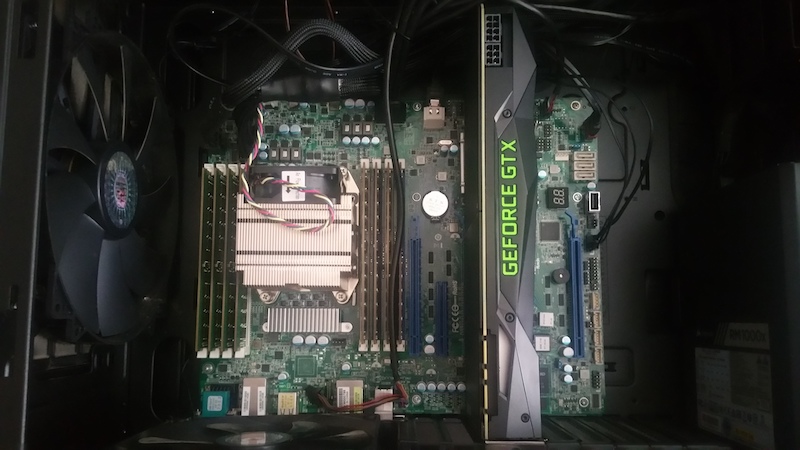
 Once the processor is finalized, we looked for compatible motherboards. Since we wanted to use this machine for deep learning, we had to make sure that the motherboard had enough PCIe slots. We wanted to have the option to add up to 2 GPUs in future. Additional things to look out for included the number of RAM slots, which would directly impact the amount of RAM you can have. You can also look at whether the motherboard support one socket or 2 sockets. Having 2 sockets is more desirable as you can add one more processor to the box later on. We zeroed in on ASRock EPC612D8A – while it had only one socket, it gave us option to expand RAM further and add more GPUs, if needed in future.
 - RAM: We bought 128 GB RAM for now. We an obviously add more, if required. This should be good for now. Needless to say DDR4 is better than DDR3 and 2400 MHz is better than 2133 MHz. We ended up with 2133 MHz to save a few bucks.
- GPU: Given the evolution in deep learning, we knew that we had to invest in the best in class GPU. The options include NVidia GTX 1080, NVidia Tesla K40. Again, we went to the basics on why we need GPUs. For deep learning, we do not need high precision computations, so the expensive Tesla K series went out of consideration. Among the two remaining Titan X Pascal clearly looked far superior for deep learning. There was only one problem – this card was not available in India yet. I had to ask one of my friends in the US to get it for us.
- Hard Disk: The first thing we did was to buy a SSD and a hard disk. The idea was to do the frequent read wite operations on the SSD, while keep the large datasets on the normal hard disk. We also decided to not go with RAID based hard disks as they were adding to the costs and most of the time, we have backups of the data anyways. So, we took a 512 GB SSD + 2 TB HDD (7200 RPM)
- Cabinet:
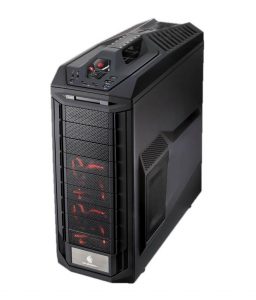
Smart Trooper Cabinet
Given the spread of Hardware, length of GPU and the cost constraints – we decided to go with Storm Trooper Cabinet.
- Power: We added a 1000 Watt Corsair SMPS to make sure that the GPU and the motherboard get ample power
- Cooling: Cooling is very important for a workstation like this. Ideally, liquid based cooling systems are the most effective. However, we could not find a compatible model. So, we went with Intel Heatsink which was the next best option. I was a bit skeptical whether this would be sufficient or not. However, we have not faced any heating problems till now. The Fan on GPU, heat sink and 2 of them on CPU have been effective to keep the temperature under control.

Assembling the server
With all the hardware ready, it was time to assemble the server. If you have not done this before, it might look a bit intimidating from outside, but it is not. The components are meant to fit in only in the slots they are supposed to fit in. So, here was the monster ready to breathe
Software Installation:
With the hardware ready, we were excited to the core. The next thing was installing the right software. Before doing so, make sure your server is connected via a LAN cable and is attached to power. It is advisable to add a wireless keyboard so that you can start installation of desired software. Once you are ready, it is time to awaken the monster – BOOM!
Time to feed the machine with the right software:
- Choosing the OS – Our preferred OS was Ubuntu as we are all used to working on it. We chose the Server veriosn over the Desktop version as we did not need the Graphical interface and thought it would add to unwanted processes. Ubuntu server 16.04 LTS loaded seamlessly in a few minutes.
- Adding other packages – Once the server was ready with Ubuntu installation, we ran the following commands to update the packages, install R & Python libraries and setup git. Here is the script for the same:
#!/bin/bash

sudo apt-get update
sudo apt-get upgrade

#Install Python2 libraries
sudo apt-get install python
sudo apt-get install python-pip python-numpy python-scipy python-matplotlib
sudo pip install ipython[all]
sudo pip install pandas
sudo pip install Theano Keras scikit-learn
sudo pip install virtualenv

sudo pip install xgboost
sudo apt-get install git
sudo apt-get install build-essential cmake g++ gfortran git pkg-config python-dev software-properties-common wget


#Install Python3 libraries
sudo apt-get install python3-pip
pip3 install jupyterhub
sudo pip3 install numpy scipy matplotlib pandas
sudo pip3 install ipython[all]
pip3 install --upgrade notebook


#Install R and RStudio
sudo apt-get install r-base r-base-dev libapparmor1 gdebi-core
sudo apt-get install libcurl4-gnutls-dev libxml2-dev libssl-dev
wget https://download2.rstudio.org/rstudio-server-0.99.903-amd64.deb
sudo gdebi rstudio-server-0.99.903-amd64.deb

#Upgrading R to latest version. Ref: https://pythonandr.com/2015/04/27/upgrading-to-r-3-2-0-on-ubuntu/
codename=$(lsb_release -c -s)
echo "deb http://ftp.iitm.ac.in/cran/bin/linux/ubuntu $codename/" | sudo tee -a /etc/apt/sources.list > /dev/null
sudo apt-key adv --keyserver keyserver.ubuntu.com --recv-keys E084DAB9
sudo add-apt-repository ppa:marutter/rdev

#Installing Node Package Manager for JupyterHub
sudo apt-get install npm nodejs-legacy
npm install -g configurable-http-proxy

#Setting up git
git config --global user.name "username"
git config --global user.email "[email protected]"


#Installing PostgreSQL
sudo apt-get install postgresql postgresql-contrib
You can add other packages you may need depending on your need, but this should give you a base setup ready. Time to add Deep Learning tools.
Setting up Deep Learning tools:
Deep learning is an active field of research. With a wide variety of available libraries to choose from and their individual dependencies, it is very hard to maintain a continuously working DL system. Hence, it is usually a good practice to set up your own virtual environment. This is what we did.
The easiest solution was to use containers, which are essentially “boxes” of self-contained softwares. Its like virtualization of OS, but along with the ease of access from local machine.
The first step we did was to setup nvidia drivers
# install nvidia driver
 sudo add-apt-repository ppa:graphics-drivers/ppa
 sudo apt-get update
 sudo apt-get install nvidia-367
 sudo shutdown -r now
Then we installed docker (https://docs.docker.com/engine/installation/linux/ubuntulinux/).
# docker installation
 sudo apt-get update
 sudo apt-get install apt-transport-https ca-certificates
 sudo apt-key adv \
 --keyserver hkp://ha.pool.sks-keyservers.net:80 \
 --recv-keys 58118E89F3A912897C070ADBF76221572C52609D

echo "deb https://apt.dockerproject.org/repo ubuntu-xenial main" | sudo tee /etc/apt/sources.list.d/docker.list

sudo apt-get update
 sudo apt-get install linux-image-extra-$(uname -r) linux-image-extra-virtual
 sudo apt-get install docker-engine
 sudo service docker start

# setup docker for another user
 sudo groupadd docker
 sudo gpasswd -a ${USER} docker
 sudo service docker restart

# check installation
 docker run hello-world
Integrating GPU on docker has some additional steps:
wget -P /tmp https://github.com/NVIDIA/nvidia-docker/releases/download/v1.0.0-rc.3/nvidia-docker_1.0.0.rc.3-1_amd64.deb
 sudo dpkg -i /tmp/nvidia-docker*.deb && rm /tmp/nvidia-docker*.deb

# Test nvidia-smi
 nvidia-docker run --rm nvidia/cuda nvidia-smi
Now comes the main part, installing DL libraries on docker. We built the docker from scratch, following this excellent guide (https://github.com/saiprashanths/dl-docker/blob/master/README.md)
git clone https://github.com/saiprashanths/dl-docker.git
 cd dl-docker
 docker build -t floydhub/dl-docker:gpu -f Dockerfile.gpu
Thats it! We have completed the “installation steps”. There were a few more things to, i.e. handle data persistency. DL requires huge amount of data to be processed and the best way to share this data to docker system is add as a data volume (https://docs.docker.com/engine/tutorials/dockervolumes/).
nvidia-docker run -it -p 8888:8888 -p 6006:6006 -v ~/sharedfolder:/sharedfolder floydhub/dl-docker:gpu bash
And Voila! We have a complete running Deep Learning system!
End Notes
We shared our decisions and choice of hardware / software as there are so many options available today. It is difficult to find the right option for you among all the options. If you are looking to build your own workstation, this guide should be immensely helpful to you. If you are not looking to build one, there is still a lot to learn from the process. I myself learnt a lot of finer aspects about hardware selection while going through this journey.
If you had to build one workstation under $4,500 – how would you go about doing so? Would you do something different? If so, why? Looking forward to hear from you.
Kunal Jain is the Founder and CEO of Analytics Vidhya, one of the world's leading communities of Al professionals. With over 17 years of experience in the field, Kunal has been instrumental in shaping the global Al landscape. His expertise spans diverse markets, from developed economies like the UK to emerging ones like India, where he has successfully led and delivered complex data-driven solutions. As a recognized thought leader, Kunal has empowered countless individuals to realize their Al ambitions through his visionary approach to Al education and community building. Before founding Analytics Vidhya, Kunal earned both his undergraduate and postgraduate degrees from IIT Bombay and held key roles at Capital One and Aviva Life Insurance across multiple geographies. His passion lies at the intersection of analytics, Al, and fostering a thriving community of data science professionals.


Its a little odd combination of hardware, but I can see why you chose them. This is my build, that was around 3.5K. If I had 1.5K more, would have put that in GPU and 64GB RAM. https://medium.com/@vivek.yadav/deep-learning-machine-first-build-experience-d04abf198831#.9k166s73h
Hi Vivek, Thanks for sharing your build - interesting read. How did the machine perform on the Udacity datasets? Regards, Kunal
Hey Kunal, Great post. I am in the process of putting together a workstation for myself. I am currently finalizing one for about INR 100k which I can use over the next couple of years with scaled down options for hardware. I can get away with it since I am the only person who will use this :) I understand why your team had to opt for a higher configuration. This approach also helps with my cash flow :), I pay INR 100k now and get up and running with a workstation which I will add to my modest two node laptop cluster. To overcome obsolescence, I plan on starting a SIP specifically to purchase another workstation (if required) in a couple of years. If I don't need it, well it's vacation money! On the Deep Learning side, get Tensorflow up and running on your monster. Now that the distributed version is made public it opens up plenty of options to working on CPUs/GPUs spread across a cluster. You can even decide which devices to use for each task. Plus their Tensor Board feature is breath taking! Not to forget their support for mobile devices which includes capabilities for running your models on the client side rather than having to ping a server. As always my best wishes to you and the team, continue to go from strength to strength. Regards, Clarence
Thanks Clarence - good to hear from you after long time. If you are plannning to use the workstation for deep learning - I think a modest processor, 16 GB RAM, the best GPU in your budget with motherboard supporting GPU expansion in future is possibly the way to go! Alternately, you can build a highend CPU and large RAM and add GPU in future :) Tensorflow and Tensor Board are definitely the way to go! Let me know, how your build goes. Regards, Kunal
Thanks Kunal for your post. I found it very useful. I have quite some good options with http://www.deltaserverstore.com/tower.html I am exploring the HPZ800( 2XHexaCore 2.80GHZ, 96GB RAM, 2TB 7.2k HDD) or the .HP ML370G6 ( 2XHexaCore 2.80GHZ, 144GB RAM, 4x146GB 10k SAS) and both are priced at $CAD 1,100. I presently have a Lenovo W510 with 512GB 7.2k HDD + 512GB SSD , 16GB RAM with individual Operating Systems.I will like to also migrate the 512GB SSD to the new workstation but will love to keep the Windows 10 currently running on it, and have Ubuntu run of a 2TB secondary drive. I presently do lots of numerical computing/simulation and my applications mostly run on windows. But I am exploring the Data Science space and seeing my self transiting to the opensource world in achieving the same objectives (numerical computing/simulation +machine learning) and will love to double the work station for some data crunching :-) and explore options with Ubuntu. My dilemma is remotely accessing both OS (Windows & Ubuntu) simultaneously. What solution would you suggest?Virtualization of the Ubuntu OS?or any other ideas. And what remote access software will you suggest. Teamviewer, VShpere Hypervisor , Citrix XenApp, Will prefer something free anyday. Cheers! Larry
Hi Larry, There are several options I can think of depending on what you need. The easiest might be to use WIndows server edition with Ubuntu machine virtualized. Windoes server would allow for remote access, so you would not need a Teamviewer separately. You can check out Vagrant as one of the virtialization options - worked seamlessly when I tried. It is free as well. Regards, Kunal