This article was published as a part of the Data Science Blogathon
Introduction
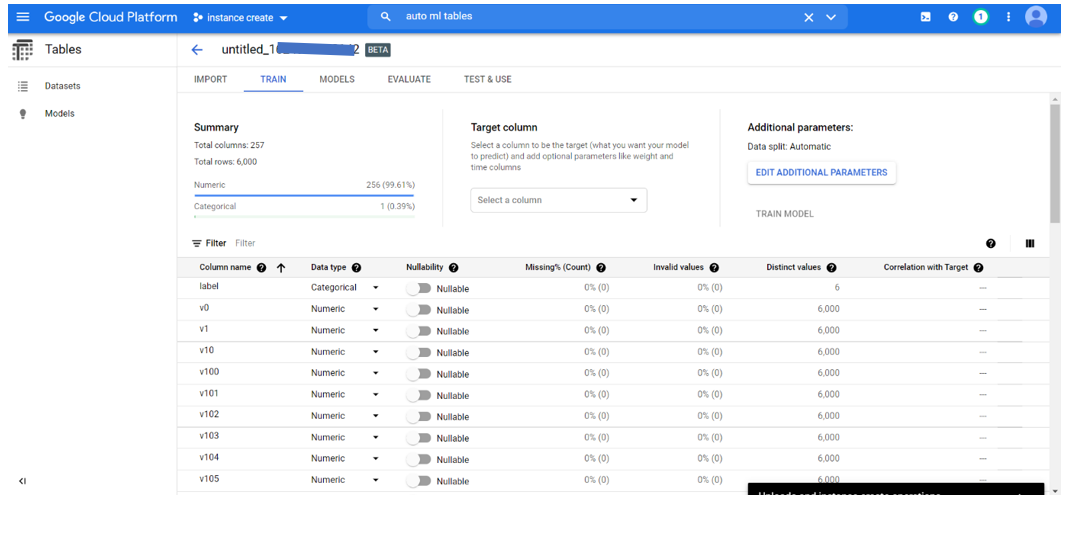
For the analysis, I have used a power quality analysis dataset. The dataset contains 6000 rows and 256 columns. Each row represents a voltage waveform with a 256 sample rate. The output or label has six classification categories. Here we upload the training dataset to the AutoML from google cloud storage so you need to store IT in a bucket with the same region.
Before we start, it is necessary that you have a billable google cloud account. If not please create one and initially, you will get a credit of $300 for use for free.
Uploading an object to a bucket
1.In the Google Cloud Console, attend the Cloud Storage Browser page.
2. In the list of buckets, click on the name of the bucket that you want to upload an object to.
within the Objects tab for the bucket, either
3.1 Drag and drop the desired files from your desktop or file manager to the main pane in the cloud console.
3.2 Click the Upload Files button, select the files you want to upload in the dialogue that appears and click Open.
Overview of Google AutoML Tables
Google AutoML Tables enables quick and high accuracy training and subsequent hosting of ML models for such a haul. Users can import and visualize the info, train a model, evaluate it on a test set, iterate on improving model accuracy then host the simplest model for online/offline predictions. All of the above functionality is out there as a service with no ML expertise or hardware or software installation required from users.
AutoML table can train both regression and classification models relying on the type of column we attempt to predict.
1. Initial Setup
We first log in to our Google Cloud Platform (GCP) account (or create it if we don’t have one) and make a project. Then open and enable AutoML Tables by selecting ‘Tables’ and enabling the API as shown below.
2.Importing Data
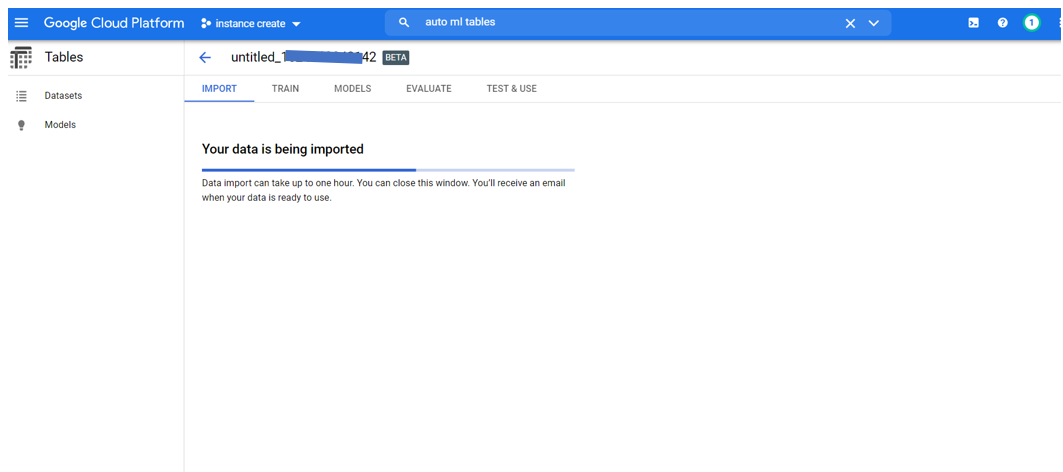
To import data, we first go to the Import tab and select the source type, i.e., either CSV or BigQuery table. In our case, we will upload the ‘voltage_train.csv’. If an upload destination GCS bucket doesn’t already exist, we can create a single region bucket,e.g.,’gs://voltage_train.csv. AutoML Tables will import the info and auto analyze it to validate it and detect the datatypes of columns.
3.Exploring Data
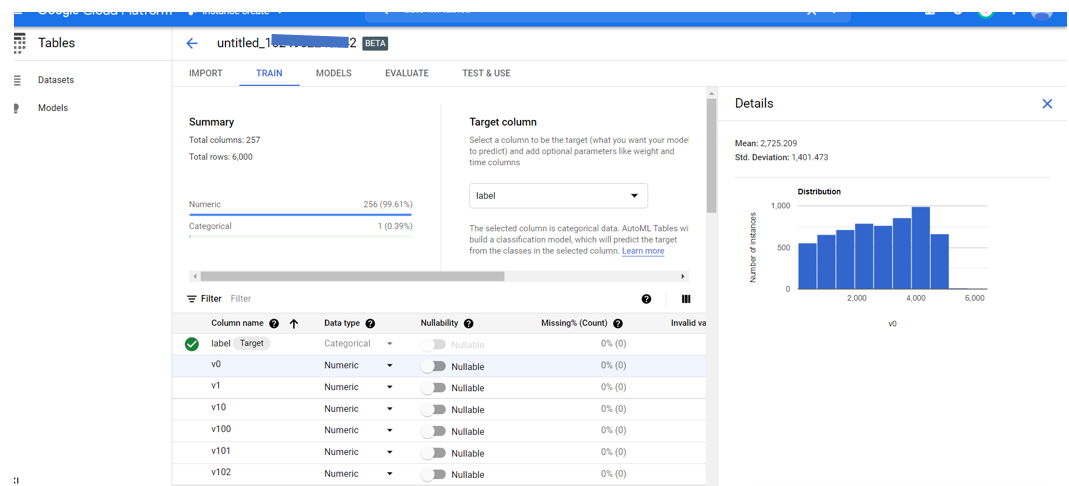
We can explore the data info which is imported and schema once import completes. AutoML will show the column names, data type (i.e., category, numeric, or text), missing values, and distinct values for every column. we should always set the prediction target column and in our case, we’ll predict the label column. To enable us to know how valuable each feature is individual, it also generates a correlation many each column with the target column. Additionally, we will explore the distribution of values in each column.
In some cases, it’s possible that feature
datatype is incorrectly detected as numeric when it’s actually categorical if
the category values are numeric rather than text.
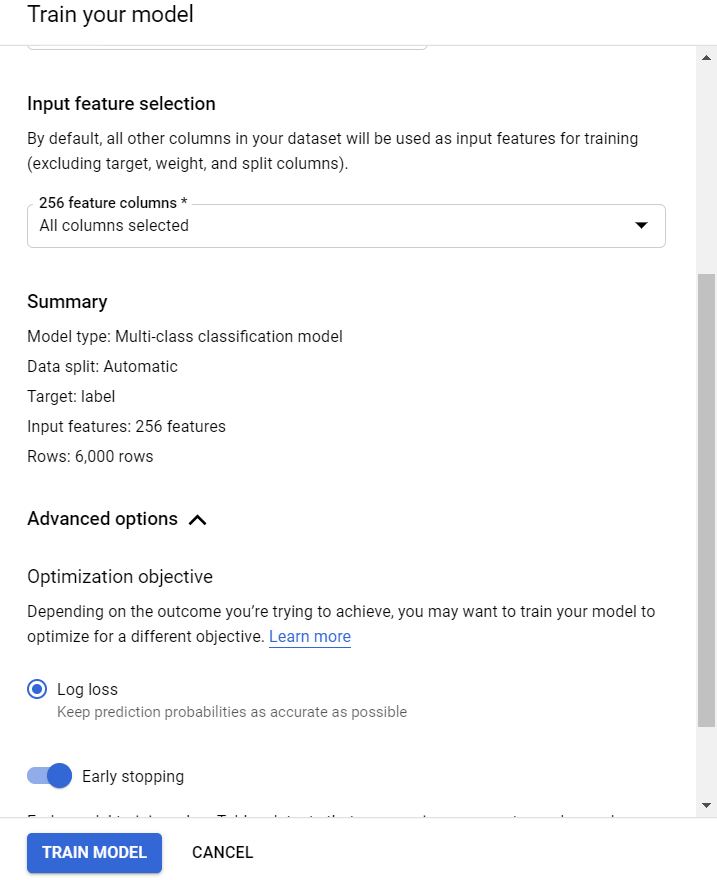
4.Training
We can now select the input columns that we require from the dataset and certain data and training parameters. We then specify the train, validation, and test dataset split that AutoML will use during training. this will be set to happen either automatically(randomly) or we will specify Train/Validation/Test set rows with a further column. Next, we will set whether any column should be considered as a weight column. this may give higher importance to certain rows and is useful if we would like our model to be more accurate surely subsets of knowledge.
In advanced features, we will select the duration that we should always train the model. just in case the model converges earlier, AutoML will automatically stop training (‘Early stopping’) before our specified duration. Since our dataset is little, we will select a budget of just 1 hour.
Finally, we will select objective functions from among:
RMSE (Root Mean Square Error) — This objective function is employed when large deviations or small relative deviations on large values should matter more.
MAE (Mean Absolute Error) — this is often almost like RMSE but large deviations matter slightly less since we take absolute difference only (L1) rather than the squared difference (L2) as in RMSE.
RMSLE (Root Mean Square Log Error) — This objective function is employed once we want to treat large and little scale deviations equally since we take a log of predictions and ground truth.
Log Loss– Log Loss is that the most vital
classification metric supported probabilities. Log-loss remains an honest
metric for comparing models. For any given problem, a lower log-loss value
means better predictions.
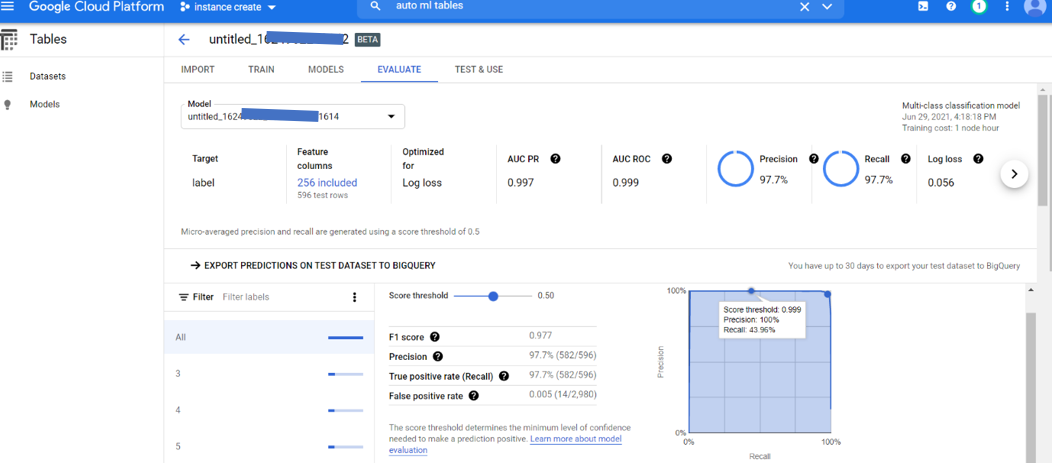
5.Testing and Results
Training the model can take between 30 min to 20 hours depending on the budget specified or we are willing to allot and convergence of training. Once completed, we can see the results of our regression model where we are able to predict the different classes of signals from the given dataset on the test split of our training data. With more training data, this error can be further reduced with respect to the previous.
We can also see the “importance score” for each feature in the dataset that we train.
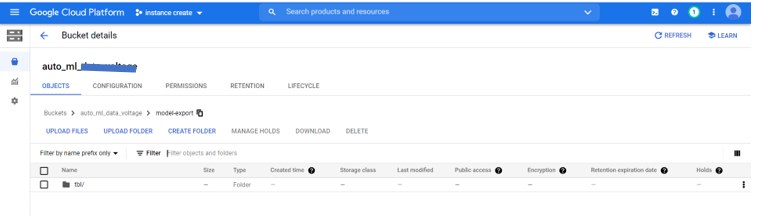
6.Exporting the model which is trained
Once the model is trained by the dataset, we’ll export the result, in order that it is often served from any environment during which you’ll run a container. (Note that you simply could also deploy your model to the Cloud AI Platform for online prediction).
You’ll find the export option under TEST & USE. (See the documentation available for detail on the export process). You’ll get to create a regional GCS bucket, within the same region as your model. you furthermore may want to make a sub-folder for the model export within the GCS bucket, in order that if you’ve got multiple exports, you’ll keep track of. Click the “Container” card to export your trained model to be run from a Docker container.

7.Predictions
We can use this trained model (AutoML) in 3 modes for the prediction of new data:
Online prediction — In online mode, we will issue live requests to our model, e.g., from a production service. The model is hosted by AutoML which can replicate the model and deliver a high-availability and low-latency SLO. For this mode, the model must be deployed.
Batch prediction — In batch mode, the model is often run one-off jobs by AutoML to predict over a much bigger batch of knowledge we have already got. there’s no requirement to deploy the model and is thus cheaper than online mode.
Self-hosted — we will export a docker image of the model and host it on our own VMs and containers. during this mode, we’ll be liable for the reliability and maintenance of the model. This mode is beneficial if the model must be used on-prem for predicting data that will not leave an on-prem environment or if the prices of using AutoML online/batch prediction are too high.
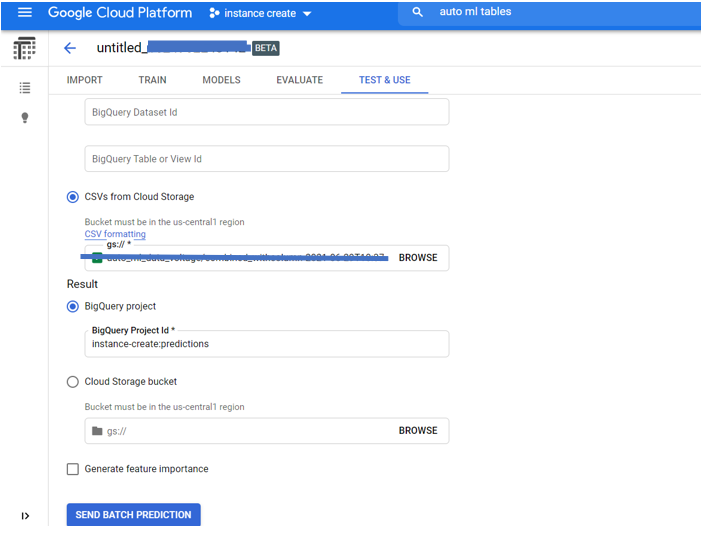
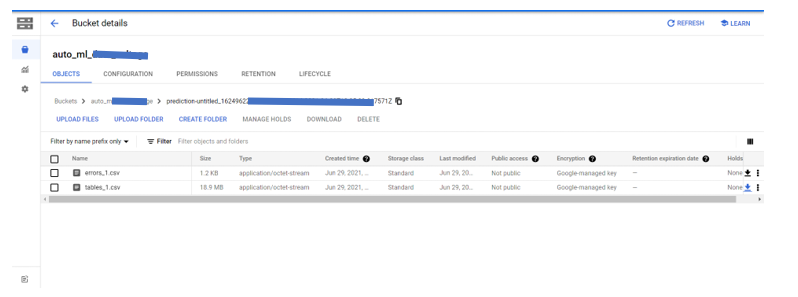
8.Store the results of the prediction
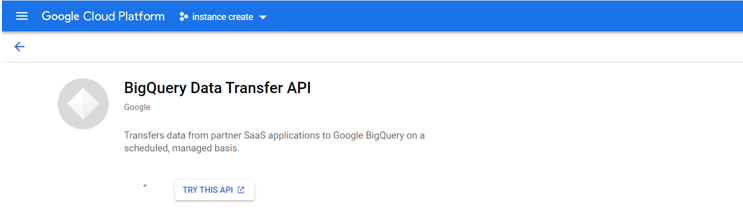
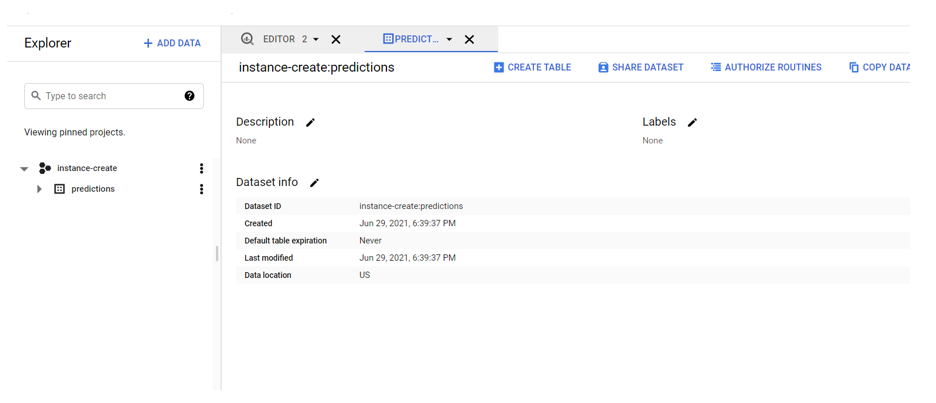
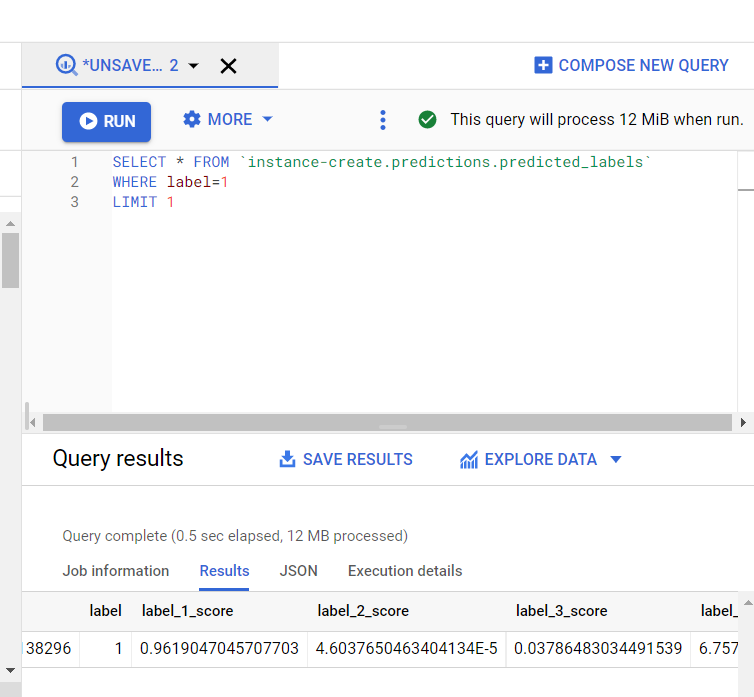
We can either store the predicted labels to BigQuery using the topic ID of which we have enabled the BigQuery API and defined the Schema. Or we can store the results in a cloud storage bucket by selecting the option in the drop-down section of Test and Use of AutoML.
CONCLUSION
• The use of Automl to train the model was efficient and easy, all the information extracted from the dataset was produced effectively.
• The use of a generated model to predict the label was simple and effective and all data was stored effectively to cloud storage.
• The Bigquery was used to get specified outputs from the predicted output of the model designed and the input is given.
LinkedIn profile: www.linkedin.com/in/ashamsmathew


