This article was published as a part of the Data Science Blogathon.
Hey Guys, I hope you are doing well.
This article is the sequel to Developing and Deploying an image classifier with Flask. This article will be about Flask and how can we use it to deploy a simple image classifier. As my other article, this article will be a hands-on experience. We will start by exciting theory, and in a later section, we will be coding everything out. Don’t worry about the code. I will add a link to Github to save up some hustle. So let’s focus on learning. Again this article will be based entirely on PYTHON.
This article is open for all viewers (Beginner, Intermediate, Advanced). Below is the table of content of this article, so feel free to skip parts you already know.
You can get the First Part HERE.
Table Of Content
- What is API?
- What is Flask Framework?
- Why do we use Flask?
- Coding
3.1 How to create a simple Flask API?
3.2 Problem Statement (Flask API with Image classifier) - Result
- Conclusion
What is API?
API is an Acronym for Application Programming Interface that acts as an intermediary layer and allows two applications to communicate.
With the help of API, companies can open up their applications’ data and functionality to individuals, other companies, business partners, basically to anyone they want for various purposes like creating more features over it or doing some kind of analysis over data. With the help of API, anyone with access can use the data. API allows services and applications to communicate with each other.
A real-world analogy can be the waiter. He takes orders from you and gives them to the Chef to prepare food. Then this same waiter gets you the food. Here Waiter is API, and you are the client, and the Chef is a web server where all the processing is being done.
What is Flask Framework?
Flask is a third-party Python library used for creating web applications. Armin Ronacher developed a flask.
What is framework ?
A web app framework is a collection of libraries or modules that helps web developer to write and deploy their application without dealing with the lower level details such as thread management , handling database etc.
Flask is a micro-framework because it does not require particular tools or libraries. It has no form validation, database abstraction layer, or other components.
Flask is based on the Werkzeg WSGI toolkit and the Jinja2 template engine.
WSGI
WSGI is an acronym for Web Server Gateway Interface. WSGI is a set of commands which helps in facilitating communication between web servers and web applications. So basically, the primary purpose of WSGI is to forward the request from a webserver to the backend i.e. flask framework and the response of Flask back to the webserver.
It helps increase scalability and promotes flexibility and efficiency in terms of speed.
Jinja2
It is the kind of template system that helps combine static HTML templates with your dynamic data from the backend. It allows you to use python data in HTML.
Example
Hello {{ username }} !
What do you think code is doing? We have sent the username variable from the backend, which is dynamic here depending upon the user. This templating style is jinja.
Jinja does not only include the variable, but we can even have an if-else statement for loops and many more things that we can do in python with a slight syntax change. Most .html files are kept inside the templates folder.
Why do we use Flask?
The significant advantage of using Flask is its simplicity and flexibility. It does not force you to follow some rigid structure while creating the API. It allows you to do unit testing easily, and the Flask has its debugger. The significant advantage of using Flask is its speed over other pythonic frameworks for web-application development.
There are many big companies like Netflix, Airbnb, Reddit, Uber.
This is what a Flask API looks like.
DAMN, this is too much theory. Let’s see how the code works.
Coding
Install Flask
pip install flask
How to create a simple flask API?
from flask import Flask
app = Flask(__name__)
@app.route(‘/’)
def hello_world():
# Make changes here
return ‘Hello World’
if __name__ == ‘__main__’:
# app.run(host, port, debug, options)
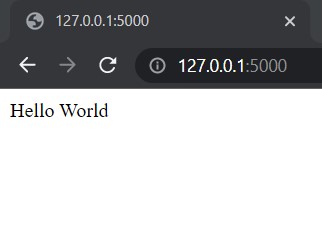
app.run(host = “127.0.0.1” ,port = 5000)
Code is Done.
open command prompt at the same location of app.py.
On CMD:
set flask_app=app.py
flask run
This code above will give results somewhat as below on 127.0.0.1:5000
Routines: This decorator tells Flask which functions to hit when entering a specific URL. For example,
if you want to hit function hello_world when the URL is localhost/hello, you must do something like the below:
@app.route('/hello')
Now, this route decorator has some more HTTP methods: GET and POST
GET: As the name suggests, it’s a primary method of getting data files or HTML pages. It is used when you are not dealing with any confidential data.
@app.route("/",method=["GET"])
POST: It is used to send data to the server with encryption. This method is used when you are dealing with credentials.
@app.route("/",method=["POST"])
# @app.route("/",method=["POST","GET"])
This is enough with Flask showing me the complete Project. Sure! Why not?
Problem Statement
In this section, we will be discussing the code for the Image Classifier added to Flask.
Prerequisites : Knowledge of CNN for which you can read part 1. Libraries for CNN.
You can find the complete code for this section HERE.
git clone https://github.com/r-sajal/Image-Classifier-With-Flask
Install all modules given below
flask==1.1.1
| h5py==2.10.0 |
| numpy==1.17.0 |
| Pillow==6.1.0 |
| tensorflow==2.3.1 OR pip3 install -r requirements.txt |
app.py
In this part, we will be breaking down this file and explaining each of them in detail.
# Variables
# Change them if you are using custom model or pretrained model with saved weights
Model_json = ".json"
Model_weights = ".h5"
Model_json will hold the JSON structure of your model, and model_weights will store weights of your pretrained model if you have any. Suppose you have not trained a model. You don’t have to care about it.
def get_ImageClassifierModel():
    model = MobileNetV2(weights='imagenet')
    # Loading the pretrained model
    # model_json = open(Model_json, 'r')
    # loaded_model_json = model_json.read()
    # model_json.close()
    # model = model_from_json(loaded_model_json)
    # model.load_weights(Model_weigths)

    return model
This function will return a model which can be directly used to predict the classes of images.
def model_predict(img, model):
”’
Prediction Function for model.
Arguments:
img: is address to image
model : image classification model
”’
img = img.resize((224, 224))
# Preprocessing the image
x = image.img_to_array(img)
# x = np.true_divide(x, 255)
x = np.expand_dims(x, axis=0)
# Be careful how your trained model deals with the input
# otherwise, it won’t make correct prediction!
x = preprocess_input(x, mode=’tf’)
preds = model.predict(x)
return preds
This function addresses your image and model, and as the name suggests, it will give you the class your idea belongs to.
@app.route('/', methods=['GET'])
def index():
    '''
    Render the main page
    '''
    return render_template('index.html')
This function is triggered when you open the link to your website or localhost.
render_template will generate output from a template file based on the Jinja2 engine found in the application’s templates folder.
@app.route(‘/predict’, methods=[‘GET’, ‘POST’])
def predict():
”’
predict function to predict the image
Api hits this function when someone clicks submit.
”’
if request.method == ‘POST’:
# Get the image from post request
img = base64_to_pil(request.json)
# initialize model
model = get_ImageClassifierModel()
# Make prediction
preds = model_predict(img, model)
pred_proba = “{:.3f}”.format(np.amax(preds)) # Max probability
pred_class = decode_predictions(preds, top=1) # ImageNet Decode
result = str(pred_class[0][0][1]) # Convert to string
result = result.replace(‘_’, ‘ ‘).capitalize()
# Serialize the result, you can add additional fields
return jsonify(result=result, probability=pred_proba)
return None
The function will be triggered when you submit an image to the classifier.
The last return None statement is triggered when someone tries to predict without giving any input image.
index.html
{% extends "base.html" %} {% block content %}
This part will copy all the present in base.html to your index.html to avoid having to write it again. This is a feature of the jinja template.
This marks the end of the explanation of the coding part.
Results
You will be able to get something like this as your end product.
Conclusion
This marks the end of this article. You must now be pretty much familiar with how to use a flask and how you can put an image classifier to the Flask. Flask is not limited to only image classification but can also be used to quickly deploy many other machine learning and deep learning models. If you want me to create more articles on flask deployment, please contact me.
Thank You for reading.
ABOUT ME
I am Sajal Rastogi, a Final Year student from IIIT pursuing my bachelor’s in Computer Science and Engineering. I love exploring and trying more and more about Deep and Machine Learning. If you want to collaborate, you can use the below information
Linkedin: Click Me
Github: Click Me
Kaggle: Click Me
Mail me: [email protected]
Thank You for reading!
The media shown in this article is not owned by Analytics Vidhya and are used at the Author’s discretion.


