This article was published as a part of the Data Science Blogathon.
Overview
- Introduction
- Understanding on Shapash
- Interpreting RandomForestRegressor
- Understanding ML model with shapash
- Summary
” Artificial intelligence is growing up fast, as are robots whose facial expressions can elicit empathy and make your mirror neurons quiver “
The above quote is quite interesting and yes, they speak the truth most of us are from the technical field so we probably know about what machine learning is? it is the current worldwide digital technology ruled over the world.
Introduction
If you are familiar with machine learning then you come across the words data, train, test, accuracy, and many more, and many of you are capable of writing machine learning scripts if you notice that we didn’t see the background calculations of the machine learning models because machine learning is not interpretable. Many people say that the machine learning models are the black box models, suppose if we give input there are a lot of calculations are happening inside and we got the output, that particular calculation based on what feature we are actually giving.
Suppose we give the input of 5 features inside this, it may be a situation where some of the feature value may be increasing and some of them are decreasing, so we not able to see this, but python has a beautiful library which makes a machine learning model interpretable by this we can able to understand that underground calculations.
The name of that python library is Shapash, now we start our discussion on this library:
Shapash
This beautiful library is developed by a group of MAIF Data Scientists. This library aims to make machine learning Interpretable in other words this is used to explaining the code. This library is very easy to use and has so many amazing features.
.png)
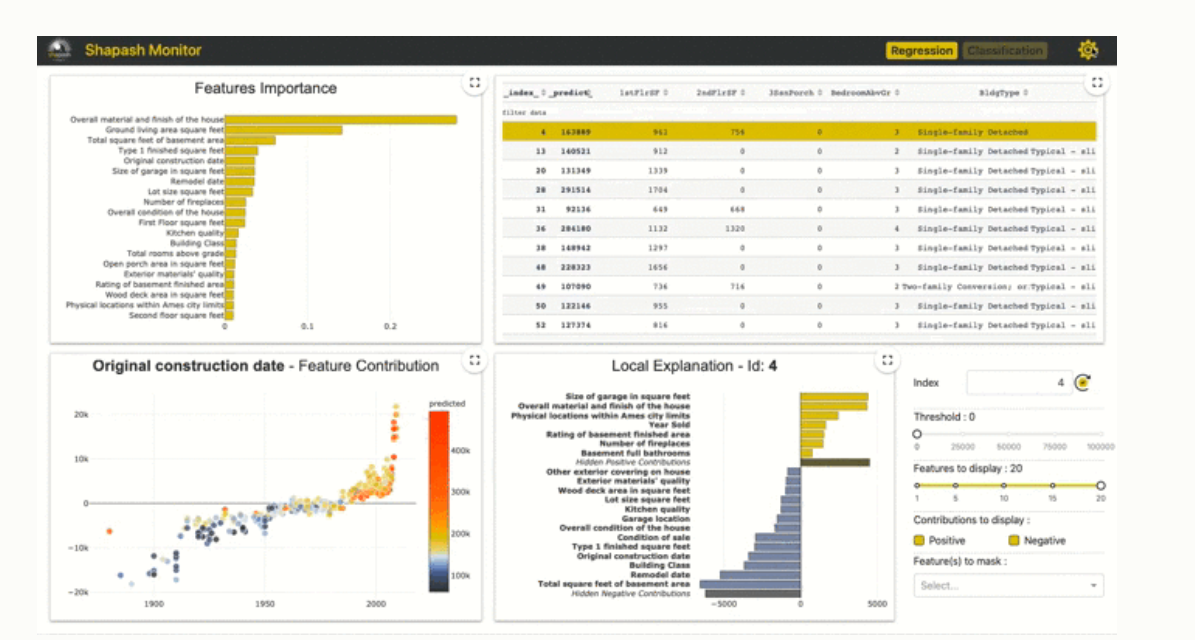
If we want to do any visualization on the dataset then shapash will use because it displays the revealed labels that everyone can understand or we can say that it displays clear and understandable results, It makes DataScientiests understand the model easily which will good for them.
The amazing point is that it allows you to quickly understand the machine learning model by using a simple webapp, by these, we can easily navigate.
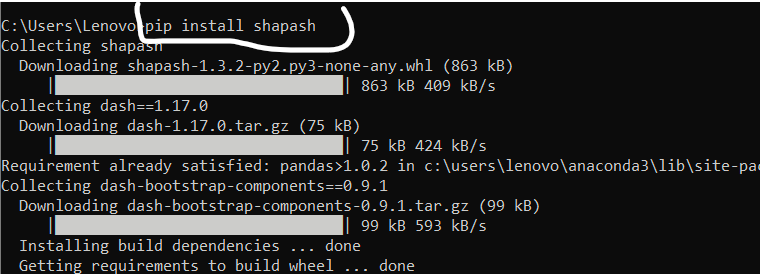
Installation:-
For installation you have to open the command prompt and type the following code:
pip install shapash
Now we will solve the regression problem statement:
Interpreting RandomForestRegressor
Now, we make RandomForestRegressor interpretable with the help of shapash.
Before we use the shapash we have to build the machine learning model for that we take a concrete dataset from the Kaggle and then we apply the model for resulting accuracy.
importing libraries:
import pandas as pd
import numpy as np
from sklearn.preprocessing import StandardScaler
from sklearn.model_selection import train_test_split
from sklearn.ensemble import RandomForestRegressor
Now, we will perform our machine learning operations on the dataset :
Creating dataframe:-
df = pd.read_csv('Concrete_Data.csv')
Imputing means to null values:-
num= df.select_dtypes(include=['int64','float64']).keys()
from sklearn.impute import SimpleImputer
impute=SimpleImputer(strategy='mean')
impute_fit= impute.fit(df[num])
df[num]= impute_fit.transform(df[num])
Divide independent and dependent variables:-
x = df.drop(['csMPa'],axis=1)
y = df['csMPa']
Splitting data into train and test:-
xtrain,xtest,ytrain,ytest= train_test_split(x,y,test_size=0.3,random_state=42)
Feature scaling
from sklearn.preprocessing import StandardScaler
stand= StandardScaler()
fit= stand.fit(xtrain)
xtrain_scl=fit.transform(xtrain)
xtest_scl=fit.transform(xtest)
Applying model:-
regressor= RandomForestRegressor(ccp_alpha=0.0)
fit_regressor= regressor.fit(xtrain_scl,ytrain)
Here we create a dataframe of concrete_data and then we have to fill the null values present inside data with the SimpleImputer. Now, divide that dataframe into independent and dependent features for training and testing the data, after that, we use the train_test_split method to split our independent and dependent variables. After splitting we balance the values by scaling. At last, we apply our RandomForestRegressor model to our training data.
Now, we going to start the working with shapash library:
Understand Our Model With Shapash
Now, we create an object of SmartExplainer from using shapash. SmartExplainer allows you to our model work with data, but this object is only used for the data mining steps.
Import shapash module:
from shapash.explainer.smart_explainer import SmartExplainer
Initialize class:
SE = SmartExplainer()
SE.compile(
x=xtest,
model=regressor,
)
Here we initialize the class of shapash and then inside this class having inbuild function compile where we set a pair of parameters.
Result:
This is the most important step we will perform:
Remember: We have to choose the 3 most contribution features from the dataset for the prediction.
app = SE.run_app(title_story='Concrete_Data')
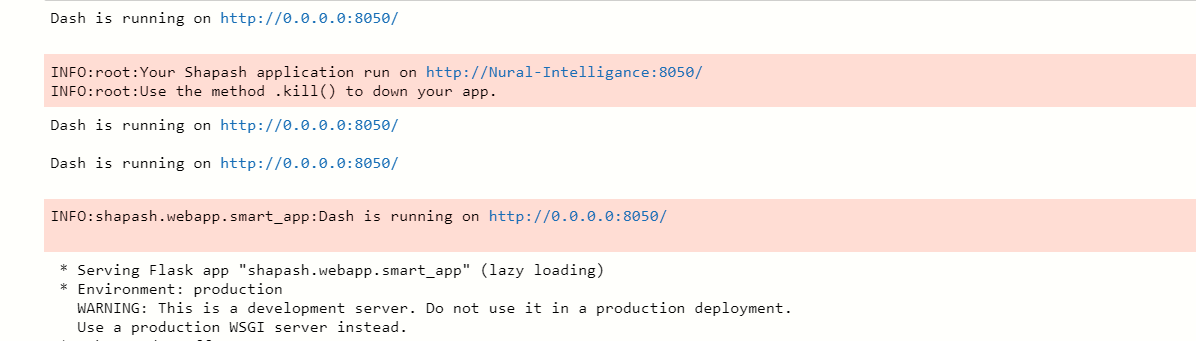
Click on the server link to see the webapp:
You can see that one separate webapp was open when we execute, where several types of plots and grasp are present. If you want to stop this application then you have to use app_name.kill() method.
If you want to plot separate all these plots then we have to use some inbuilt functions which were present inside shapash library:
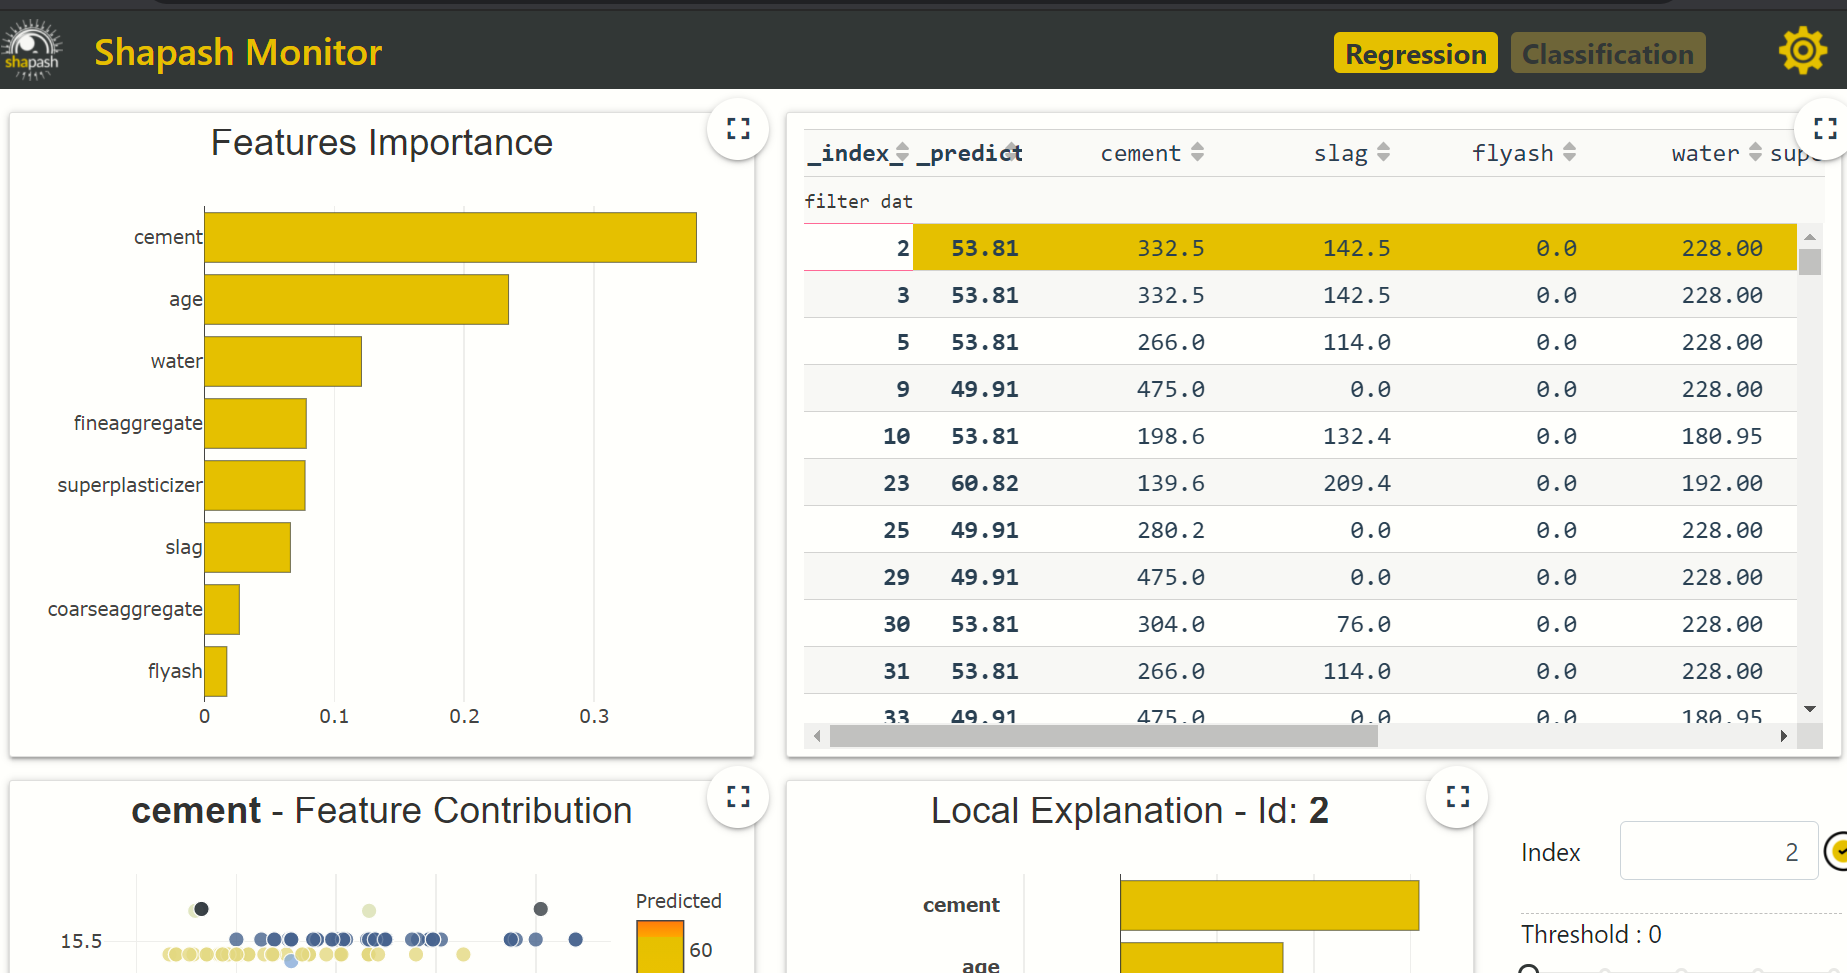
1. Let’s see which feature is important in our dataset,
se = SmartExplainer()
se.compile(
x=xtest,
model=rnd,
#creating plot
se.plot.features_importance()

This plot represents that which feature has how much weightage in the dataset, you can see that cement is the most important feature in our data.
2. We can also plot contribution plots to analyze the specific feature, here we plot the contribution plot of water to see how water contributes to concrete strength.
SE = SmartExplainer()
SE.compile(
x=xtest,
model=rnd,
#creating plot
se.plot.features_importance()

It’s prediction time:
Now, it’s time to predict the strength of concrete using shapash inbuild function to_smartpredictor().
prediction = SE.to_smartpredictor()
Now, we convert this prediction into a pickle file,
prediction.save('./predictor.pkl')
At this step, we have to load this pick file using the inbuild function load_smartpredictor,
from shapash.utils.load_smartpredictor import load_smartpredictor
predictor_load = load_smartpredictor('./predictor.pkl')
Hence, the is load now we see the predicted values,
load.add_input(x=x, ypred=y)
detailed = load.detail_contributions()
detailed_contributions.head()
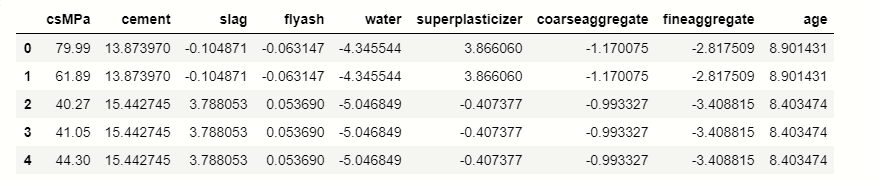
Hence, you can able to see that our model is predicting the values using shapash library.
Summary
This article provides a detailed understanding of the python library shapash which is pretty much amazing used to make machine learning interpretable, as I here give the detailed explanation on the shapes library.
Thank you.
The media shown in this article are not owned by Analytics Vidhya and is used at the Author’s discretion.


