The ADLS Gen2 service is built upon Azure Storage as its foundation. It combines the capabilities of ADLS Gen1 with Azure Blob Storage. Azure Data Lake Storage is capable of storing large quantities of structured, semi-structured, and unstructured data in their original file formats. For example, it can store Text files, CSV files, JSON files, XML files, images, videos, etc. When the uploading of files gets completed after that we can use any technologies like Databricks, or Hadoop, to process and analyze the data as per our business needs.
Data Lake Storage Gen2 makes Azure Storage the inspiration for building enterprise knowledge lakes on Azure Cloud. it’s designed to service multiple petabytes of data while sustaining many gigabits of turnout, Data Lake Storage Gen2 helps you to simply manage huge amounts of data.
A fundamental part of Data Lake Storage Gen2 is the addition of a hierarchical namespace to Blob storage. The hierarchical namespace organizes objects/files into a hierarchy of directories for efficient data access.
In this article, we will explore Azure Data Lake Storage Gen2 (ADLS Gen2) service. We are going to create a storage account using an azure free tier subscription and use Microsoft Azure Storage Explorer to create storage containers and upload the data inside the containers from our local system.
Steps to Create ADLS Gen2 Storage Account
Pre-Requisite:-
Need to have at least an Azure free tier subscription. I will use a free tier subscription to perform the below steps.
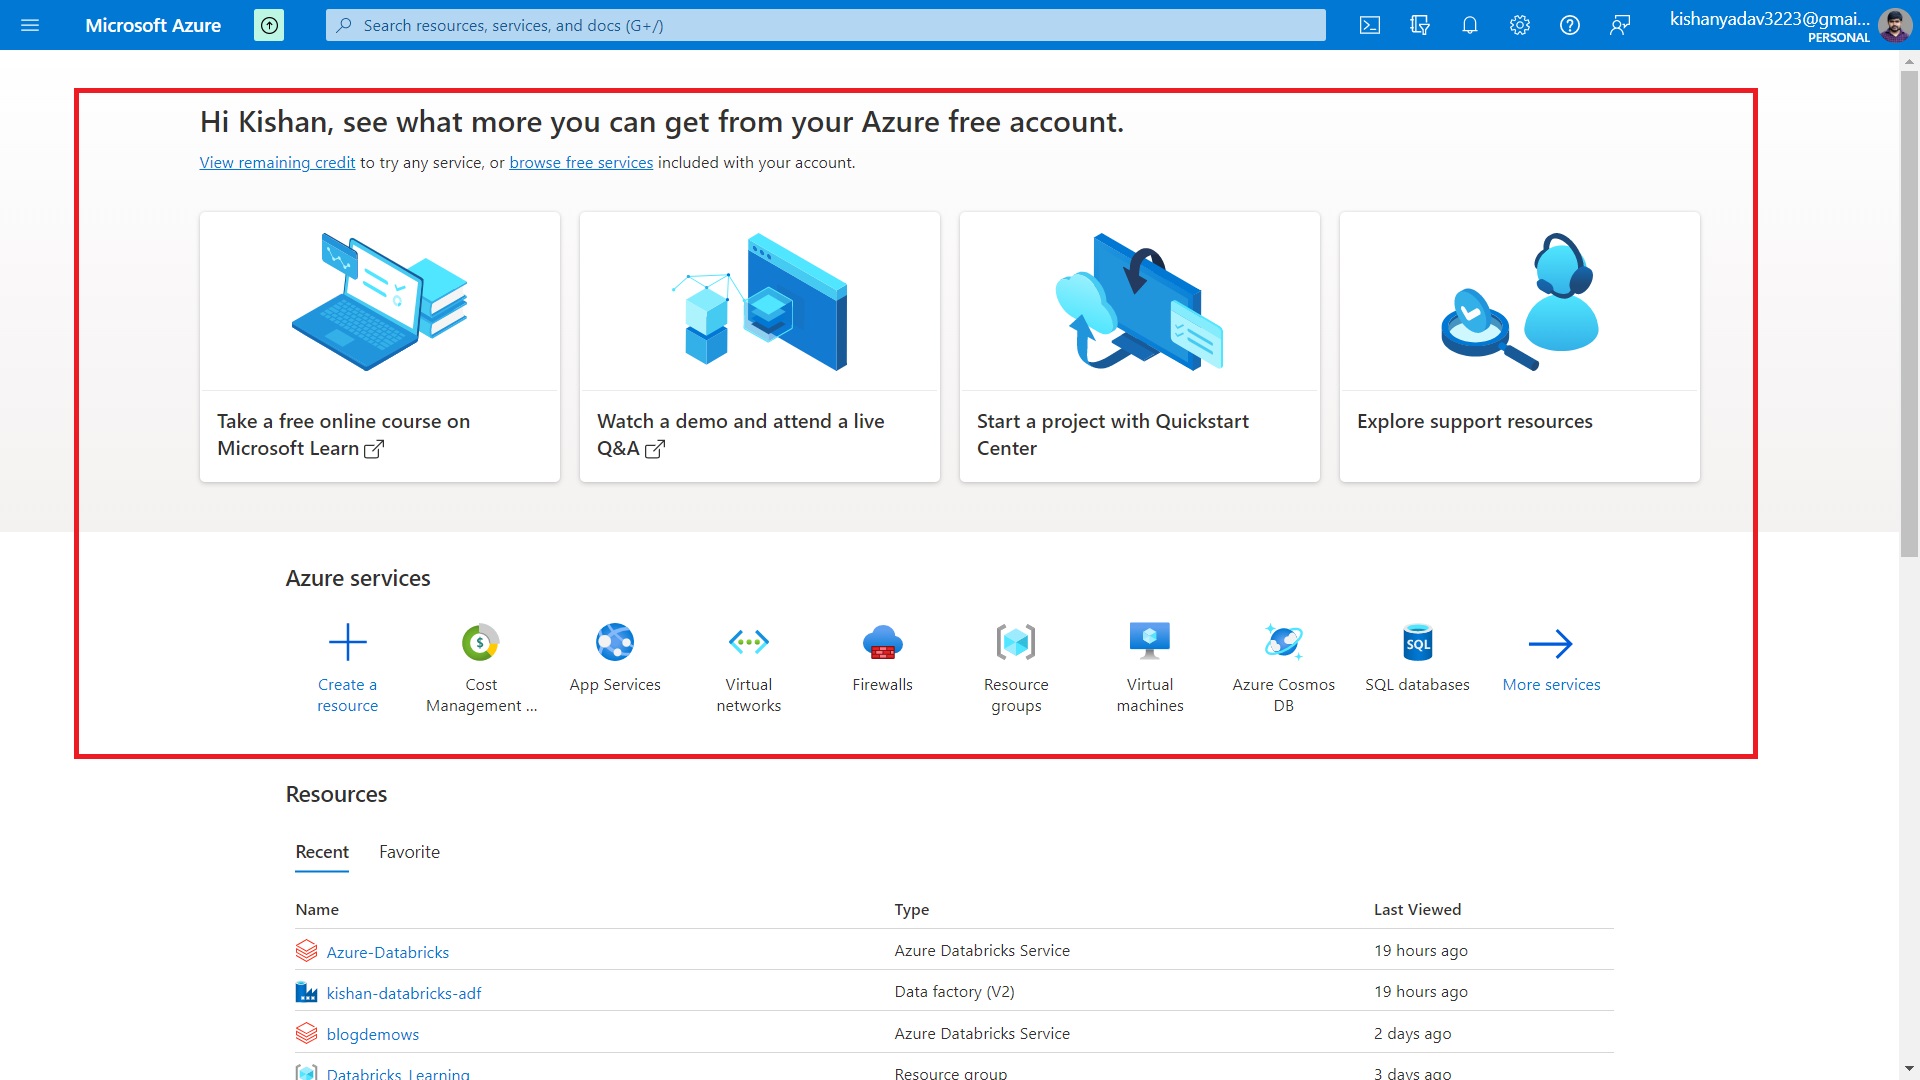
Step 1 – We will open the Azure portal (portal.azure.com). This is the home page of the Azure cloud.
Step 2 – Now we will create the storage service.
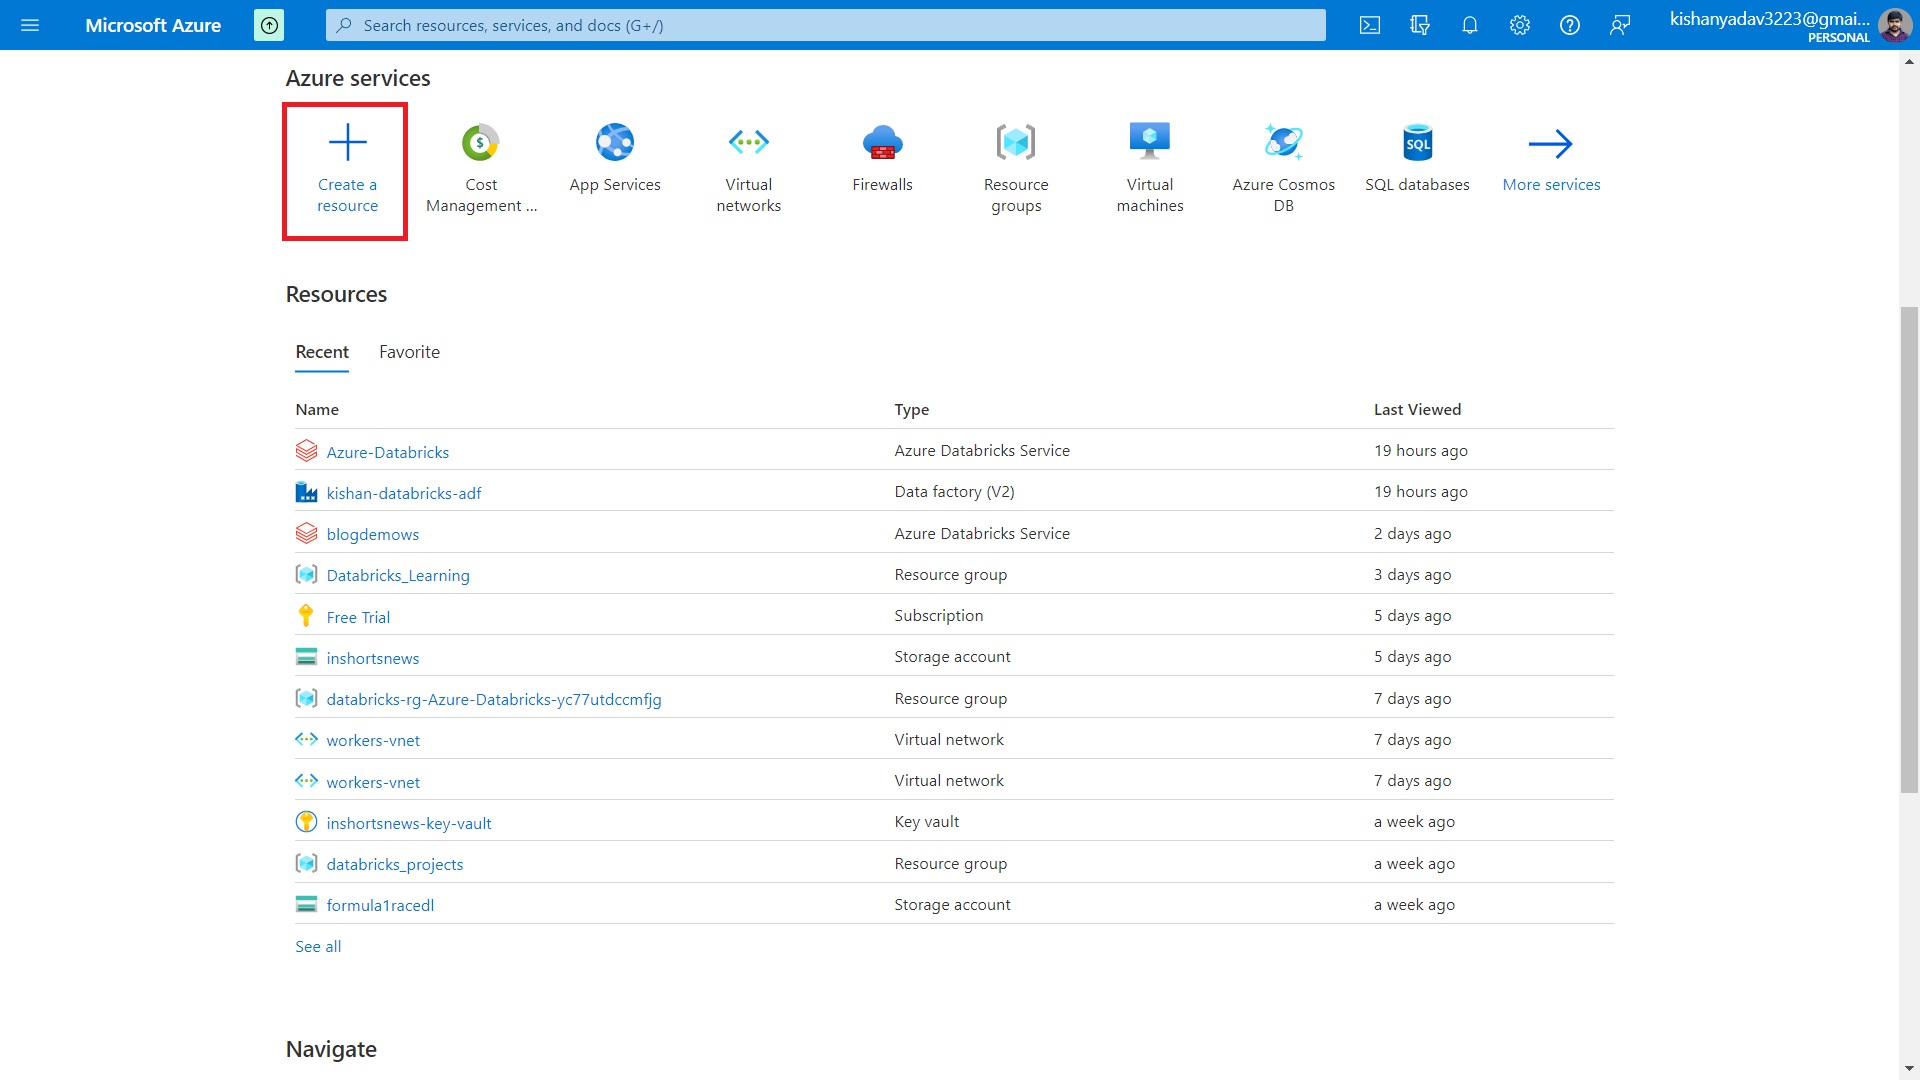
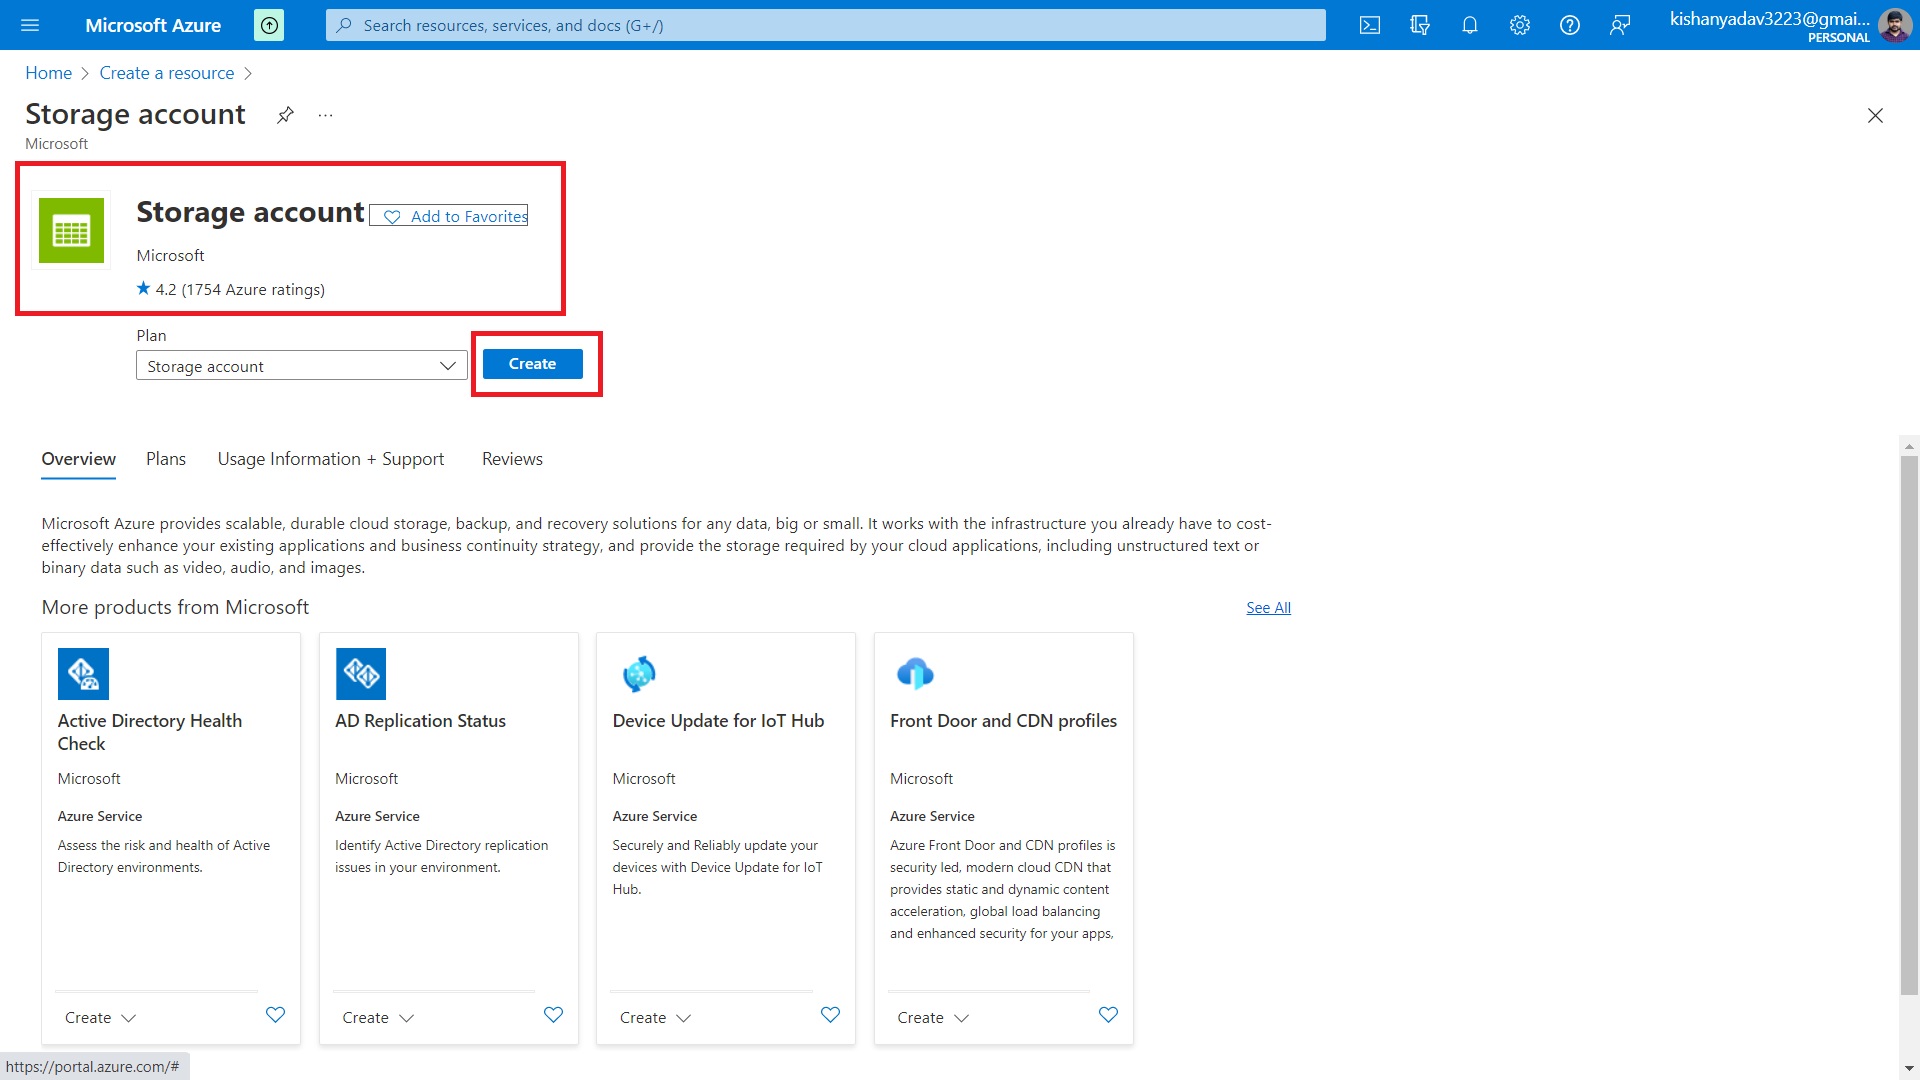
Step 2.1 – To create an Azure Storage Account, first click on the “create a resource” icon from the azure services to create your service.
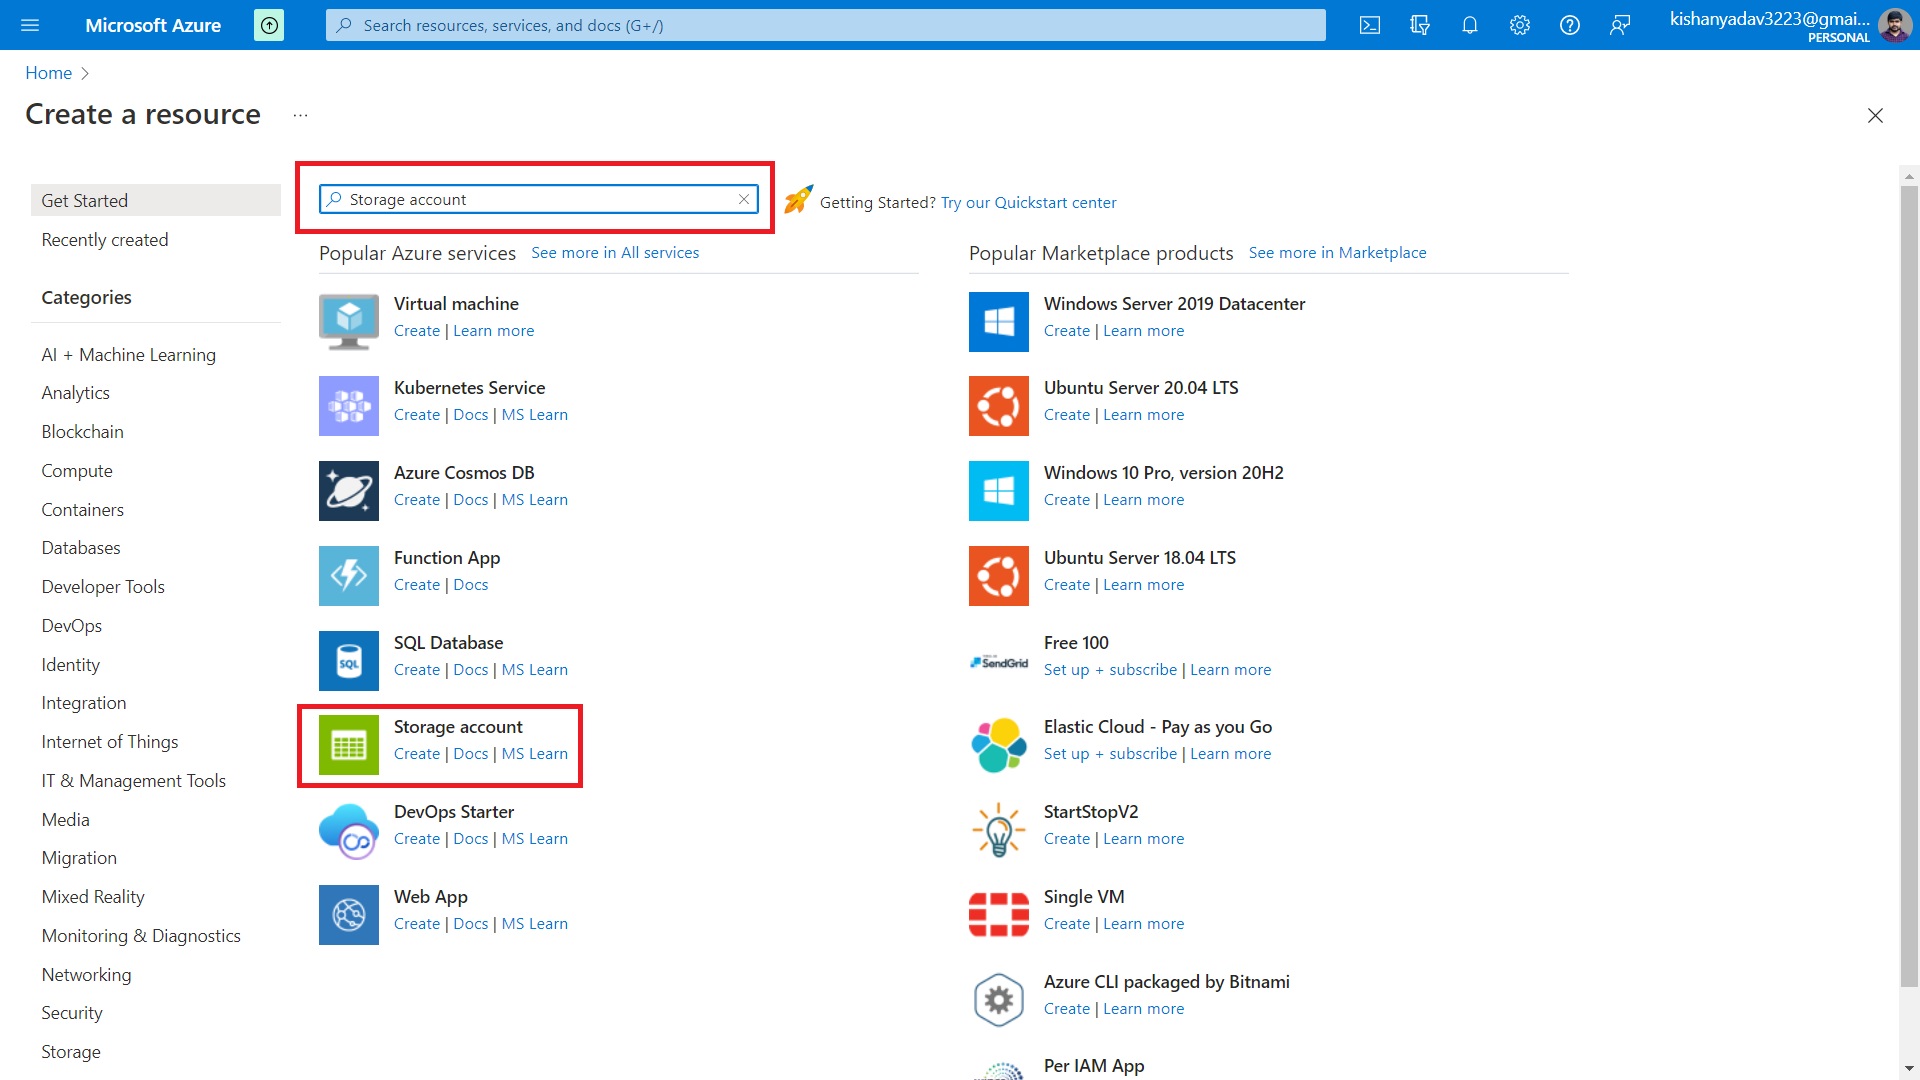
Step 2.2 – Type “storage account” and select the only option “storage account” to create this service.
Step 2.3 – Now, click on “Create” button.
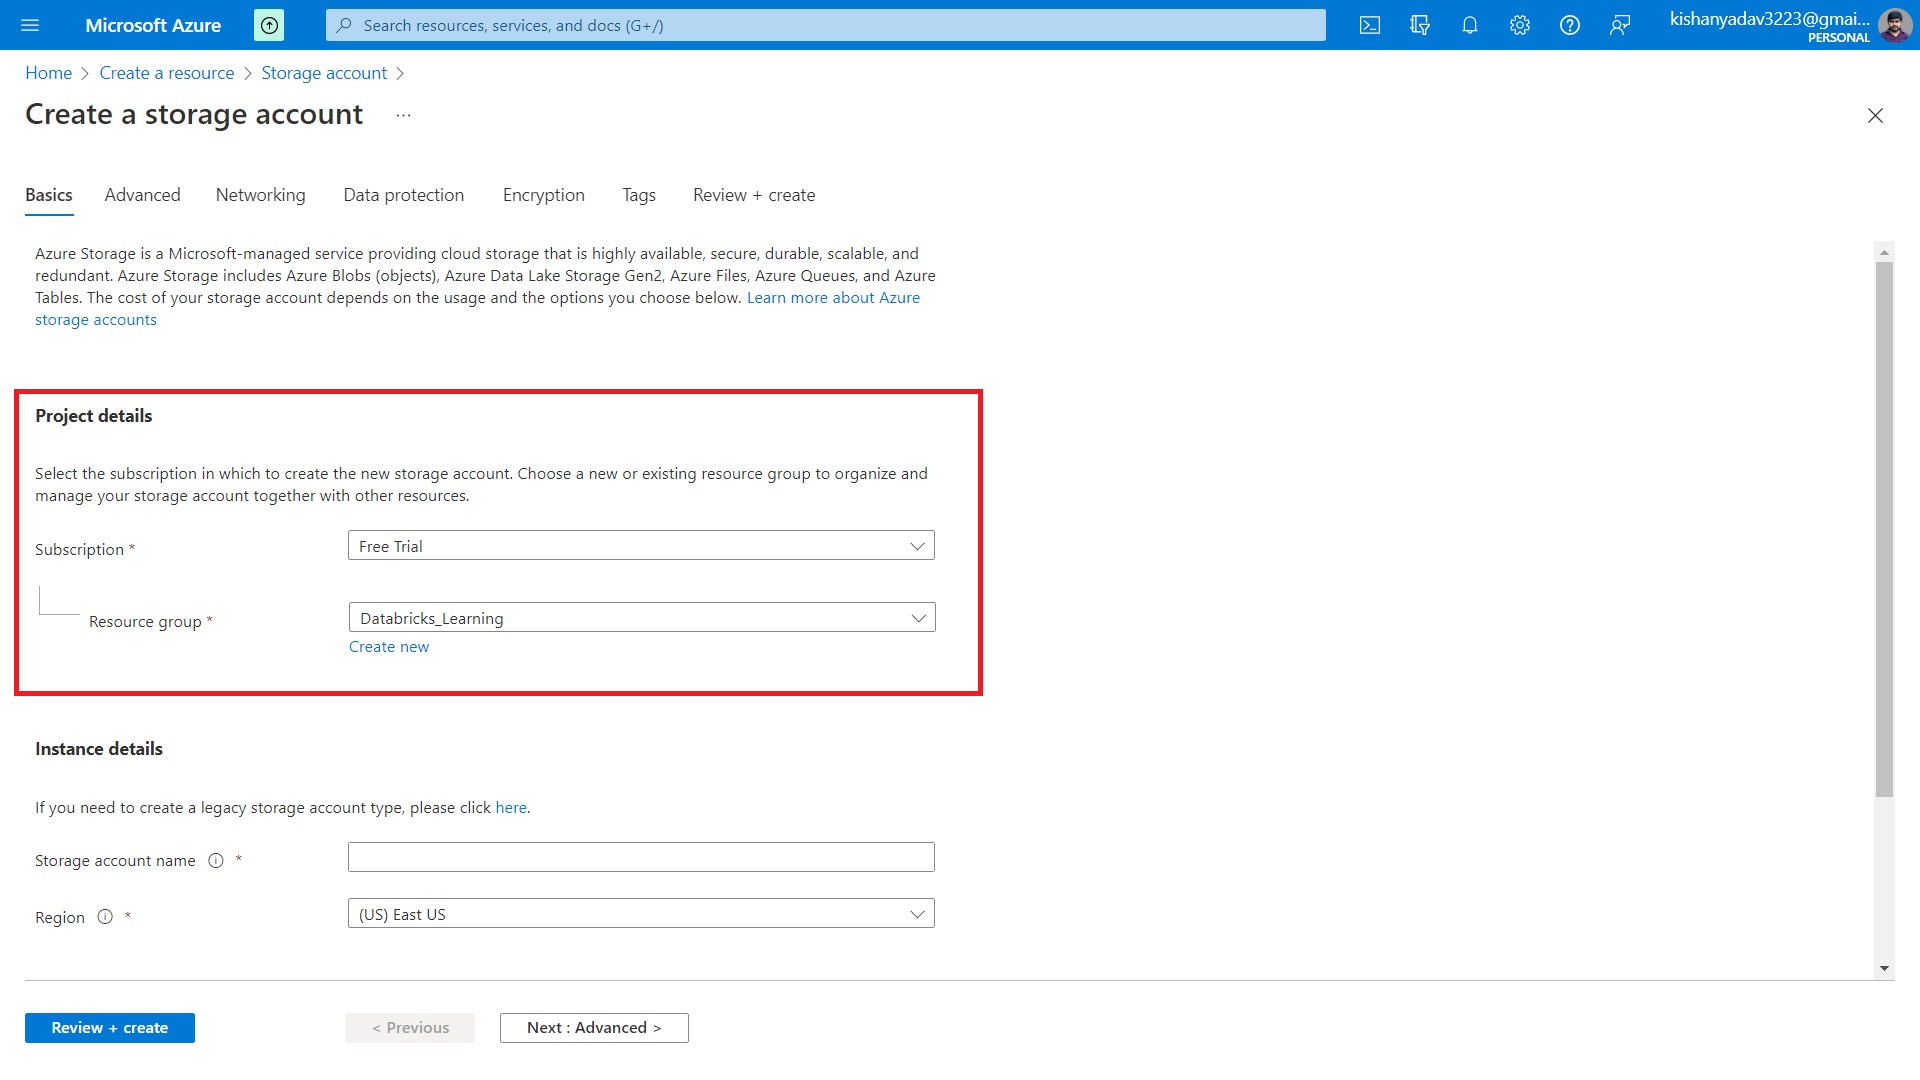
Step 2.4 –Provide the following information in the “Basics” tab of the “Create a storage account” page –
“Project Details” Section –
Subscription – Select the proper “Subscription” to use from the Dropdown.
Resource Group – Select “RG-Storage” from the Dropdown of “Resource Group”.
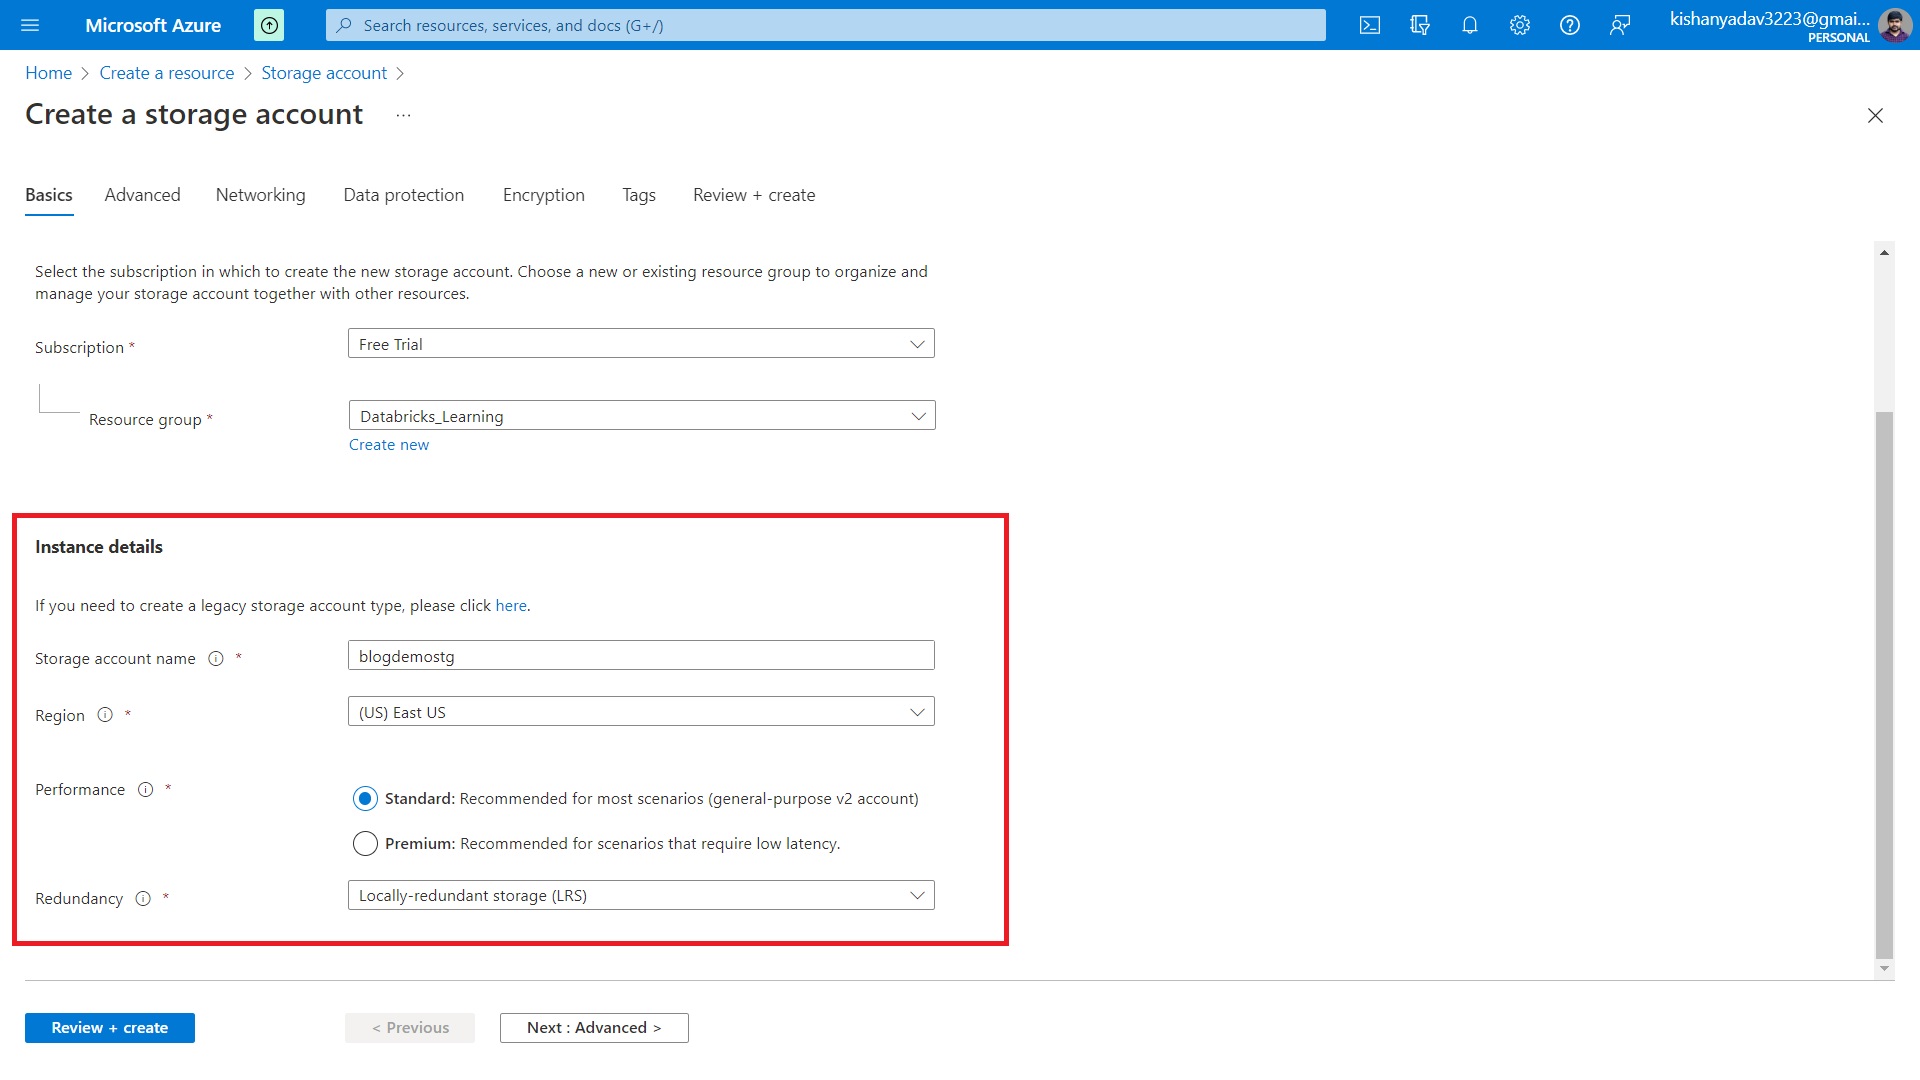
“Instance Details” Section –
Storage account name – Type the name “blogdemostg ” in the provided input box.
Region – Select the default option “East US” from the Dropdown of “Region”. If you want you can change it as per your choice.
Performance – Select the option “Standard: Recommended for most scenarios (general-purpose v2 account)”.
Redundancy – Select the“Locally-redundant storage(LRS)” Option in the Dropdown.
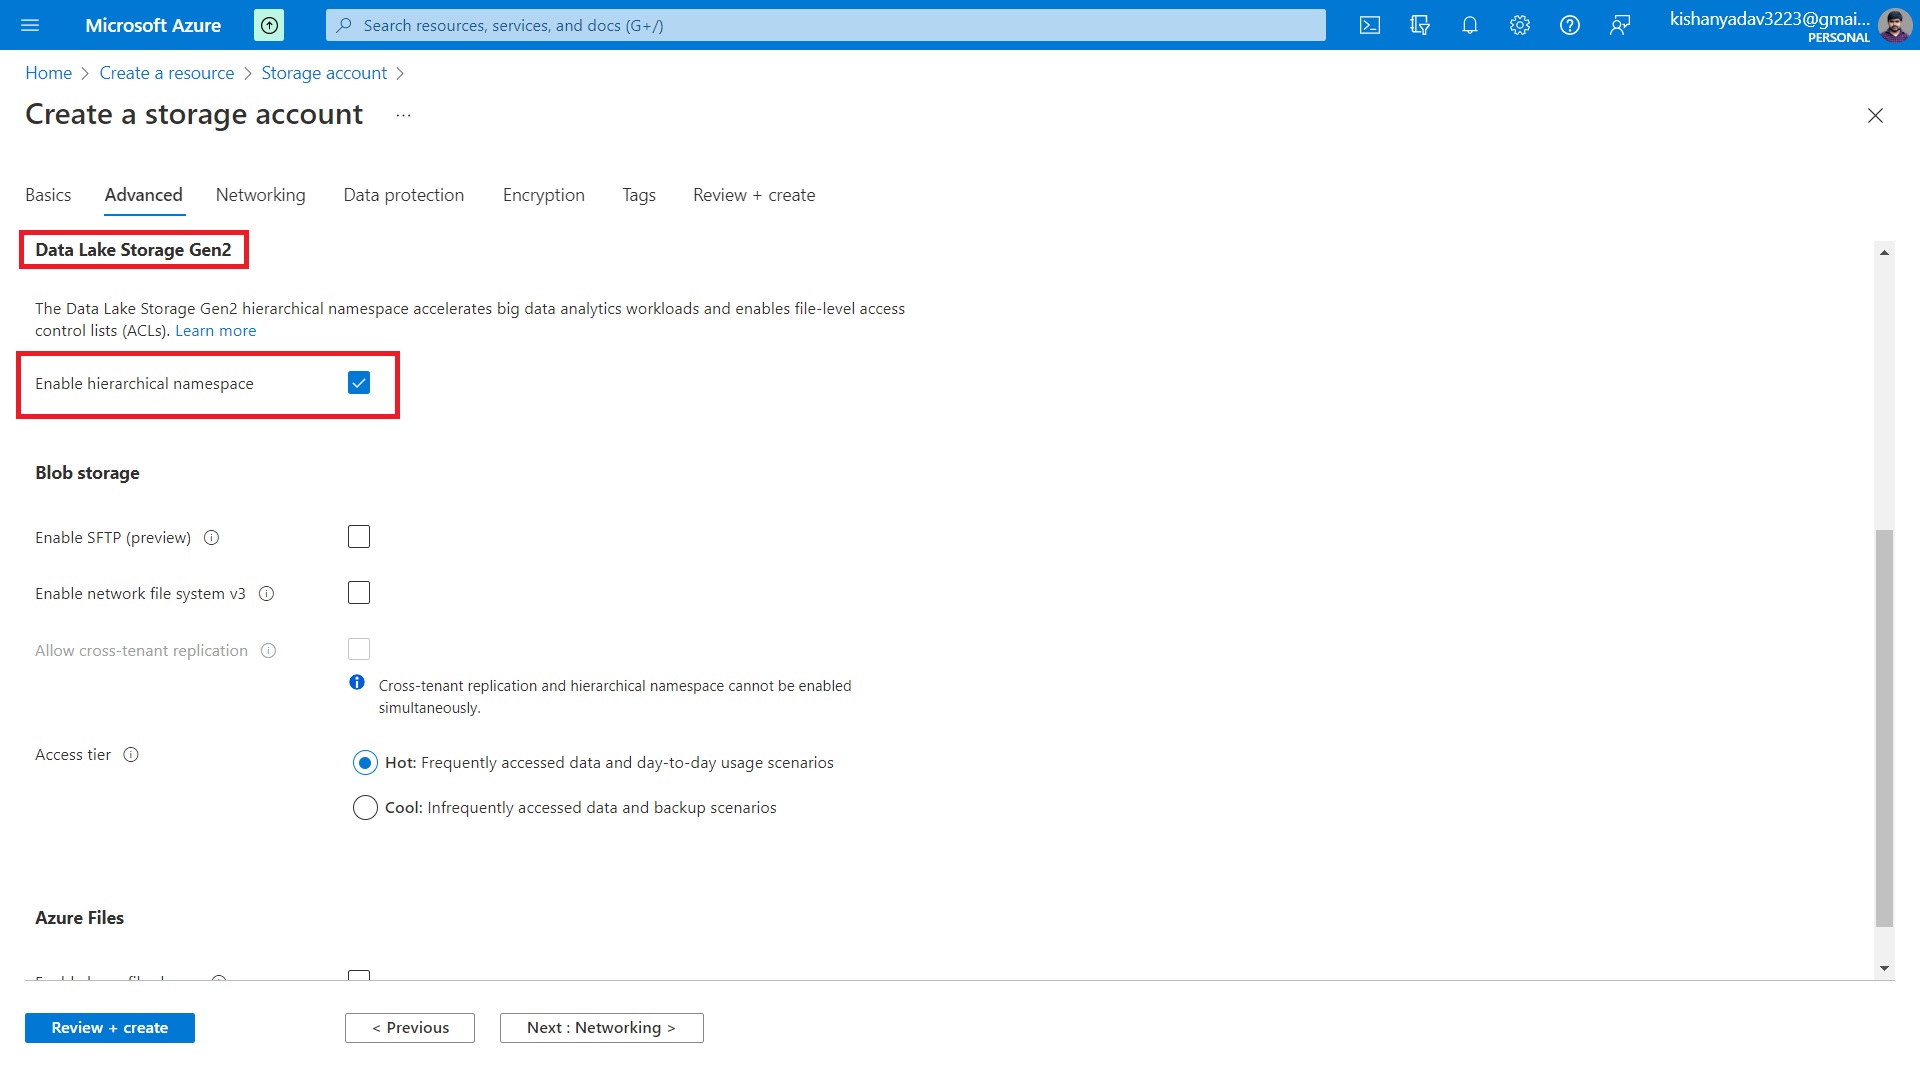
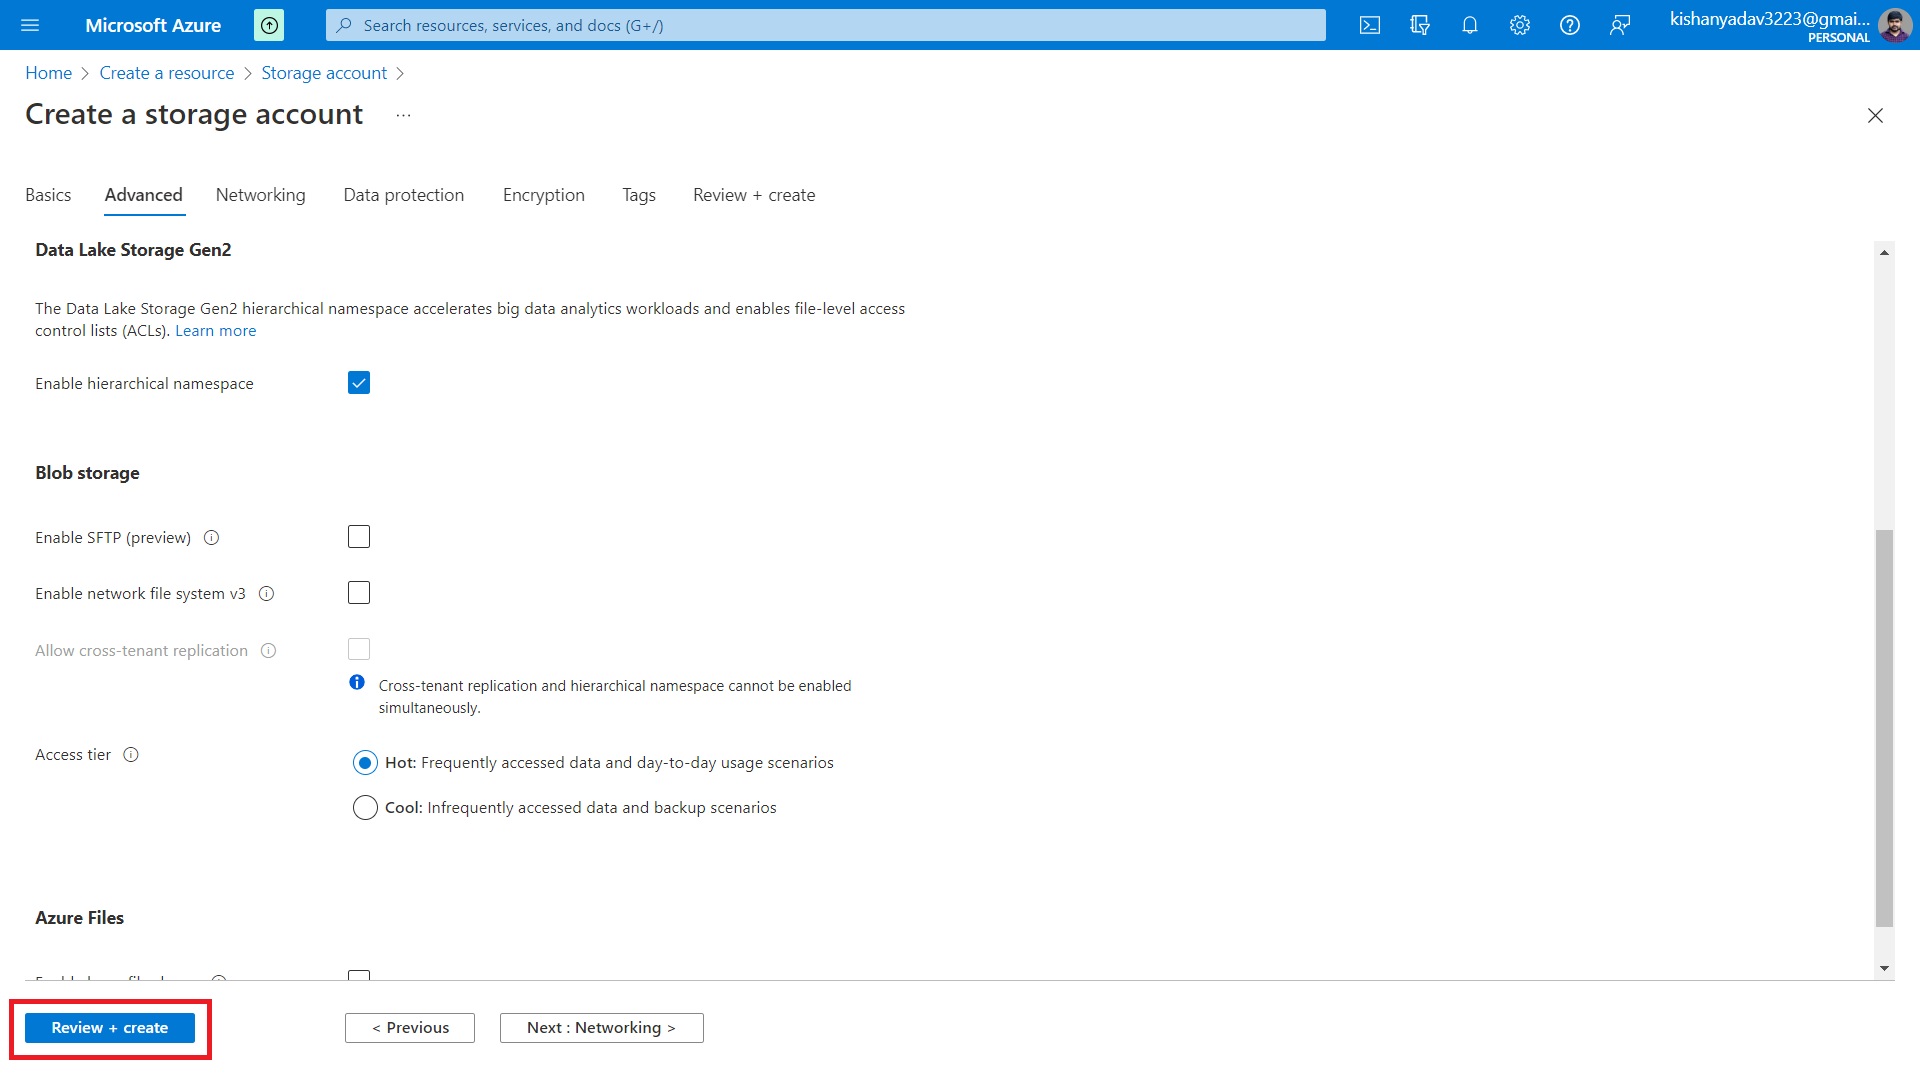
Step 2.5 – Now, in advance option go to Data Lake Storage Gen2 section and here to “Enable hierarchical namespace” click on the checkbox.
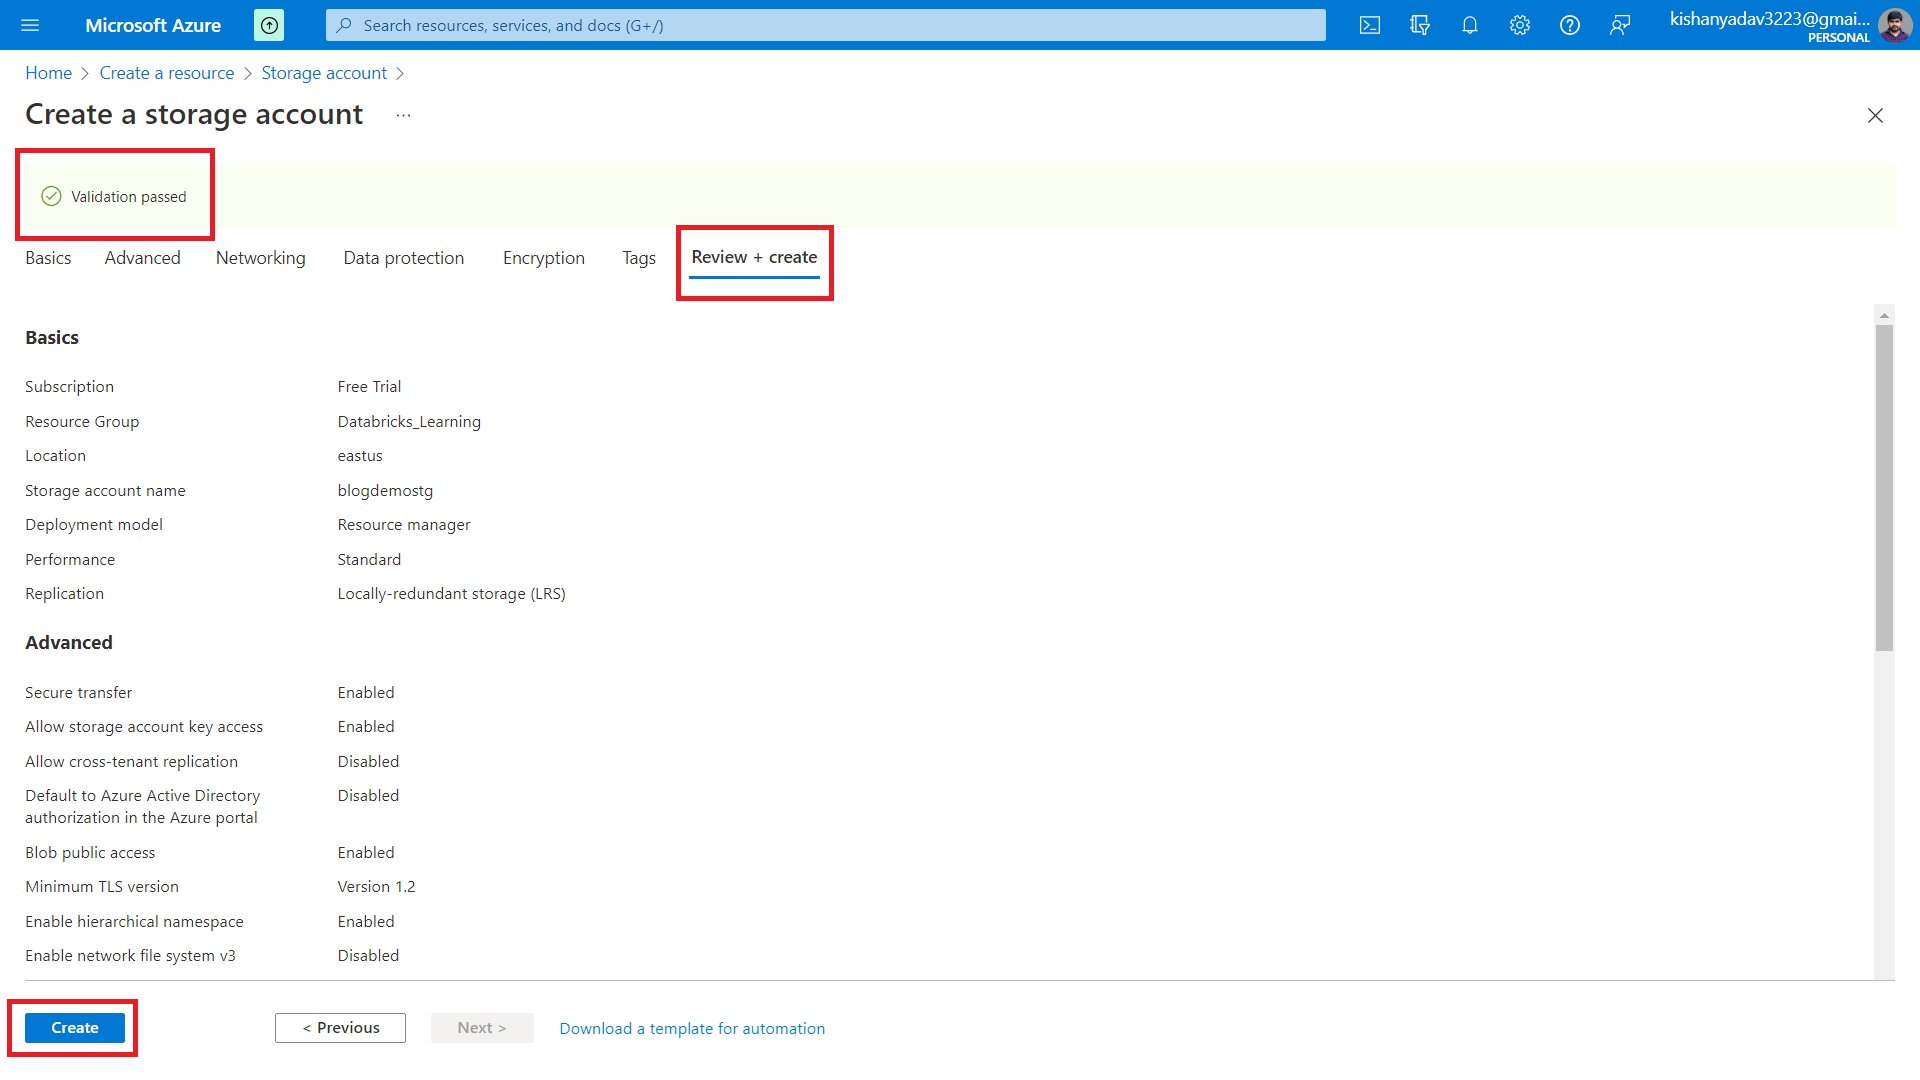
Step 2.6 – Finally,click on the “Review + create” button.
Step 2.7 – Once, the message “Validation passed” is displayed, click on the “Create” button.
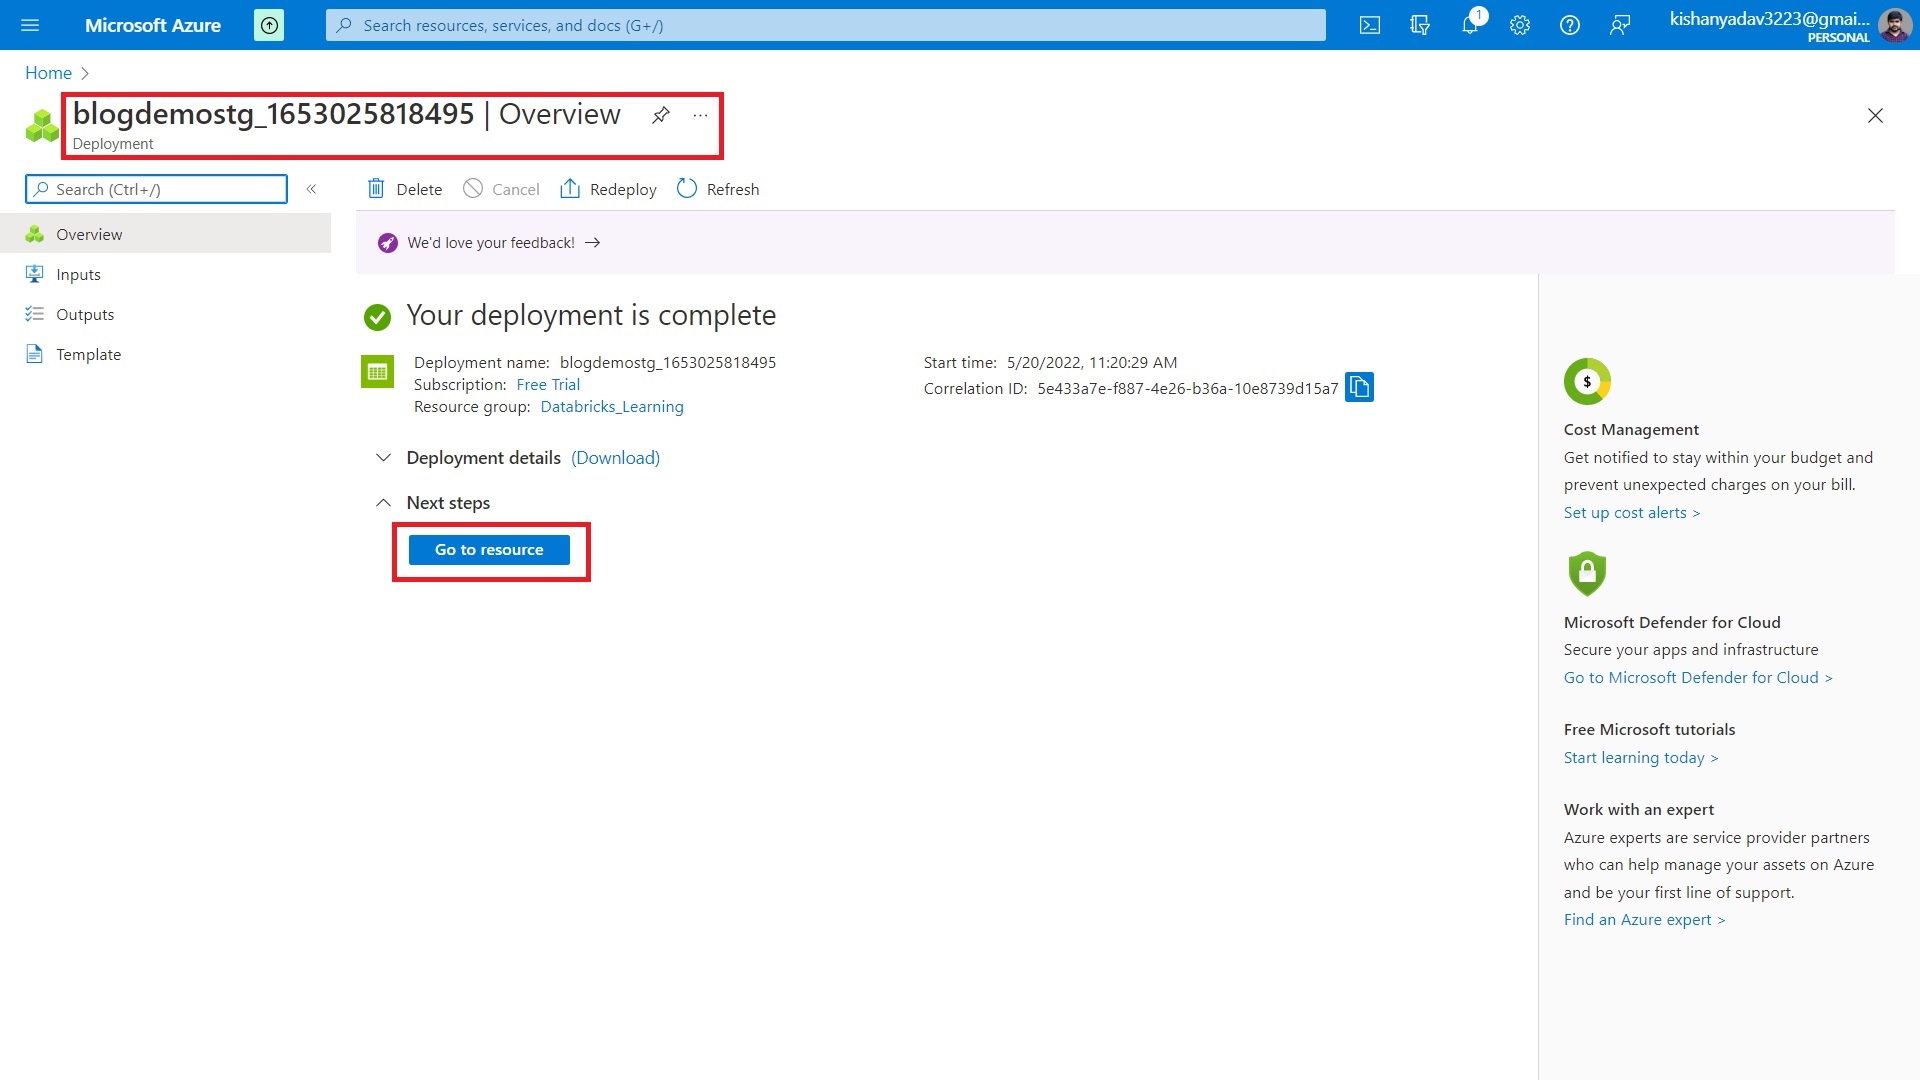
Step 3 – Now our service got created and now you will be redirected to the storage account deployment page. Here, click on the “Go to resource” button.
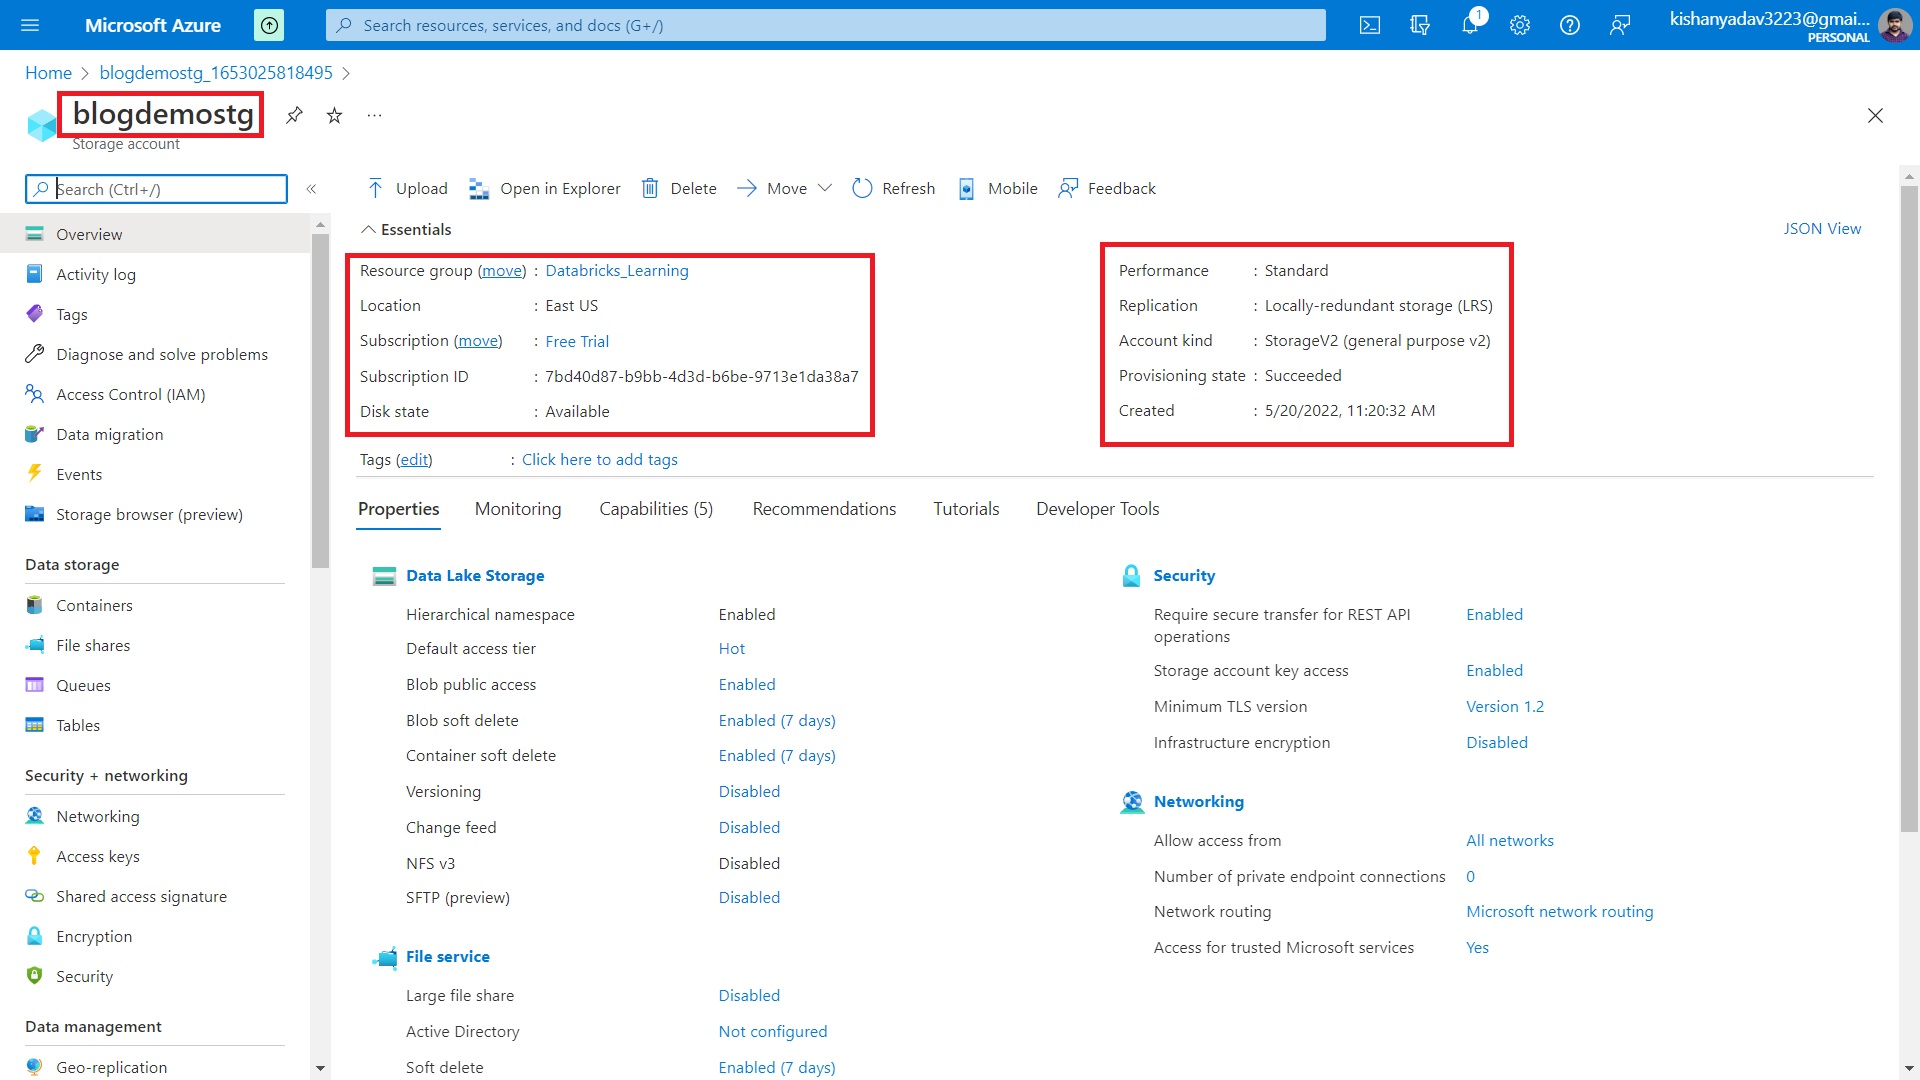
Step 4 – Finally our service gets launched and we can see all the credentials that we have defined during the creation of the ADLS Gen2 storage account.
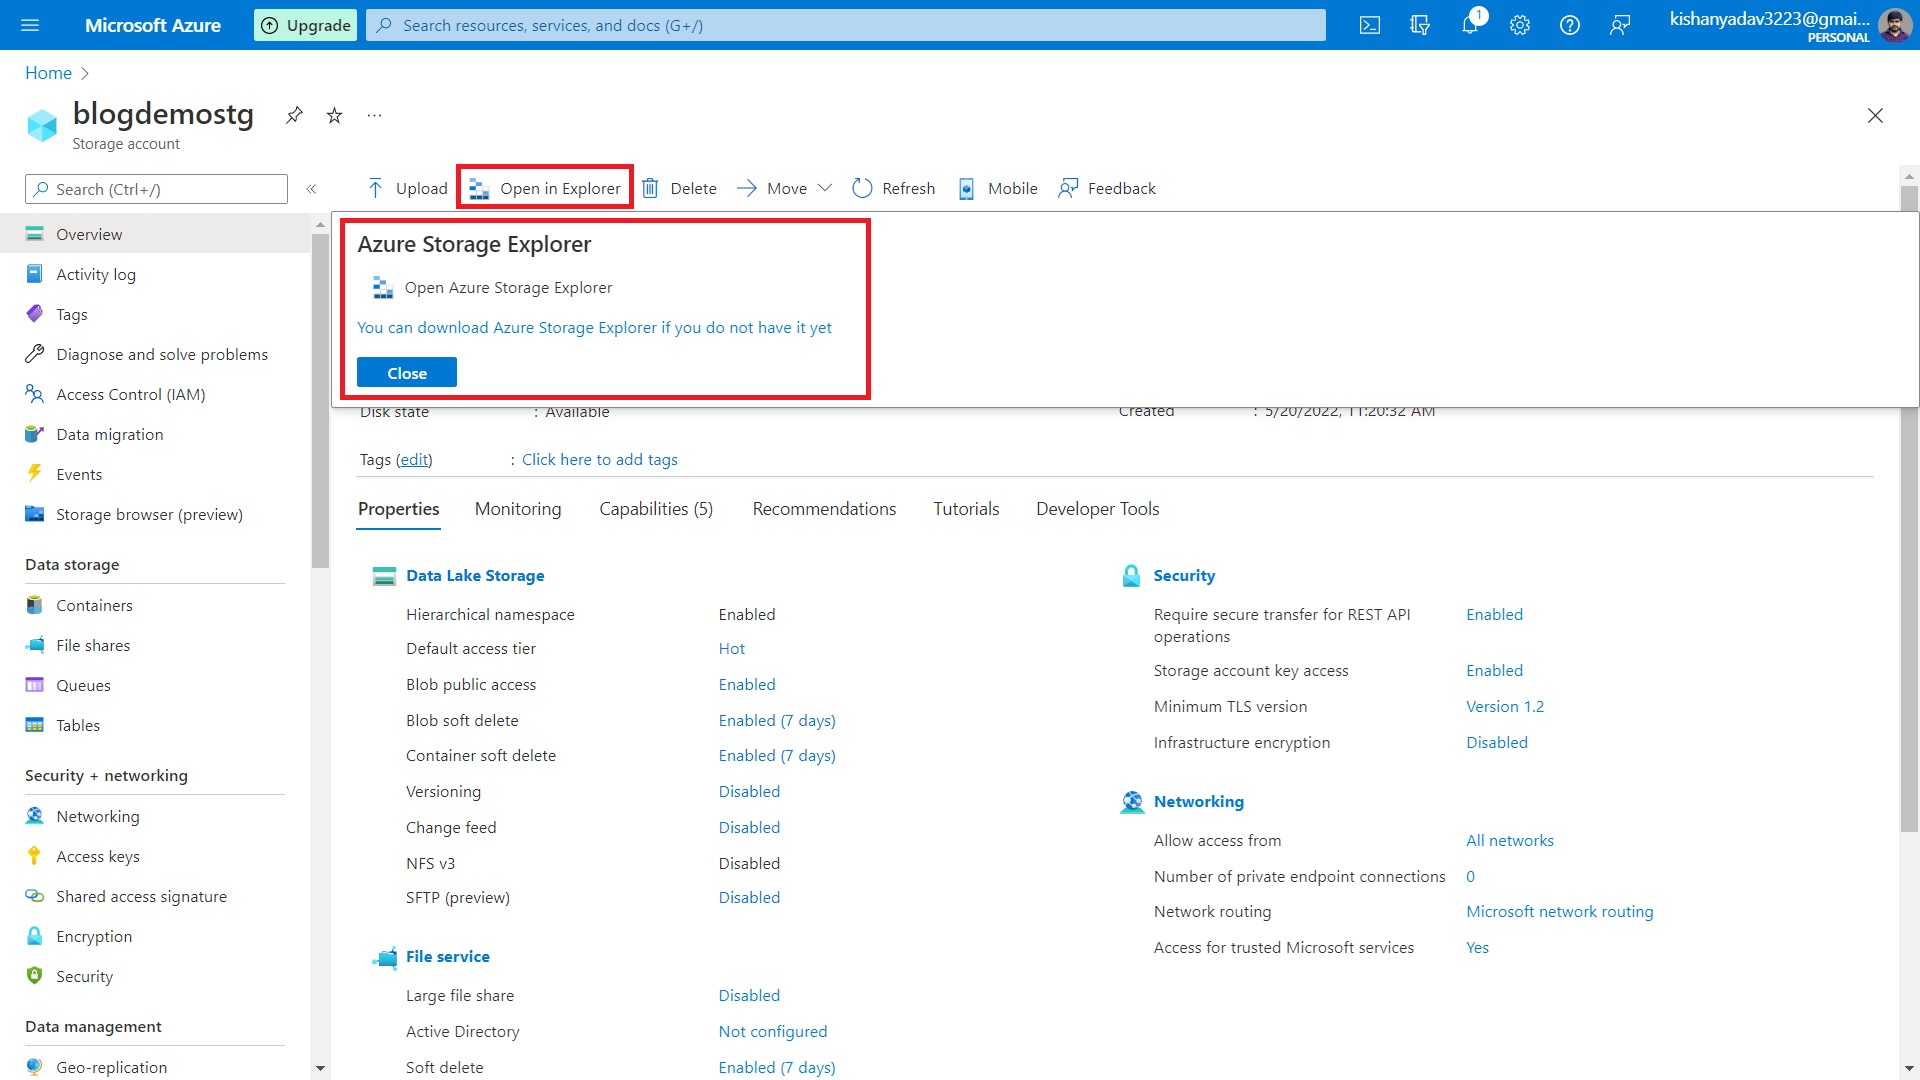
Step 5 – Finally, we verify our storage service in Microsoft Azure Storage Explorer. It will help us to create containers, and upload data files and folders from our local systems to our storage account which we have created in Azure Cloud. Install it locally and you can access all the storage-related functionality of Azure from yo.You can download it from the storage account page or just click here.
Step 6 – Now open the Microsoft Azure Storage Explorer and connect it with your Azure account. To connect, just click on the “Plug” symbol provided on the left side of the menu options and then click on the “Subscription” section, and then it will redirect you to connect your Microsoft account. Fill in the details and your azure account will get connected with storage explorer. Now you can see your storage service name inside your storage accounts dropdown.
Uploading Data in ADLS Gen2
We have successfully created our first ADLS Gen2 storage account. Now, we will upload the data inside it using Microsoft Azure Storage Explorer. To upload the data we are going to create a folder with the name “raw”. Inside this folder, we are going to upload our data. Let’s go…
Steps to upload the Data in ADLS Gen2 Storage Accounts
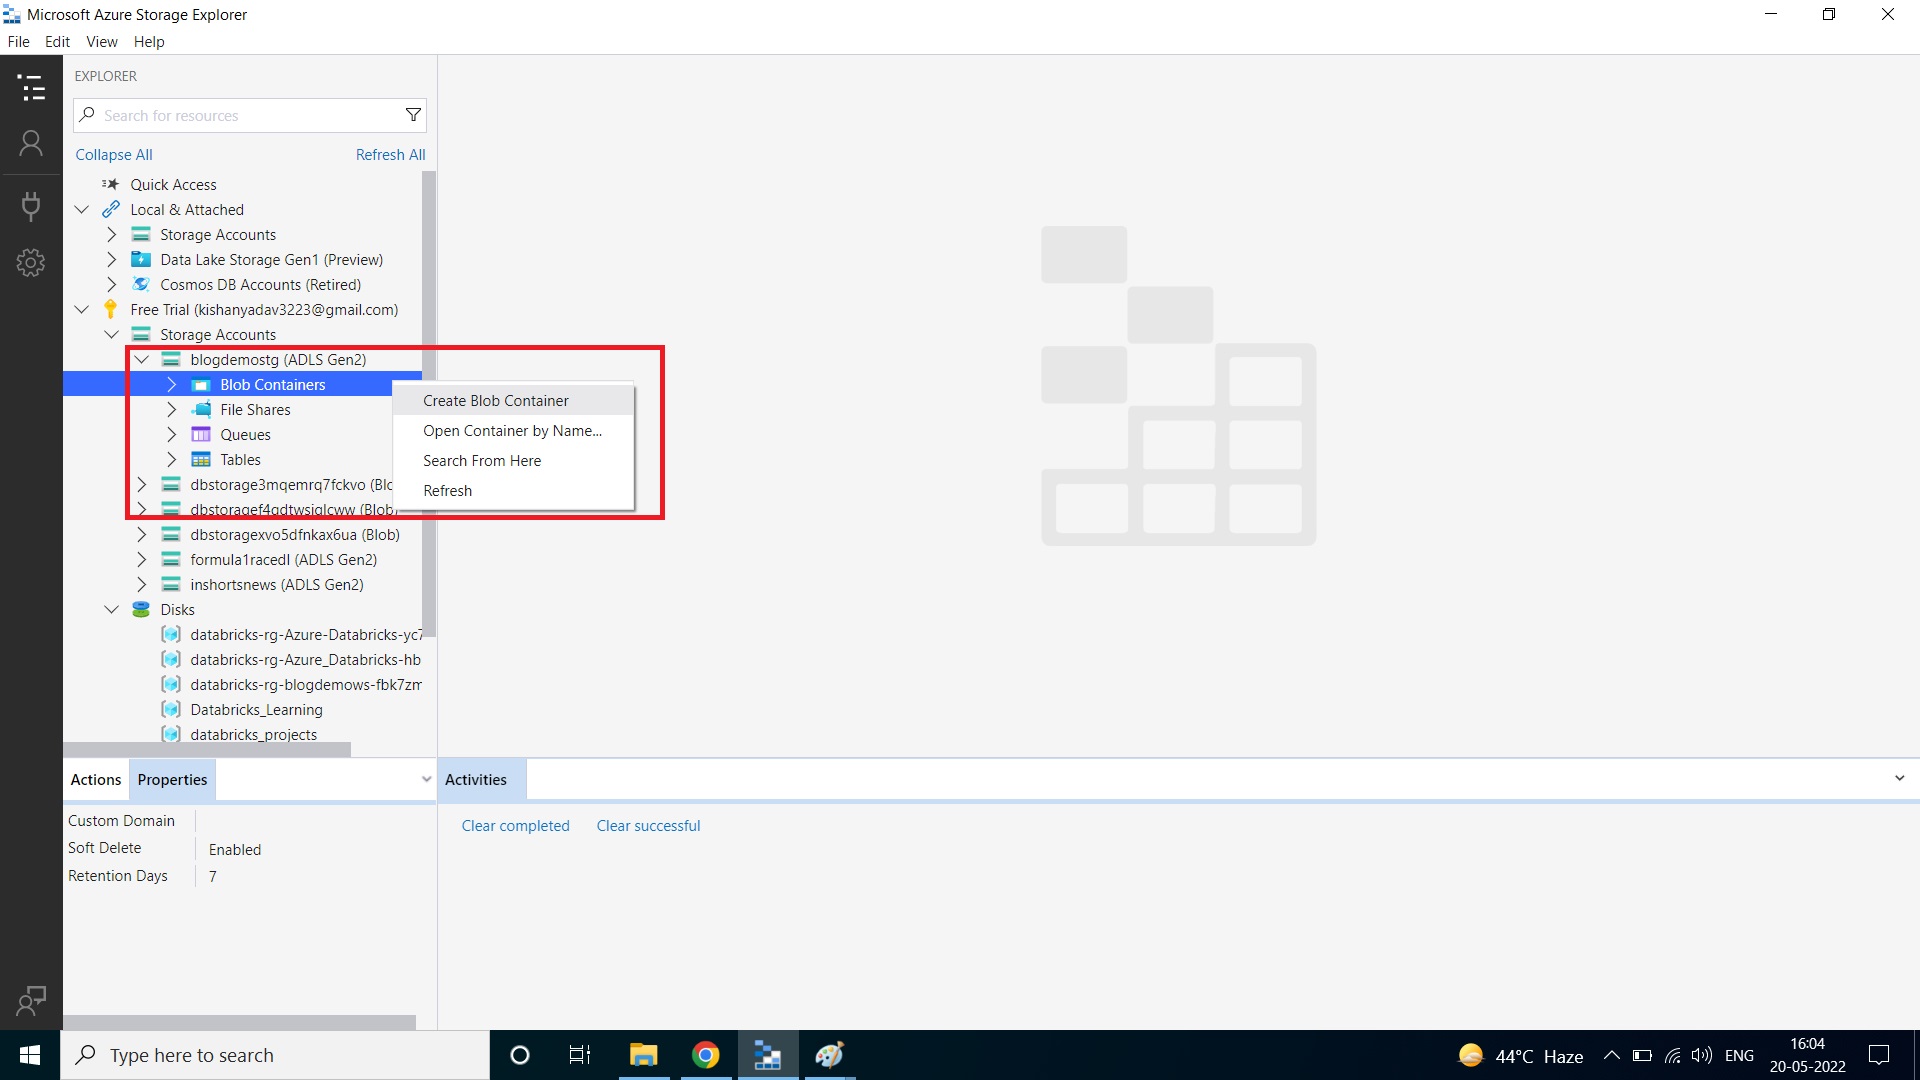
Step 1 – To create a container or folder, right-click on “Blob Containers” which are inside your storage account. Now a pop will appears and here right-click on “Create Blob Container”.
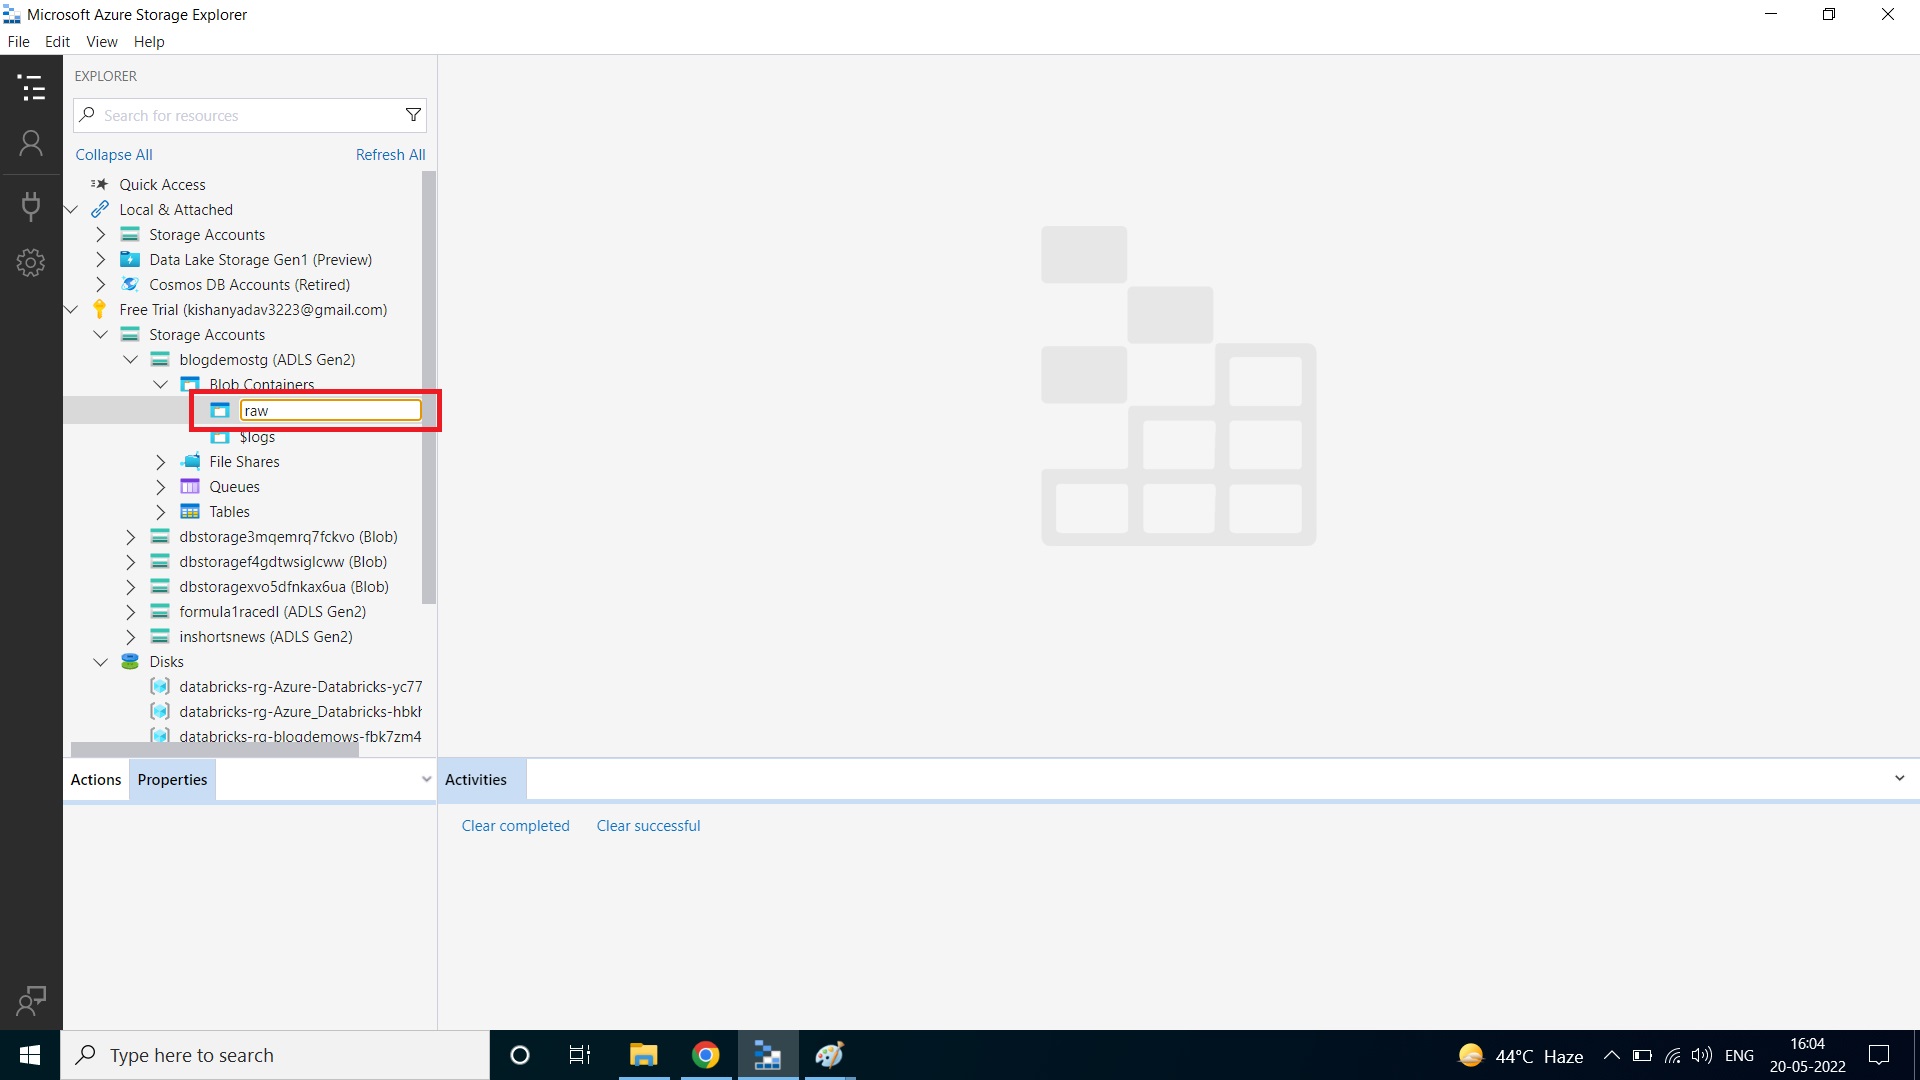
Step 2 – Type the name of your folder inside the provided box as “raw”.
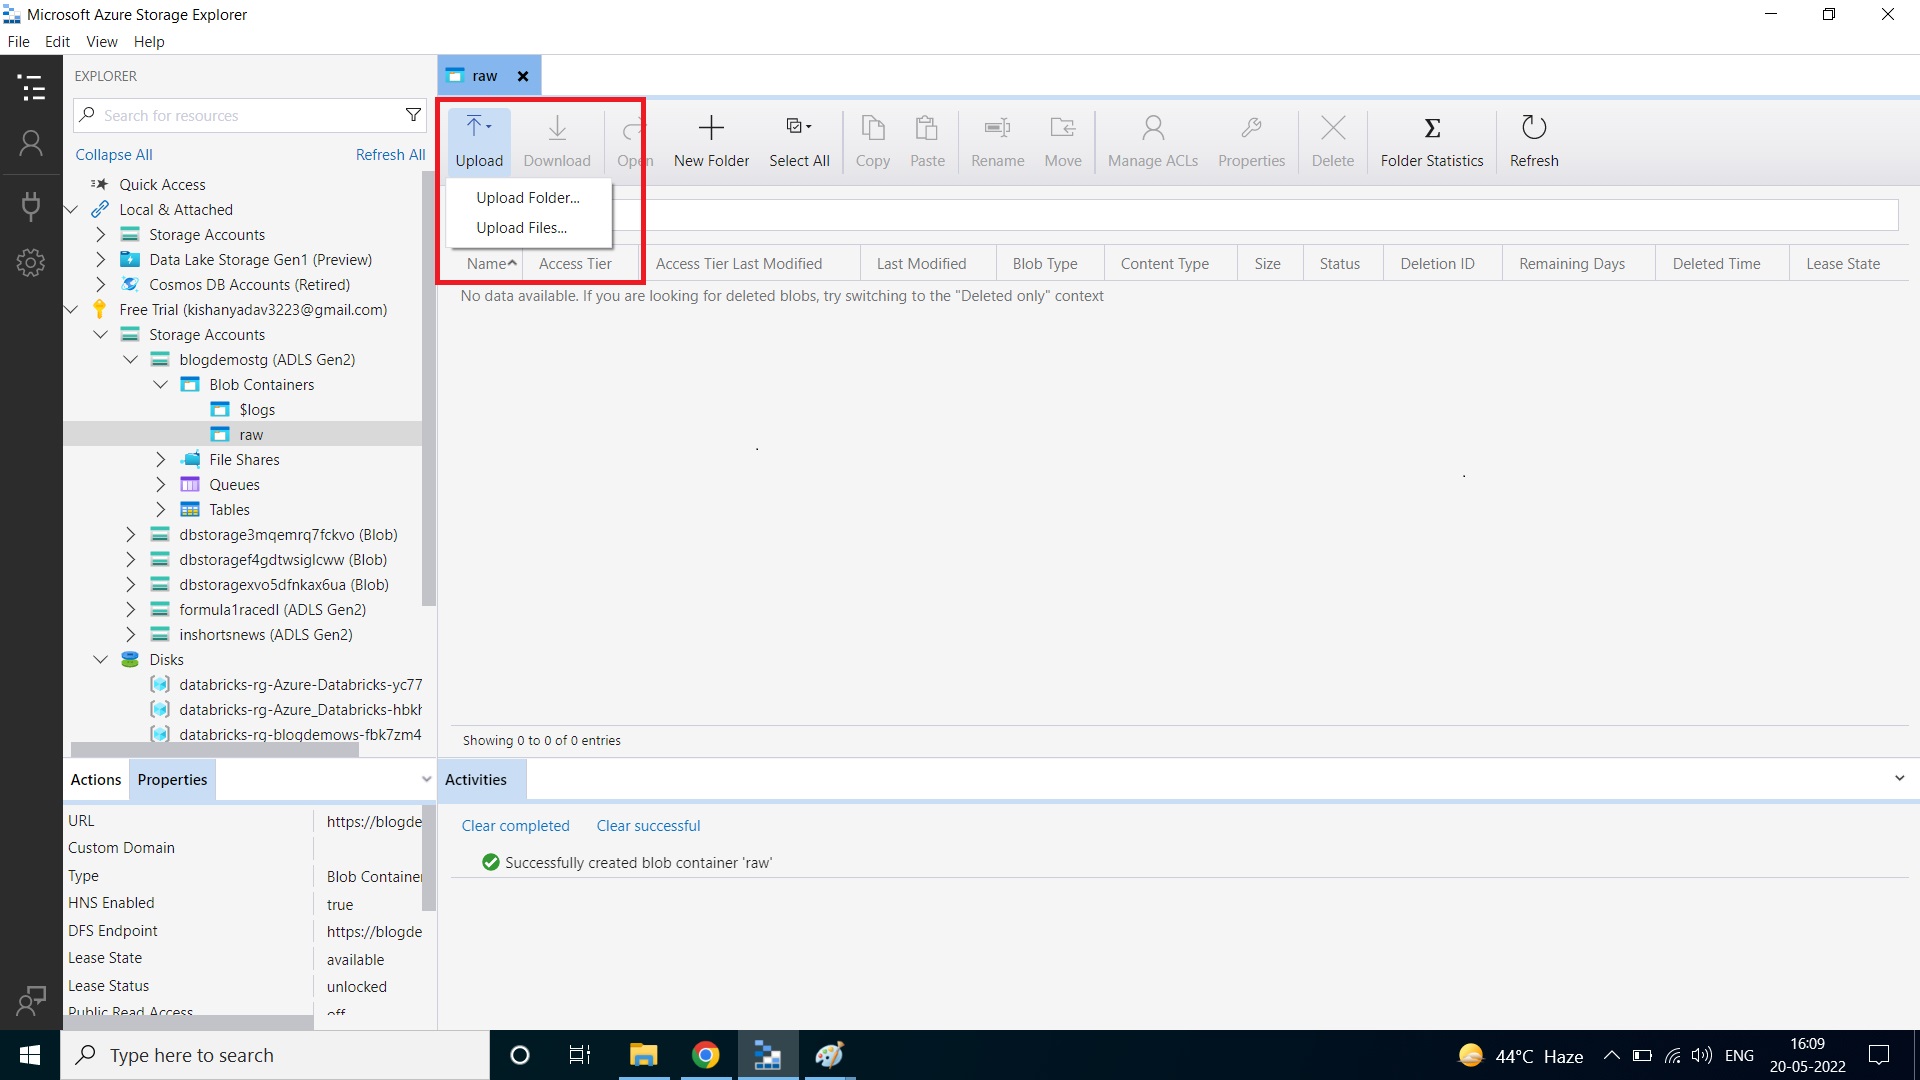
Step 3 – Click on the raw folder and you will see different options, click on the “upload” option. Here you will get 2 options whether you want to upload a file or you want to upload a folder. We will upload a file to our storage folder.
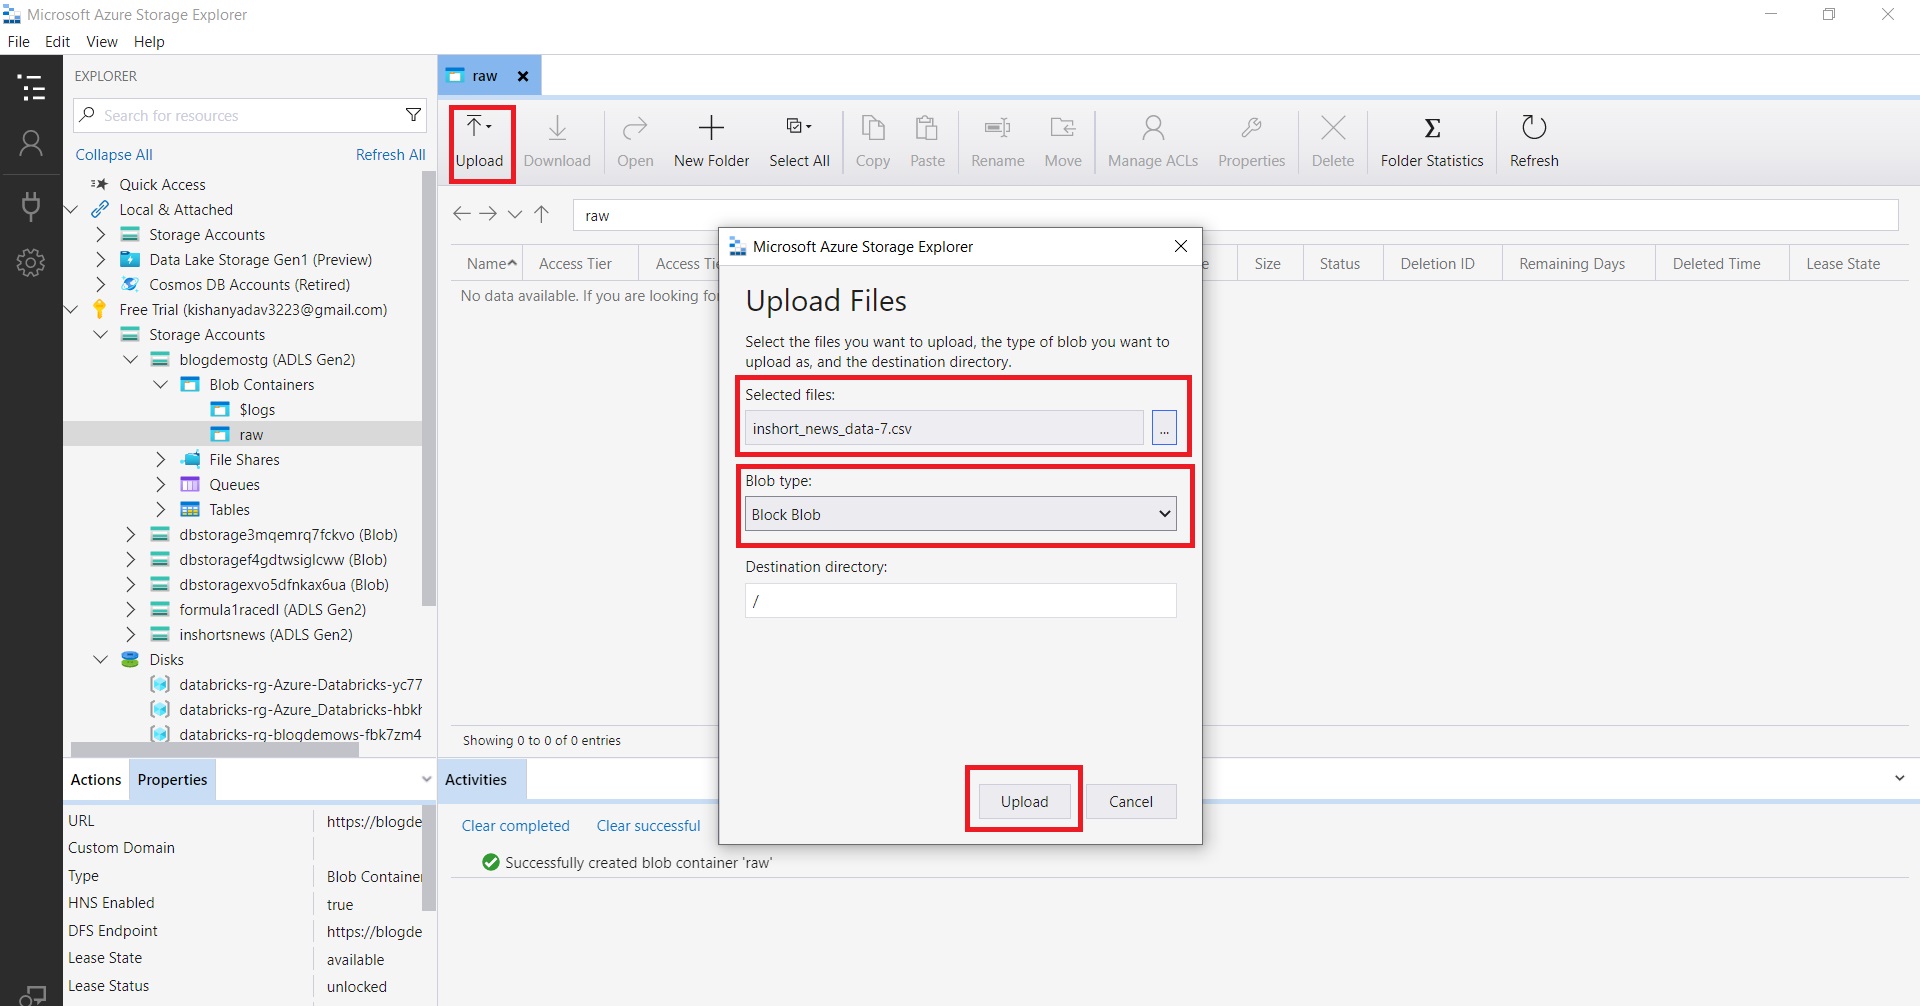
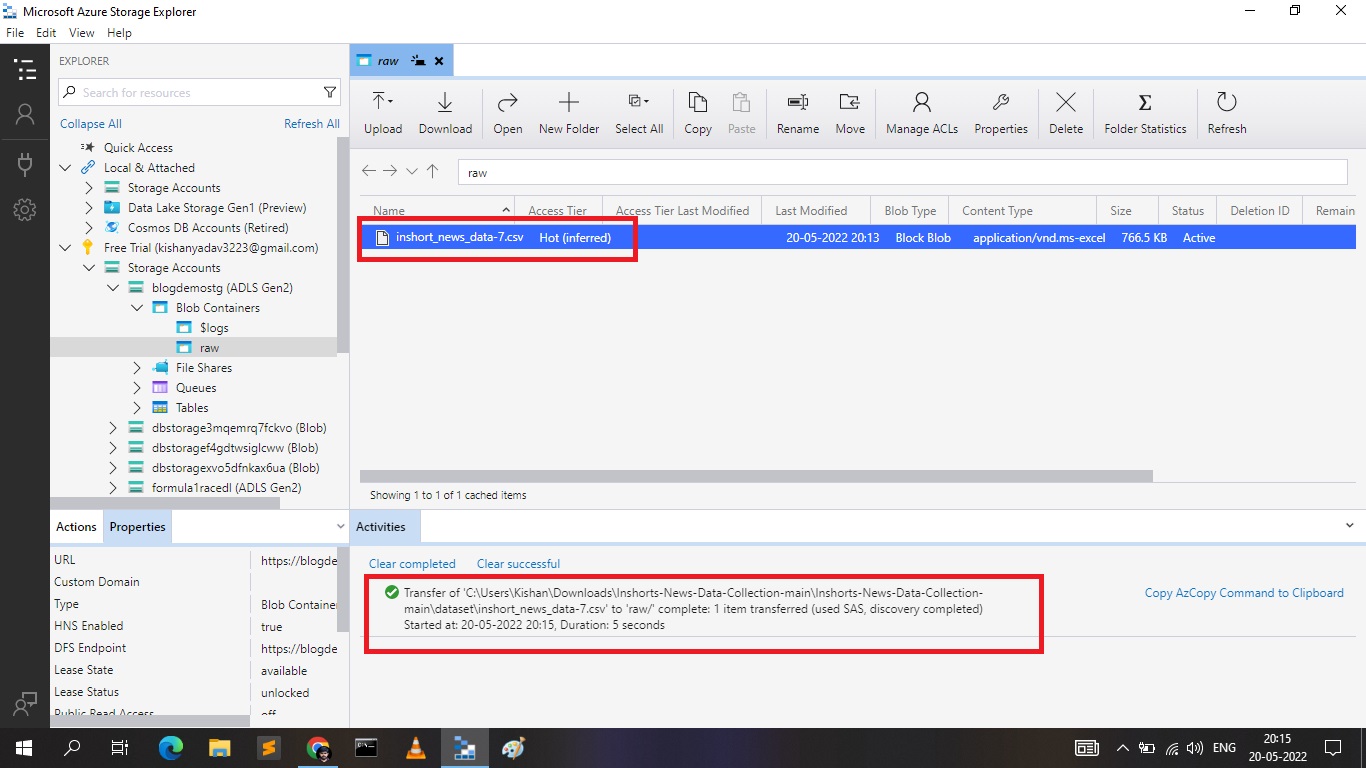
Step 4 – Click to upload files option and a file upload prompt will open, there you can select the file to upload. After selecting click on the “upload button” and the file gets uploaded into the raw container. I am uploading the scraped data “CSV file” named “inshort_news_data_7.csv” to our storage. You can see the below image.
Step 5 – Now your file gets uploaded into the Azure storage.You can check the “Activities” section which will display the status of your task,and whether your task is successful or gets failed.
Conclusion
In this article, we have discussed important steps one needs to know while creating their first Data Lake Storage Service in Azure Cloud.
This article has covered the following topics:
Details about ADLS Gen2 Storge Service.
Steps to create your first Storage Account in Azure Cloud.
Connecting your Azure account with Microsoft Azure Storage Explorer.
Creating containers in your ADLS Gen2 storage account with the help of Microsoft Azure Storage Explorer.
Uploading the data files and folders inside your containers from your local system.
I hope you liked my article on ADLS Gen2. If you have any opinions or questions, then comment down below. Connect with me on LinkedIn for further discussion.
Happy Learning!
The media shown in this article is not owned by Analytics Vidhya and is used at the Author’s discretion.
Hello 👋,
I am a Data Engineer with a proven track record of working in the information technology and services industry. I am skilled in Apache Spark, Hive, SQL, Python, Hadoop, Databricks and Cloud.
.jpg)