Overview
- Streamlit is one of the best tools for Model Deployment that helps you showcase your model to the world
- Lets us see how to create a web app to increase code typing speed and perform model deployment using Streamlit (click on the link below to access the website)
Introduction
The best part of the data science life cycle is actually deploying the machine learning model and showcasing it to your peers and community. Consequently, for one, you can actually get praised for the work you’ve done, and second, in all seriousness, you get constructive feedback on the finished product so that you can improve it and bring your dream of positively affecting millions of lives with your efforts closer.

These last few weeks, I’ve been working on finalizing a data science project, pertaining to bringing an idea to reality. I have been trying to create a Web app for coding practice for programmers, called Typing Tutor. This article is around the technical aspect behind the app, the technology stack needed to bring the idea to fruition. Below is the demo of the deployed project using Streamlit.
Table of Contents
- Motivation behind Typing Tutor for Programmers
- Fixing a Deep Learning Model for Code Generation
- Model Deployment as a WebApp using Streamlit
- Debugging on dev platform using Google Colab
- Serving in Production using AWS
- Finalizing the finishing touches for Deploying in Production
1. Motivation behind Typing Tutor for Programmers
The idea for the project originated from my personal experience of improving my speed of coding. What I have noticed is that my typing speed is regrettably slower than most of my peers. This might be because I constantly switched between my wired keyboard to the inbuilt laptop keyboard. This motivated me to build an app that could help me practice my typing speed.
Now there are many online websites/free tools out there that are specifically built for improving typing speed. But very few of them focus on typing speed for programmers. Practical code very much relies on punctuations and syntactical correctness, which makes it a level higher in difficulty in comparison to regular typing.
Also, as tools/languages change, the syntax changes with it, which makes it difficult to make a reliable platform for typing practice. This encouraged me to depend on Deep Learning to dynamically generate code so that the code is similar to what the user is working on in day-to-day work. For example, if the user is a Data scientist working specifically with python, the code generated to be in the range of what the code he/she will write, and so on.
2. Fixing a Deep Learning Model for Code Generation
As mentioned in the motivation, the requirement for the Deep Learning model arises from-
- To generate code similar to the stack the person is currently working on
- Dynamically generate code for each run to enable a more comprehensive practice
This would ensure that the user is getting the appropriate practice they need.
To simplify the problem statement with respect to creating a successful data science product, I took a call that the code generated by the Deep Learning model can be semantically incorrect, but still seem to be syntactically correct. What I mean by this is that the code generated by the model could give a garbage output if the code was run, but at least it should be within the boundaries of what an actual code would look like.
Keeping this in mind, I searched for an open-source pretrained model that gives code as output and luckily found Huggingface’s pretrained model trained by Congcong Wang. Let me explain briefly how this model was built and how it works
When given an input sequence, ideally any name of the function, the model returns the code which might belong to that function as an output, as shown in the image above.
More technically, the model is a fine-tuned GPT-2 sequence-to-sequence transformer model trained on The Algorithms project, which is a collection of various algorithms in mathematics, machine learning, computer science, physics, etc implemented in Python for educational purposes (Note – If you are not familiar with sequence-to-sequence models in Deep Learning, you can take a look at this introductory article)
This is how we can generate code using the pretrained model
3. Model Deployment as a WebApp using Streamlit
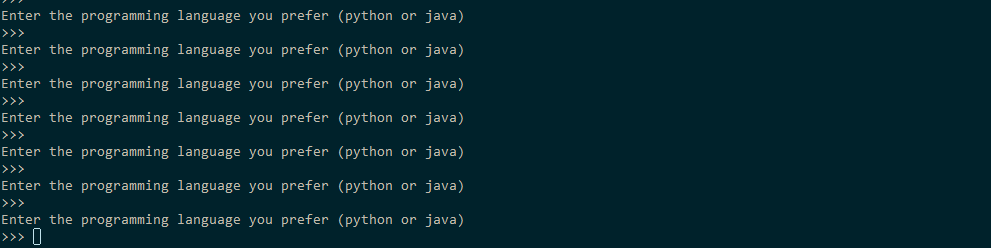
Now that we have a model that suits our purpose, the next step is to build a UI that will be shown to the user where they will actually interact with our program. For now, I thought of keeping it as simple as possible (as shown in the image below)

The overall functioning would be like this,
- When a person opens the website and clicks on the “start” button, the timer starts and the model starts its inference to generate code.
- This code is displayed on the left-hand side panel of the webpage
- The person is then provided with a coding window on the right-hand side panel, where they can rewrite the code exactly as is shown
- When it is complete, they can click on the “check speed” button to check their typing speed and accuracy of what they typed
To build this, I used streamlit as a tool to create simplistic UI and connected it to the model as a backend.
Note: If you want a simple introduction of what streamlit is, here’s a great resource from the creators of streamlit
The following code does exactly what is explained to create the simplistic UI-
Now that our basic functionality is ready, the next thing is to set up the inner workings of the buttons. As explained above,
- On clicking the “start” button, the timer starts, and the model starts its inference to generate code.
- On clicking the “check speed” button, their typing speed and accuracy of what they typed is calculated
Here’s how it will look with respect to the code-
Now that our basic functionality is ready, the next step is to check if it works as expected. And for this, we set up a google Colab system as a dev environment
3.1 Debugging on dev platform using Google Colab
Before I go ahead to explain how to set up the streamlit code on google Colab, let me explain why is this necessary. Before the model can be pushed into production, you have to completely sure that the overall code doesn’t break for a new user. This includes, but not limited to
- Writing the code in a modular object-oriented format and testing each module
- Logging the code wherever required
- Analyzing the response time of the UI elements and making sure they are within limits
- Checking the overall UI/UX of the website for multiple platforms, etc
For this, a dev environment such as google Colab gives an ample substitute to a production system, so that you can evaluate your code and modify it if required. For simplicity. here’s the complete code which can be easily downloaded on Google Colab
Now to run the code we created for UI and backend with streamlit, you can simply save the code as an app.py file, upload it on a new google Colab notebook and run the command below in a new cell-
!streamlit run app.py &>/dev/null&
Also, as google colab doesn’t give direct access to the streamlit app inherently, you would have to use Ngrok to create a tunnel to the app-
from pyngrok import ngrok

public_url = ngrok.connect(port='8501')
public_url
And Voila! Now you can use Google Colab as a temporary hosting service for your model.
3.2 Serving in Production using AWS
Once you are certain that the program is working as intended, you can deploy it as a permanently accessible website using AWS. More detailed steps are given here, but there are two important steps you need to remember,
- Choose an appropriate AMI – for our case we need an ubuntu 18.04 CPU instance. We could ideally rely on a Deep learning AMI with Nvidia CUDA preinstalled along with PyTorch, but it would be a costlier alternative

- Add TCP rule to the AWS instance – as similar to google colab, direct access to the streamlit app isn’t inherently available, so you would have to create the rule

Now that the AWS instance has started, you can ssh into it and copy the code, start the streamlit app using the command
streamlit run app.py
4. Finalizing the finishing touches for Deploying in Production
If you see, your model is technically deployed on AWS, but the weblink you get is something like “172.181.32.41:8501“, which is an unintuitive name to share with a user. Ideally, you would want a permanent website where you can share your project in its full glory. For that technically speaking, there are few intermediate steps we have to do
- Create / Buy a domain where the website is hosted securely (Service used – BigRock + Cloudflare)
- Host a web server and connect it to the website as an HTPPS website (Service used – Nginx + CertBot)
- Running the Streamlit app permanently in the background (Tool used – Tmux)
5. Conclusion
This article is around the technical aspect behind the app, the technology stack needed to bring the idea to fruition. Hope this article motivates you to create your own end-to-end projects and perform model deployment using tools like Streamlit.
To get started with Streamlit, please refer to the following article
Let me know in comments if you have any queries.
Faizan is a Data Science enthusiast and a Deep learning rookie. A recent Comp. Sc. undergrad, he aims to utilize his skills to push the boundaries of AI research.


I am sure the content of this article would be engaging. But the formatting and size of images is bonkers and makes it unreadable even on desktop. I couldn't finish reading it because of that.