This article was published as a part of the Data Science Blogathon.
Introduction
Let’s say you want to build Dapp on top of the blockchain. So you wrote the code and configured your specification. Now you need to deploy it on the blockchain. But wait, you need to download the entire network to do so!
It’s not a feasible solution if you want to deploy your app multiple times or as the app’s user base grows.
This is mainly because the entire chain takes up a lot of storage. Once an app scales, it gets replicated across multiple chain nodes, taking up even more computational power and resources.
So to solve this issue, some brilliant minds came up with the idea of using RPC(Remote Procedure Call) to interact with the hosted blockchain, much like AWS instances. Quick Node is one such service provider.
So this article focuses on How to deploy Dapps using Quick Node RPC on a local environment and understand the Metrics GUI.
Let’s get started.
What Is Quick Node?
Think Quick Node as an AWS for blockchain, which runs multiple instances of blockchain that can be accessed through the API call.
Apart from that, you can check the associated metrics and apply some additions to enhance the security and experience of your smart contact.
This helps debug smart contracts and make them more effective and efficient before deploying on an authentic chain.
We will be using their service to first deploy and then check their metrics tab to get a glance at the smart contract state on the blockchain.
But before that, let us define our Project Structure🙂.
Project Structure
As good programmers, we will split the projects into multiple parts, carry out each individually, and finally merge them to form a complete project.
So this is how our project structure will look like:
- Create a directory
- Install dependencies
- Create a solidity smart contract & compile it.
- Create a deployment script
- Setup .env File
- Creating HTTP endpoint & Pvt. key
- Change configuration of hardhat.config.js file to include testnet
- Deploy the project
- Interact with the contract.
Note:
- Make sure you have a meta mask development account ready with Goerli test net enabled & have some goreli eth in your wallet for transaction fees. Check out this article to fix this one!
- I am using vs. code for this project, but you can use whatever you like.
So let’s work on all components now.
The Code
We will code each section for simplicity and then merge it to create the complete project.
1. Create a Directory
Just create a folder with any name. I am gonna name it GreetUser.
Alternatively, spin up the terminal and run the following command:
cd GreetUser
Hit ENTER, and done!
2. Install Dependencies
We need the following dependencies:
- Node.js – To run our node project.
- npm – Node Package Manager to initialize and install libraries.
- Hardhat – Local development environment for Ethereum.
- Dotenv – Libary to access environment variables.
Let’s install each of them one by one!
Nodejs
Visit the node js official page, download and install the LTS version.
You can verify the installation using the following:
node -vIf this prints the version, you are good to go; else, use this guide to troubleshoot.
NPM
The main point of installing nodejs was to use npm (node package manager). So let’s now initialize our project using the following:
cd GreetUser
npm init –yes
This will create a package.json file that holds the skeleton of the project 👇
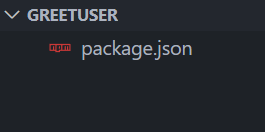
Directory After npm init –yes
Hardhat
Hardhat is a local development kit for Ethereum. This is what will enable us to work locally on our blockchain project.
It ships with a hardhat network and 20 default accounts for an easy development experience.
To install, just hit:
npm install --save-dev hardhat
Wait for a few minutes, and you will see the node_modules folder added to your directory.
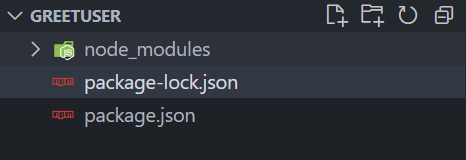
Directory After Installing Hardhat
If you face any difficulty, refer to the official hardhat documentation for installation.
Though we installed hardhat, our work is not done yet; we need to initialize our hardhat project using the:
npx hardhat
Since we will be using java-script to deploy our contract, choose – Create a Javascript Project and follow the later steps. Make sure to add a .gitignore file!
This will add a couple of folders. Let’s review the following:
- Contracts – stores all our smart contract codes. Default comes with Lock.sol.
- test – holds all unit testing code.
- scripts/deploy.js – The main file for deploying smart contracts
So, in the end, the folder structure should look like the below:
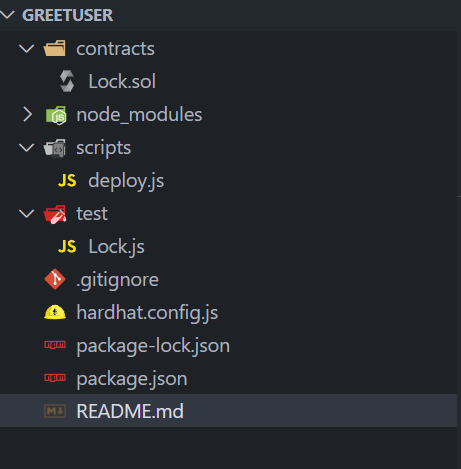
Directory After Starting Hardhat Project
Date
In most cases, you don’t want to include sensitive information, so as a measure, we can store our data in a .env file and access it using the dotenv package. So let’s install it using the command:
npm install dotenv
We will look into how to use it later in the tutorial.
Having all our dependencies installed, we are now good to go with coding smart contracts.
3. Coding & Compiling Smart Contract – GreetUser.sol
Open the contracts folder and create a new file called GreetUser.sol and paste the following piece of code:
💡 Tip: – Its better if you delete the lock.sol file for avoiding ambiguity.
// Simple smart contract to GREET user with USERNAME provided.
// SPDX-License-Identifier: MIT

pragma solidity ^0.8.12;

contract GreetUser{

// sets greeting sting to "Enter Your Name" in public scope.

string public username = "Enter Your Username...";

// function to return value of greeting .

// view only no gas.

function greet() public view returns(string memory) {

return string.concat("Hello ", username);

}

// function to set new value of greeting and display it.

// storing in memory (requires gas).

function setGreeting(string memory word) public {

username = word;

}

}
In a nutshell, this is what our smart contract does:
- Ask the user to enter their Username, else return the string “Enter Your Username..”.
- If there is provided username, write that to the blockchain and, when queried, return “Hello username.”
For the sake of this tutorial, we will use this simple read-and-write smart contract, but use cases can be extended.
Now let’s dive into code specifics 🤓.
Code Specifics
// SPDX-License-Identifier: MIT
This defines the license we are using – MIT is a general-purpose license. Learn more about them here.
pragma solidity ^0.8.12;
Defines the version of solidity we are going to use. Here it says all versions> 0.8.12 (used specifically)!
contract GreetUser{}
Everything inside the solidity is an abstraction called a contract (self-executed & condition based). So here we create a contract called GreetUser which will hold all the logic of code!
—
Inside GreetUser we have:
string public username = "Hello Enter Your Username...";
We create a variable username that holds the default text (string). Notice public is used to ensure the variable is accessible from everywhere.
function greet()
Next, we create a function greet that returns a concatenated string (“Hello “, username). As the function is not writing to blockchain so view & memory keyword is used, and it is a gasless transaction
function setGreeting()
Similar to greet, we also have a function called setGreeting which uses a variable to store the user input and write that value to the blockchain. It’s a gas one!
Note :- By default, it will display Hello Enter Your Username…
Now that the code is ready let’s compile the same.
Contract Compilation
We will use hardhat CLI to compile our contract. So head over to the terminal and press enter after typing the following command one by one:
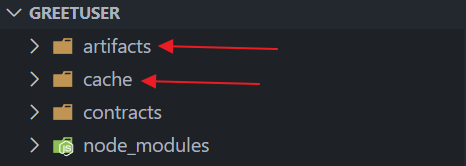
npm audit fix --force
npx hardhat compile

If everything goes well, you will see 2 new folders in the repo, artifacts & cache. These are code binaries and skeletons of our contract that will be used later while deploying our project.
💡 Tip – Make sure you use the same compiler version as soldity version defined.
4. Deployment Script – deploy.js
Inside the scripts folder, either delete the file or file content of deploy.js and paste the following javascript code.
async function main() {

// creating contract object using getContractFactory abstraction

const contract = await hre.ethers.getContractFactory("GreetUser");

// deploy contract

const delployedContract = await contract.deploy();

// print deployed address

console.log("Contract deployed at:", delployedContract.address);

}

// We recommend this pattern to be able to use async/await everywhere

// and properly handle errors.

main().catch((error) => {

console.error(error);

process.exitCode = 1;

});
Now let’s break down the code and understand.
From the very beginning, it’s clear that this script will deploy our contract. But how is it gonna do that?
The idea is to use the async function to deploy our code and listen for the confirmation event. Once done, broadcast/return the contract deployment details.
But there are 3 specific parts that we need to pay attention to. Let me explain them!
const hre = require("hardhat");
Here hre store the hardhat package, which is used as an abbreviation.
const contract = await hre.ethers.getContractFactory("GreetUser");
Here we use the getContractFactory abstraction to create a contract class that we will deploy in the following line. Also, we are using await keyword to listen for events which can be used later to print the contract address after deployment.
main().catch((error) =>
For the last part of code after } – we call our primary function and check for any errors:
- If it happens, we exit the process and display the errors
- Else let the process go on smoothly.
So now that we have our deployment script ready, let’s create our quick node RPC endpoint 🤝.
5. Creating a .env file
As a dev, we don’t want our personal data to be shared, so we create a .env file and store all the data as a constant.
In the file, add the following lines.”
QUICKNODE_HTTP_URL="add-quicknode-http-provider-url-here"

PRIVATE_KEY="add-the-private-key-here"
We will access the constant using the dotenv library we installed earlier.
Let’s now fill in those blanks!
6. Creating HTTP Endpoint - Quick Node
To create an endpoint / API key, head to the official website and register an account. It’s free for one endpoint!
Now configure a new project as follows:
- After login, head over to the dashboard and click Create an endpoint.
- Now select the chain as Ethereum.
- Next, select the network as Goerli.
- Skip any add-on proposed and hit Create Endpoint.
Congratulations, you have created your endpoint, but our work is not done here.
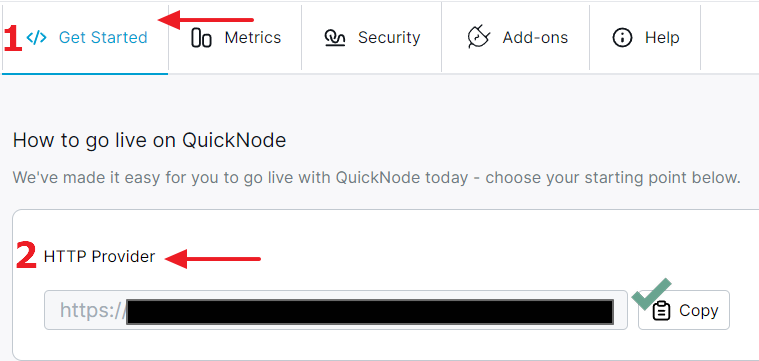
Head over to the Get Started, copy the HTTP Provide, and paste it into the newly created .env file under constant QUICKNODE_HTTP_URL.
For 2nd constant, export the metamask / wallet private key and paste it. Make sure you use the dev account for the same.
If you need help, refer to this helpdesk post.
With this done, let’s head to configure the chain that we want to deploy the contract.
7. Including Testnet In hardhat.config.js
Now I will show you a neat trick to add as many chains for your contract deployment.
Head over to hardhat.config.js and delete all its contents, now paste the following code:
require("@nomicfoundation/hardhat-toolbox");

require("dotenv").config({ path: ".env" });

const QUICKNODE_HTTP_URL = process.env.QUICKNODE_HTTP_URL;

const PRIVATE_KEY = process.env.PRIVATE_KEY;

module.exports = {

solidity: "0.8.17",

networks: {

goerli: {

url: QUICKNODE_HTTP_URL,

accounts: [PRIVATE_KEY],

},

},

};
Code Specifics
Now, if we inspect, you can find that we are using the dotenv package to configure the path to the file.
Next up, we store the constant values in the same constants.
And finally, we are defining where to deploy our code. It requires a network name (goerli), URL, and accounts.
Adding Multiple Networks
In case you want to deploy to multiple networks, add a new networks name after 1st one but within the network construct. E.g
module.exports = {

solidity: "0.8.17",

networks: {

goerli: {

url: QUICKNODE_HTTP_URL,

accounts: [PRIVATE_KEY],

},

rinkeby: {

url: "https://eth-rinkeby.alchemyapi.io/v2/123abc123abc123abc123abc123abcde",

accounts: [[privateKey1, privateKey2, ...]] ,

},

},

};
Keep following the similar format to add n no of networks and deploy on all at once. That’s the power of hardhat!
Now let’s deploy our code.
8. Deploy Code Using Hardhat
To deploy our code, head to the terminal and hit:
npx hardhat run scripts/deploy.js --network goerli
If everything goes well, you will see the following output:
Keep the deployment address safe, as we will be using it in the next section.
For sanity check, head to the Quick Node Dashboard and check your metrics tab. It will display some metrics and graphs.
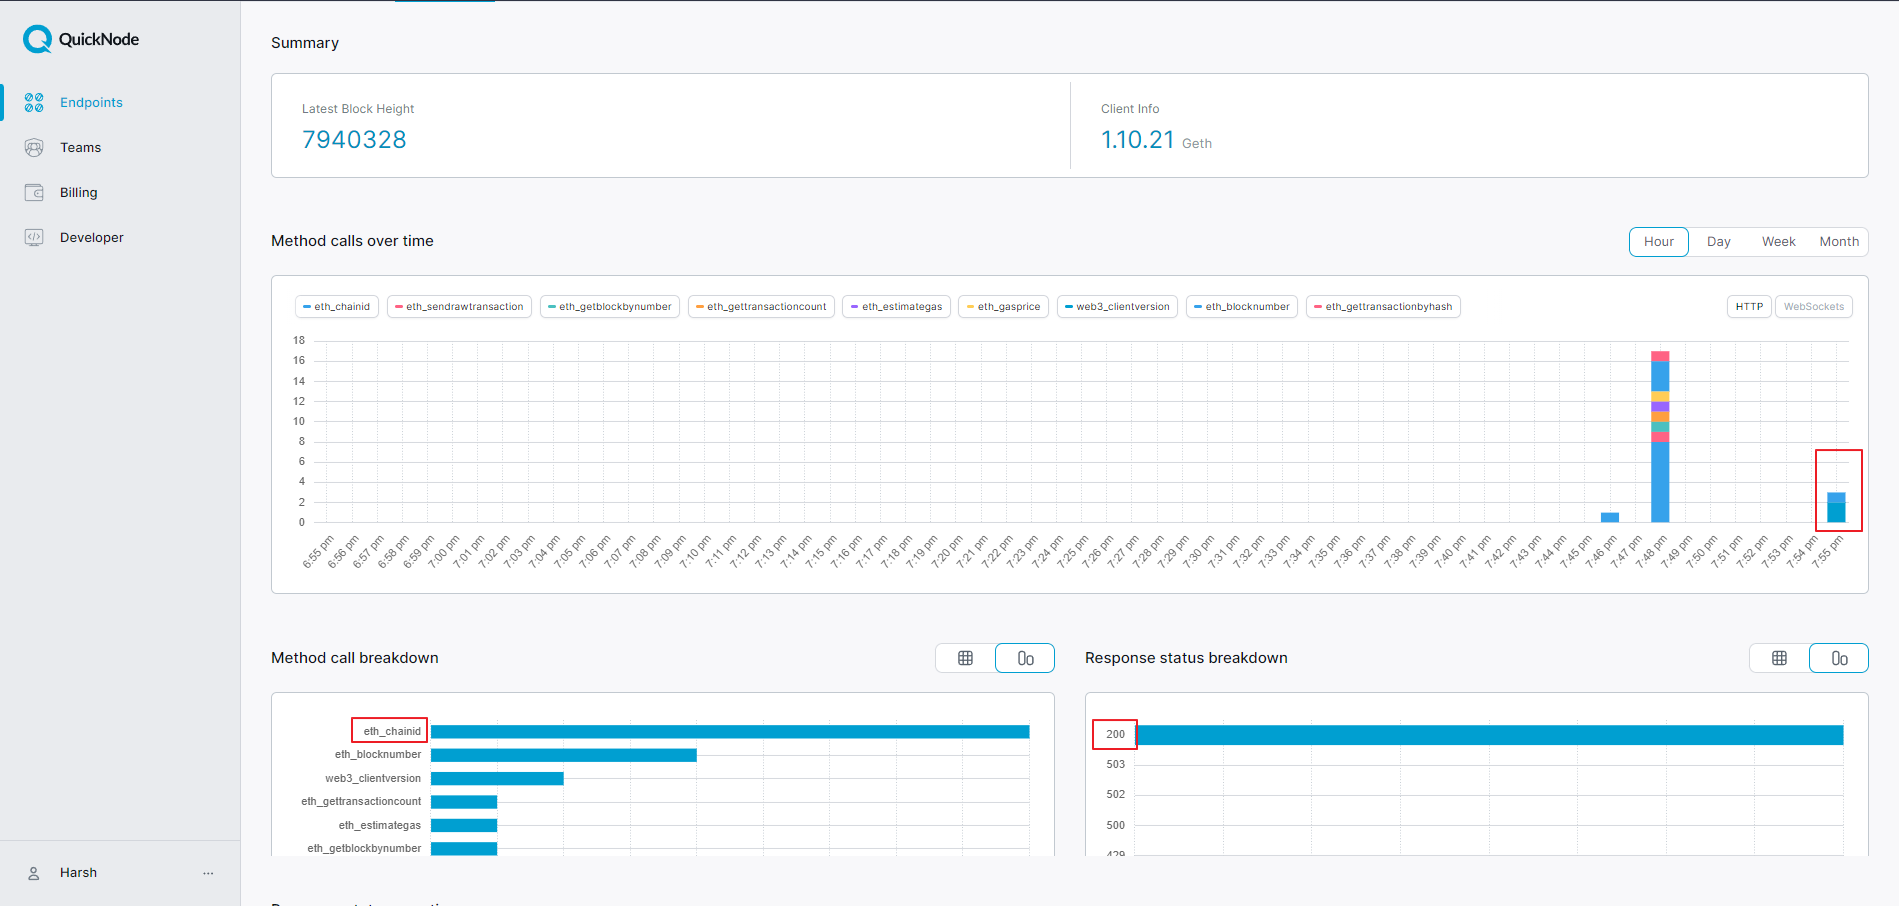
As you can see, it returns the full summary (block no and how much gas was paid to interact) as metrics and a drill-down overview of each component. By the time of writing, I had deployed the contract at 07:55 pm. As you can there is a small bar peaking up at that point, representing there was some event that occurred!
If you go for a drill-down summary, multiple events occurred. Still, since we deployed the contract on the chain, it says eth_chain is the most recent id, as evident from the graph.
Also, a close look tells us we always got a response back as OK or successful; hence you see the bar at 200.
Hope that gives you a bit of an idea of why one should use RPCs over a local development environment
The following section is optional; you can skip it if you are technical. Else let’s carry on.
9. Interaction With Contract
Let’s now use block explorer to interact with our SC.
- Copy the contract address and head to goerli block explorer.
- Now paste the address into the Seach box.
Once found, head to Contracts, and then you can see 2 tabs – Read Contract and Write Contract. These will hold all fn that read/write to the blockchain.
A Sample Example
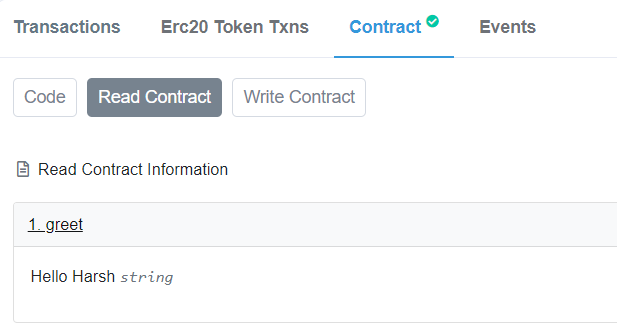
A. Let’s first read what the current state of the blockchain is. To do so:
- Head over to Read Contract, and expand the greet
- This displays the default value, the function we use to display output.

B. Now let’s change the state, to do so:
- Head to Write Contract and open the Write Contract tab.
- Change the network to goerli testnet, and connect to your wallet.
- Expand setGreeting
- Now enter the desired string you want. I am adding “Harsh.”
- Click on write.
- Confirm the transaction using metamask.
You are done. Now you can repeat step A to sanity check!
If you don’t see the same results(), refresh the page by following step A.
Congrats, you now know how to use API endpoints to create and query the blockchain and why to use them.
Now let’s summarise all the things we learned in this blog!
Conclusion
So, in essence, this article teaches us a simple way to use API calls to interact with the blockchain using Quick Node. This way, you don’t have to worry about downloading the entire Quick Node blockchain to interact with them.
This makes your web 3 development life easier as you can now focus on building stuff rather than worrying about deployment. We also looked at how to infer the metrics once we perform the interaction (deploying Dapp).
Here are the takeaways from the lesson:
- We started by structuring / decomposing our project into multiple pieces, we devs do it all the time, and it helps ensure the project’s smooth workflow.
- Next, we learned how to install different packages using NPM. It would be best if you had Quick Node js installed.
- Later we looked at how to write solidity code that can read and write to the blockchain.
- We even learn how to create a deployment script for the smart contract and keep our private data safe using .env files.
- Also, we looked at a clever and neat trick to deploy the SMC onto multiple blockchains by just changing a few configuration settings of hardhat.
- 6. Finally, we understood how to use the metrics tab to sanity check and query the blockchain. Also, we looked at how to interact with the blockchain using a block explorer.
Hope you learned a lot and had fun developing this project.
Got any questions?
Connect with me on my Linkedin, Twitter, or Instagram 😊
See you next time, Ba-bye👋.
The media shown in this article is not owned by Analytics Vidhya and is used at the Author’s discretion.
A dynamic and enthusiastic individual with a proven track record of delivering high-quality content around Data Science, Machine Learning, Deep Learning, Web 3.0, and Programming in general.
Here are a few of my notable achievements👇
🏆 3X times Analytics Vidhya Blogathon Winner under guides category.
🏆 Stackathon by Winner Under Circle API Usage Category - My Detailed Guide
🏆 Google TensorFlow Developer ( for deep learning) and Contributor to Open Source
🏆 A Part Time Youtuber - Programing Related content coming every week!
Feel free to contact me if you wanna have a conversation on Data Science, AI Ethics & Web 3 / share some opportunities.


